Announcing the Canon 6D - an initial review

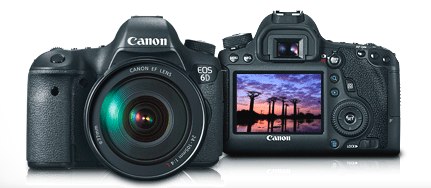
After weeks/months of speculation, Canon has announced the 6D.  It's a brand new full frame camera and in my estimation just fired a full nail gun into the coffin of the 5D Mark II.  For specification junkies, the full specs are at the bottom of the post. The time is right for the 6D.  The 5D Mk III is a terrific product but as the entry level for full frame has been priced out of the general marketplace, hence the keeping of the aged but still functional 5D Mark II.  The 6D changes things for the Canon shooter wanting full frame but without over $3000 for a body only purchase.

When it debuted, the 5D Mark II was the way to go.  It's a great camera but is showing its age in areas such as AF and burst mode.  And that's where the 6D fits in.

With an MSRP of $2099 body only, as well as to be available with the proven 24-105/4 lens, the 6D makes full frame with modern performance affordable for Canonistas.  It has some interesting shifts from the xD lineup though, where x represents a single digit.  Most telling is the switch from CF cards to SD cards as the primary storage.  Manufacturing is probably cheaper, but this change I cannot applaud if you already have any of the xD family.  It makes sense if the 6D is an upgrade target for the 60D or the legion of Rebels out there, but SD is simply not as fast as CF, even at the UHS-1 level.  The camera uses Canon's latest CPU, the Digic 5+.

As one would expect with ANY Canon full frame, this is an EF mount only.  EF-S lenses will not mount up, and Canon makes the point that EOS-M lenses won't mount either, even though none exist at present.  Image circle matters in full frame.

The 6D does both RAW and JPEG as expected and I am pleased to see that Canon continues to deliver 14 bit depth on the new camera in keeping with the 5D, 7D and 1D line as well as with the exception created by the T4i.  When thinking about image quality and large prints, bit depth makes a substantial difference.  The sensor is a new design 20MP sensor, slightly down from the 22MP sensor in the 5D but the gap is going to be negligible in most all cases and the then necessary larger pixels should give better low light performance.  This will be a step up over the crop sensor 7D whose low light performance leaves room for improvement.  The published ISO range is 100-25600 with a one stop pull (to 50) and two stop push (to 51200 and 102400).  This is in keeping with other modern full frame sensors and focuses attention on Canon's increased commitment to better low light imaging.

Shutter speed range is 1/4000s to 30s plus bulb mode.  Flash sync is 1/180s which is in my opinion a step backwards as the growth of flash is being driven by increasing use to mix fill flash and to be able to sync at higher, not lower speeds.  Strobist David Hobby will have nothing good to say about the low sync speed but will at least be able to be less frustrated because unlike Nikon's D600, the 6D does have a PC sync port to connect to studio flash.  Maximum burst mode is 4.5 fps with a RAW capture capacity in full burst of 14 frames, before letting the camera catch up.  The 6D incorporates in camera HDR (meh) and in camera multiple exposure (Yay!).

The camera brings new tech into the body that formerly has been only found in outboard devices, sold in low volume because of insanely high cost given what they do.  There is built-in GPS (about time given its prevalence in P/S cameras for some time) and built in WiFi.  Canon, for one, has this in some of their low end P/S cameras and charging hundreds of dollars for an outboard connection on other bodies is a kick in the jewels to Canon buyers.  In addition to having built-in WiFi, Canon is delivering tethering applications for iDevices.  This is also a really good thing as other wireless tethering solutions really still required a laptop and a wire connected to the camera.  Perhaps Canon will reduce their crack intake and drop the price substantially on their outboard wireless connection systems.

Metering is delivered by the new 63 zone metering system and is rated from 1 EV to 20 EV.  That's not as good as we are seeing from other vendors (down to -3 EV).  Canon has increased the exposure compensation range to 5 stops up or down in gaps of 1/3, and 1/2 stops but AEB is still limited to +/- 3 stops.  With the growing interest in HDR, they could have extended this out a la Nikon and others.  The meter patterns are centre-weighted average, partial 8%, spot 3% and Evaluative (default).  There are the usual assortment of predefined exposure modes for different scene types and our expected grouping of PASM.

Autofocus is of the 11pt type, which compared to other full frame cameras in the price range is quite lame.  That said, many serious photographers tend to use the centre spot and then recompose, so this may be less of an issue than it could.  AF purported works down to -3 EV so three stops better performance than the metering system.   AF will fall off the tracks at maximum apertures below f/5.6 so slow lenses or big lenses with teleconverters may push the user into manual focus.  It won't kill you.  Really.

Multiple white balance presets are available as is Canon's Automatic White Balance setting which does a pretty decent job in most shooting situations.

Of course the 6D does video.  It shoots 1080p HD video at 30/25/24 fps and incporates both IPB and ALL-I in camera compression.  The camera has a mini HDMI connector but Canon makes no notices about whether you can stream uncompressed HDMI through the port as you can on the Nikon D600.  It's not clear if full time AF is available if you use the new EF STM lenses.

The camera is powered by the existing LP-E6 battery (good decision Canon) and supplemental power is made available with the accessory BG-13 grip.  Expect about 1,000 shots on a single battery charge without using the Live View too much.  Live view is delivered via a 1m dot 3 inch LCD panel that does not swivel or flip around.

Conclusions

The 6D is a viable replacement for the 5D Mark II.  There is still a lot more in the 5D Mark III and there had better be for the significant cost increase.  I expect the body price of 5D Mk II units to drop until cleared out and then the device will be officially discontinued.  I have believed that the continuance of the 5D Mk II was only a stop gap since the release of the Mark III really a holding pattern for the 6D.  There's a lot to like in the new camera.  There's also in my opinion, a fair bit left out.  I'm disappointed by the flash sync speed, the low count of AF points, and the backward thinking on AEB.  I could not find ANY indicators one way or the other if you can fully control the 600-EX-RT flash from inside the camera, although my guess is that you can.  I like the battery decision and the subtle improvements on the 5D Mark II and would suggest that readers who have been thinking about a 5D Mark II rethink that with the release of the 6D.

Specifications (courtesy Canon USA)

Type Digital AF/AE single-lens reflex camera

Recording Media SD card, SDHC card, SDXC memory card

* Compatible with Ultra High-Speed (UHS-I) memory cards.

Image Format 35.8mm x 23.9mm (Full-Frame)

Compatible Lenses Canon EF lenses (except EF-S and EF-M lenses)

Lens Mount Canon EF mount

Image Sensor

Type CMOS Sensor

Pixels Effective: Approx. 20.2 megapixels

Pixel Unit 6.55 µm square

Total Pixels Approx. 20.6 megapixels

Aspect Ratio 3:2 (Horizontal: Vertical)

Color Filter System RGB primary color filters

Low Pass Filter Fixed position in front of the CMOS sensor

Dust Deletion Feature (1) Self Cleaning Sensor Unit

  • Removes dust adhering to the low-pass filter.
  • Self-cleaning executed automatically (taking 2 sec.) when power is turned on or off. Manual execution also possible (taking 8.0 sec.).

(2) Dust Delete Data acquisition and appending

  • The coordinates of the dust adhering to the low-pass filter are detected by a test shot and appended to subsequent images.
  • The dust coordinate data appended to the image is used by the provided software to automatically erase the dust spots.

(3) Manual cleaning of sensor

Recording System

Recording Format Complies with Design rule for Camera File system 2.0 and EXIF 2.30

Image Format Still: JPEG, RAW (14-bit, Canon original), RAW+JPEG

Video: MOV (Image data: H.264, Audio: Linear PCM)

File Size (1) Large: Approx. 20.0 megapixels (5,472 x 3,648)

(2) Medium: Approx. 8.9 megapixels (3,648 x 2,432)

(3) Small 1: Approx. 5.0 megapixels (2,736 x 1,824)

(4) Small 2: Approx. 2.5 megapixels (1920 x 1280)

(5) Small 3: Approx. 350,000 pixels (720 x 480)

(6) RAW: Approx. 20.0 megapixels (5,472 x 3,648)

M RAW: Approx. 11.0 megapixels (4,104 x 2,736)

S RAW: Approx. 5.0 megapixels (2,736 x 1,824)

Backup Recording N/A

File Numbering The following three types of file numbering methods can be set:

(1) Continuous numbering

* The numbering of captured images will continue even after you replace the camera's card.

(2) Auto reset

* When you replace the camera's card, the numbering will be reset to start from 0001. If the new card already contains images, the numbering will continue from the last recorded image in the card.

(3) Manual reset

* Resets the file number to 0001, and creates a new folder automatically.

RAW + JPEG Simultaneous Recording Large RAW and JPEG images are recorded simultaneously

Color Space sRGB, Adobe RGB

Picture Style Auto, Standard, Portrait, Landscape, Neutral, Faithful, Monochrome, User Defined 1-3

White Balance

Settings Auto, Preset (Daylight, Shade, Cloudy, Tungsten Light, White Fluorescent Light, Flash), Custom (Approx. 2,000° - 10,000°K), Color Temperature (Approx. 2,500° - 10,000°K), White Balance Correction, and White Balance Bracketing

Auto White Balance Auto white balance with the image sensor

Color Temperature Compensation Blue/amber bias: ±9 levels

- Magenta/green bias: ±9 levels

* Correction based on the current WB mode's color temperature.

Color Temperature Information Transmission Provided

Viewfinder

Type Eye-level SLR (with fixed pentaprism)

Coverage Vertical/Horizontal approx. 97%

Magnification Approx. 0.71x / 33.3°

Eye Point Approx. 21mm (At -1m-1 from the eyepiece lens center)

Dioptric Adjustment Correction -3.0 to +1.0m-1 (diopter)

Focusing Screen Eg-A II provided. Interchangeable with Eg-D and Eg-S. Incompatible with Eg-A.

Mirror Quick-return half mirror (transmission: reflection ratio of 40:60)

Viewfinder Information - AF information

AF points and focus confirmation

- Exposure information

Shutter speed, aperture, ISO speed (always displayed), AE lock, exposure level, exposure warning

- Flash information

Flash ready, flash exposure compensation, high-speed sync, FE lock

- Image information

Highlight tone priority (D+), maximum burst (2-digit display), card information

- Battery check

- Composition information

Electronic level

- Warning Symbol

Displayed if any of the following is set: Monochrome, white balance correction, expanded ISO speed, or spot metering.

Depth Of Field Preview Enabled with depth-of-field preview button

Autofocus

Type TTL secondary image-forming phase-difference detection system with AF-dedicated CMOS sensor

AF Points 11 points

Center: cross-type at f/5.6; vertical line-sensitive at f/2.8.

Upper and lower AF points: vertical line-sensitive AF at f/5.6.

Other AF points: Horizontal line-sensitive AF at f/5.6.

AF Working Range Center AF Point: EV -3 to 18 (at 73°F/23°C, ISO 100)

Other AF points: EV +0.5 to 18 (at 73°F/23°C, ISO 100)

Focusing Modes 1) Autofocus

- One-Shot AF

- AI Servo AF

- AI Focus AF

*Switches between One-Shot AF and AI Servo AF automatically.

2) Manual focus

AF Point Selection (1) Automatic selection

(2) Manual selection

Selected AF Point Display Displayed or indicated by superimposed display in the viewfinder and on the LCD monitor.

AF Assist Beam 1) Enable

* With an EOS-dedicated Speedlite attached, AF-assist beam is emitted automatically when necessary.

2) Disable

3) IR AF-assist beam only

* No AF-assist beam with flash bursts.

Exposure Control

Metering Modes Max. aperture TTL metering with 63-zone SPC with the following selectable modes:

1) Evaluative metering

2) Partial metering (center: approx. 8% of viewfinder)

3) Spot metering (center: approx. 3.5% of viewfinder)

4) Center-weighted average metering

Metering Range EV 1-20 (at 73°F/23°C with EF50mm f/1.8 II lens, ISO 100)

Exposure Control Systems Creative Zone

(1) Program AE (shiftable)

(2) Shutter-priority AE

(3) Aperture-priority AE

(4) Manual exposure

(5) Bulb

(6) Custom shooting mode

Basic zone

(1) Scene Intelligent Auto (Program AE / non-shiftable)

(2) Creative Auto

(3) Special Scene

- Portrait

- Landscape

- Close-up

- Sports

- Night Portrait

- Handheld Night Scene

- HDR Backlight Control mode

ISO Speed Range For Stills: Manual setting range of ISO 100-25600 (expansion possible to ISO 50, ISO 51200 and 102400) in 1/3-stop or whole-stop increments)

Shooting Mode ISO Settings
Auto (Scene Intelligent Auto, Creative Auto, Close-up, Macro, Sports, Night Portrait, HDR Backlight Control mode) ISO 100–12800
Handheld Night Scene mode ISO 100–25600
Landscape ISO 100–1600
P, TV, Av, M ISO–25600*1
B ISO 400 fixed*1
With flash ISO 400 fixed*1,2,3,4

*1: It depends on [Minimum] and [Maximum] of auto ISO setting. *2: If overexposure would occur with fill flash, the minimum ISO speed is ISO 100. *3: Scene Intelligent Auto, Night Portrait and Handheld Night Scene modes are excluded. *4: For bounced external flash when Creative Auto, Close-up, Landscape, Macro, Sports / P is set, automatically set between ISO 400–1600.

Exposure Compensation (1) Manual : ±5 stops in 1/3- or 1/2-stop increments

(2) AEB : ±3 stops in 1/3- or 1/2-stop increments

* Manual exposure compensation and AEB can be combined.

* The AEB shooting sequence will be standard exposure, underexposure and overexposure. With the self-timer, three continuous shots will be taken regardless of the current drive mode.

* The number of bracketed shots: 2, 3, 5, or 7 settable with a Custom Function.

AE Lock Possible

* During movie shooting, press the <*> button for AE lock and press the button to cancel AE lock (not automatically cancelled).

* AE lock (cancelled automatically when metering timer is turned off) possible before movie shooting. Movie shooting can start while AE lock is set.

Shutter

Type Vertical-travel, mechanical, focal-plane shutter with all speeds electronically-controlled

Shutter Speeds 1/4000 to 30 sec., X-sync at 1/180 sec. (Total shutter speed range. Available range varies by shooting mode.)

Shutter Release Soft-touch electromagnetic release

Self Timer 10-sec. or 2-sec. delay

Shutter Lag Time (1) During SW-1 ON, time lag between SW-2 ON and start of exposure: approx. 0.060 sec.

(2) Time lag between simultaneous SW-1/SW-2 ON and start of exposure: Approx. 0.144 sec.

* Time lag with the aperture stopped down by 3.5 stops or less (Excludes AF operation time).

External Speedlite

Flash Metering E-TTL II autoflash (evaluative flash metering and average flash metering)

Flash Exposure Compensation ±3 stops in 1/3- or 1/2-stop increments

FE Lock Provided

PC Terminal Provided

Drive System

Drive Modes (1) Single shooting

(2) Continuous shooting

(3) Silent single shooting

(4) Silent continuous shooting

(5) 10-sec. self-timer/Remote control

(6) 2-sec. self-timer

Continuous Shooting Speed Continuous shooting: Max. approx. 4.5 fps

Silent continuous shooting: Max. approx. 3.0 fps

Maximum Burst Based on 8GB memory Card:

JPEG Large/Fine: Approx. 73 Shots

RAW: Approx. 14 Shots

RAW+JPEG Large/Fine: 7 Shots

Based on 8GB UHS-I memory card:

JPEG Large/Fine: Approx. 1250 Shots

RAW: Approx. 17 Shots

RAW + JPEG Large/Fine: 8 Shots

* Figures are based on Canon's testing standards (ISO 100 and Standard Picture Style).

Live View Functions

Shooting Modes Still photo shooting and video shooting

Focusing (1) Autofocus

- FlexiZone - Single

* One-point, contrast AF. Switching to another AF point is possible.

- Face Detection Live mode

* Face detection, contrast AF. Face is selectable.

- Quick Mode AF

* Phase-difference AF with 11 AF points.

(2) Manual Focus

- Magnify the image by 5x or 10x and focus manually.

Metering Modes Real-time evaluative metering with image sensor.

(1) Evaluative metering (315 zones)

(2) Partial metering (approx. 11% of Live View screen)

(3) Spot metering (approx. 3% of Live View screen)

(4) Center-weighted average metering

Metering Range EV 0-20 (at 73°F/23°C with EF 50mm f/1.4 lens, ISO 100)

Grid Display Provided (three grid displays)

Exposure Simulation Provided

Silent Shooting Provided (Mode 1 and 2)

Video Shooting

File Format MOV (Image data: MPEG-4 AVC / H.264)

Audio: Linear PCM (Stereo)

File Size Recording Size:

[Full HD]

1920 x 1080 (30 fps/25fps/24fps):

235 MB/min. with IPB compression

685 MB/min. with All-I compression

[HD]

1280 x 720 (60 fps/50fps):

205 MB/min. with IPB compression

610 MB/min. with All-I compression

[SD]

640 x 480 (30 fps/25fps):

78 MB/min. with IPB compression

Frame Rates 1920 x 1080 (Full HD): 30p (29.97) / 24p (23.976) / 25p

1280 x 720 (HD): 60p (59.94) / 50p

640 x 480 (SD): 30p (29.97) / 25p

Continuous Shooting Time Based on 8GB Memory card

[1920 x 1080]

30 fps/25 fps/24 fps:

32 min. with IPB compression

11 min. with All-I compression

[1280 x 720]

60 fps/50 fps:

37 min. with IPB compression

12 min. with All-I compression

[640 x 480]

30 fps/25 fps:

97 min. with IPB or All-I compression

* The maximum recording time is limited to 29 min. 59 sec.

Focusing (1) Autofocus

- FlexiZone - Single

* One-point, contrast AF. Switching to another AF point is possible.

- Face Detection Live mode

* Face detection, contrast AF. Face is selectable.

- Quick Mode AF

* Phase-difference AF with 11 AF points.

- Manual Focus

1. Magnified view is not possible during video shooting.

Range Full Range (0?255)

Exposure Control (1) Program AE for movie shooting

* For shooting modes other than manual exposure and bulb.

* Shutter speed 1/30 - 1/4000 sec. (Signal accumulation time), aperture, and ISO speed automatically set.

(2) Manual exposure

* For manual exposure.

* Shutter speed (signal accumulation time), aperture, and ISO speed (auto/manual) manually set. The shutter speed (signal accumulation time) is limited to 1/4000 sec. at the maximum and to 1/30 sec. at the minimum for 24/25/30 fps or 1/60 sec. or higher for 50/60 fps depending on the frame rate.

Exposure Compensation Provided (±3 stops in 1/3-stop increments)

* For movies, even if exposure compensation has been set beyond ±3 stops, exposure compensation up to only ±3 stops will be applied.

LCD Monitor

Type TFT color, liquid-crystal monitor

Monitor Size 3.0-inches (Screen aspect ratio of 3:2)

7.7cm diagonal (6.37cm wide, 4.25cm high)

Pixels Approx: 1,040,000 dots

Coverage Approx. 100%

Brightness Control Manually adjustable to one of 7 levels

Coating Resin cover and anti-reflection AR coating

Interface Languages 25 (English, German, French, Dutch, Danish, Portuguese, Finnish, Italian, Norwegian, Swedish, Spanish, Greek, Russian, Polish, Czech, Hungarian, Romanian, Ukraine, Turkish, Arabic, Thai, Simplified/Traditional Chinese, Korean, Japanese)

Playback

Display Format Single image display

- Two types of single-image full display, two types of shooting information

- Index display

4-image index and 9-image index

- Jump display

Jump 1/10/100 images, Shooting Date, Folder, Movies, Stills, or Rating

* Two-image comparative display is not provided.

Highlight Alert With single-image display (Info.) and single-image display, overexposed highlight areas will blink.

Histogram Brightness and RGB can be displayed.

Quick Control Function

Items When you press the Quick Control function button under the following conditions, you can set the functions below:

*The settable functions depend on the shooting mode

(1) With viewfinder shooting:

Shutter speed, aperture, ISO speed, exposure compensation, AEB, flash exposure compensation, Wi-Fi®, Picture Style, white balance, white balance correction, Auto Lighting Optimizer, Custom Controls, AF operation, AF point selection, Drive mode, metering mode, and image recording quality.

(2) During playback:

Image protect, image rotate, rating, RAW image processing, resize, highlight alert, AF point, and image jump with mode dial.

Image Protection and Erase

Protection Erase protection can be applied/canceled for a single image, all images in a folder, or all images in the card.

Erase Erase single image, erase selected images, erase all images on folder, erase all images in a card, or erase only unprotected images.

Direct Printing

Compatible Printers PictBridge-compatible printers

Printable Images RAW and JPEG images complying to Design rule for Camera File System

* Movies cannot be printed.

DPOF: Digital Print Order Format

DPOF Complies to DPOF Version 1.1

Direct Image Transfer

Compatible Images Not Provided

Customization

Custom Functions 20 Custom Functions

Custom Controls The following camera controls can be customized by assigning the desired function: Shutter button halfway pressing, AF-ON button, AE lock button, Depth-of-field preview button, Lens AF Stop button, SET button, Main Dial, Quick Control Dial, and Multi-controller

My Menu Registration Up to six top-tier menu options and Custom Function settings can be registered

Interface

USB Terminal For personal computer communication and direct printing (USB 2.0 Hi-Speed)

Video Out Terminal (1) AV stereo OUT terminal: NTSC/PAL selectable

(2) mini-HDMI OUT terminal (Type C)

Battery One Battery Pack LP-E6

- With the AC Adapter Kit ACK-E6, AC power is possible.

- With Battery Grip BG-E13, two battery packs (LP-E6) can be used. Or six AA-sized/LR6 batteries can be used

Battery Life 1) Camera Body Only:

Shooting Method Temperature Possible Shots
Viewfinder Shooting At 73°F / 23°C Approx. 1090 shots
At 32°F / 0°C Approx. 980 shots
Live View Shooting At 73°F / 23°C Approx. 220 shots
At 32°F / 0°C Approx. 190 shots

∗With a fully charged battery pack LP-E6. Based on CIPA testing standards.

2) With Battery Grip BG-E13:

Shooting Method Battery Temperature Possible Shots
Viewfinder Shooting LP-E6 x 1 Same as (1)
LP-E6 x 2 At 73°F / 23°C Approx. 2130 shots
At 32°F / 0°C Approx. 1900 shots
Size AA/LR6 Alkaline Batteries At 73°F / 23°C Approx. 480 shots
At 32°F / 0°C Approx. 140 shots
Live View Shooting LP-E6 x 1 Same as (1)
LP-E6 x 2 At 73°F / 23°C Approx. 420 shots
At 32°F / 0°C Approx. 360 shots
Size AA/LR6 Alkaline Batteries At 73°F / 23°C Approx. 110 shots
At 32°F / 0°C Approx. 24 shots

∗With a fully charged battery. Based on CIPA testing standards.

Battery Check Automatic battery level check when power is turned ON

Battery level indicated in six levels.*1,2,3

*1 Battery level displayed on LCD panel and in viewfinder.

*2 Battery information can be checked with the [Battery info.] menu.

*3 If Battery Grip BG-E13 is used with size-AA/LR6 batteries, the battery level is displayed in four levels instead.

Power Saving Power turns off after the set time of non-operation elapses

* [Auto power off] settable to 1 min., 2 min., 4 min., 8 min., 15 min., 30 min., or disable

Date/Time Battery Built-in secondary battery

When battery is fully charged, the date/time can be maintained for 3 months. Requires about 8 hours to fully recharge the backup battery.

Start-up Time Approx. 0.1 sec. (Based on CIPA testing standards)

Dimensions (W x H x D) 

Approx. 5.7 x 4.4 x 2.8 in./ 144.5 x 110.5 x 71.2mm

Weight Approx. 26.7 oz. / 755g (CIPA standard)

Approx. 24.0 oz. / 680g (Body only)

Working Temperature Range

32-104°F/0-40°C

Working Humidity Range 85% or less

# One-time registration is required on CANON iMAGE GATEWAY.
  1. * Compatible with iOS version 5.0 or later and Android devices version 2.3/4.0 or later. Data charges may apply.
  2. ** The EOS Remote app will be available soon. This software enables you to upload images to social network services. Before uploading images, please be aware that image files may contain privacy related information such as people and places. If necessary, please delete such information. Canon does not obtain, collect or use such images or any information included in such images through this software.
  3. ^ DPS over IP certified printer is required.
  4. ## In certain countries and regions, the use of GPS may be restricted. Therefore be sure to use GPS in accordance with the laws and regulations of your country or region. Be particularly careful when traveling outside your home country. As a signal is received from GPS satellites, take sufficient measures when using in locations where the use of electronics is regulated.

† Prices and specifications subject to change without notice. Actual prices are determined by individual dealers and may vary.

Sharpening in Lightroom

Fullscreen-Unsharpened.jpg

It's often said that all digital photographs will benefit from some sharpening. Judging by the number of add-ons, plug-ins, and even the diverse tools in editing tools, the marketplace would agree. Indeed sharpening when applied well can really make a photograph better. Lightroom users have historically felt left behind when it comes to sharpening with the not completely invalid perception that sharpening in Lightroom has been akin to throwing paint at the wall. With Lightroom 4, things improved significantly, but there is more there than meets the eye.

Let me be clear. You have a lot more granular control of sharpening in Photoshop CS6. You in fact have more control over sharpening in Nik Software's awesome Sharpener Pro. According to Adobe's Brian Hughes in his session at Photoshop World, while Lightroom and Adobe Camera Raw both benefit from enhancements to their sharpening engines (it's the same engine), Photoshop CS6 takes sharpening to a brand new level and its local sharpening is the best ever.

Good to know. What if you don't own or cannot afford Photoshop CS6 or even an excellent add-on like Sharpener Pro? Lightroom brings a lot to the table.

First, let's define what we mean by sharpening. In principle, what sharpening does is increase contrast in edge boundaries creating the image of greater sharpness. Really it is playing with the pixels to make the distinction of an edge more visible. We all know that increasing contrast increases apparent sharpness when used judiciously, sharpening is a very specific application of increasing contrast.

Global vs Local

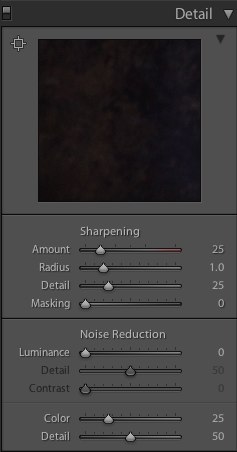
Lightroom has two adjustment modes. Global is what we see first in the Develop module. In the graphic you can see the sliders that make up the Sharpness control. This graphic is from Lightroom 4.1 Here's what they do.

  • Amount - The amount of sharpening applied, meaning the strength of the application of the sharpening algorithm
  • Radius - The pixel range around which sharpening gets applied. Default is 1.0 Higher than about 1.2 produces "interesting" results. Less than 1.0 becomes less distinctive
  • Detail - Allows more finite control over the sharpening of high frequency details. A sharp edged leaf can look oversharpened pretty quickly, use this slider to reduce that oversharpened look
  • Masking - This is the real magic in the global sharpening, and it's default setting is 0 or no masking. If you've ever learned to use high pass filters to do sharpening in Photoshop this tool is your friend.

Local mode means using an Adjustment Brush as seen in this panel.  An adjustment brush is a local change that does not apply to the entire image.  This is useful if you want to sharpen the iris of a model but not the skin texture.  Note that this control does not have the same level of granular control in the single slider that the global sharpening tool has.  You can however use the tools to control the feather of your brush and use the auto-mask option for the brush to exercise more control.  Use of a tablet with a pressure sensitive pen will also permit you significantly more control than just a mouse or touchpad.

Sharpening an Image

The first rule of sharpening is to find areas where you will want to really judge the level of global sharpening.  Flat areas like open sky are not a good choice, although you will want to be zooming in and out to see what is happening overall.  Failing to zoom in can result in over-sharpening because you simply cannot see what is happening.  Remember the Z key.  It's how you quickly zoom in and out.  The thumbnail view in the upper left corner allows you to move your zoomed area around the image without exiting the tool you are using.

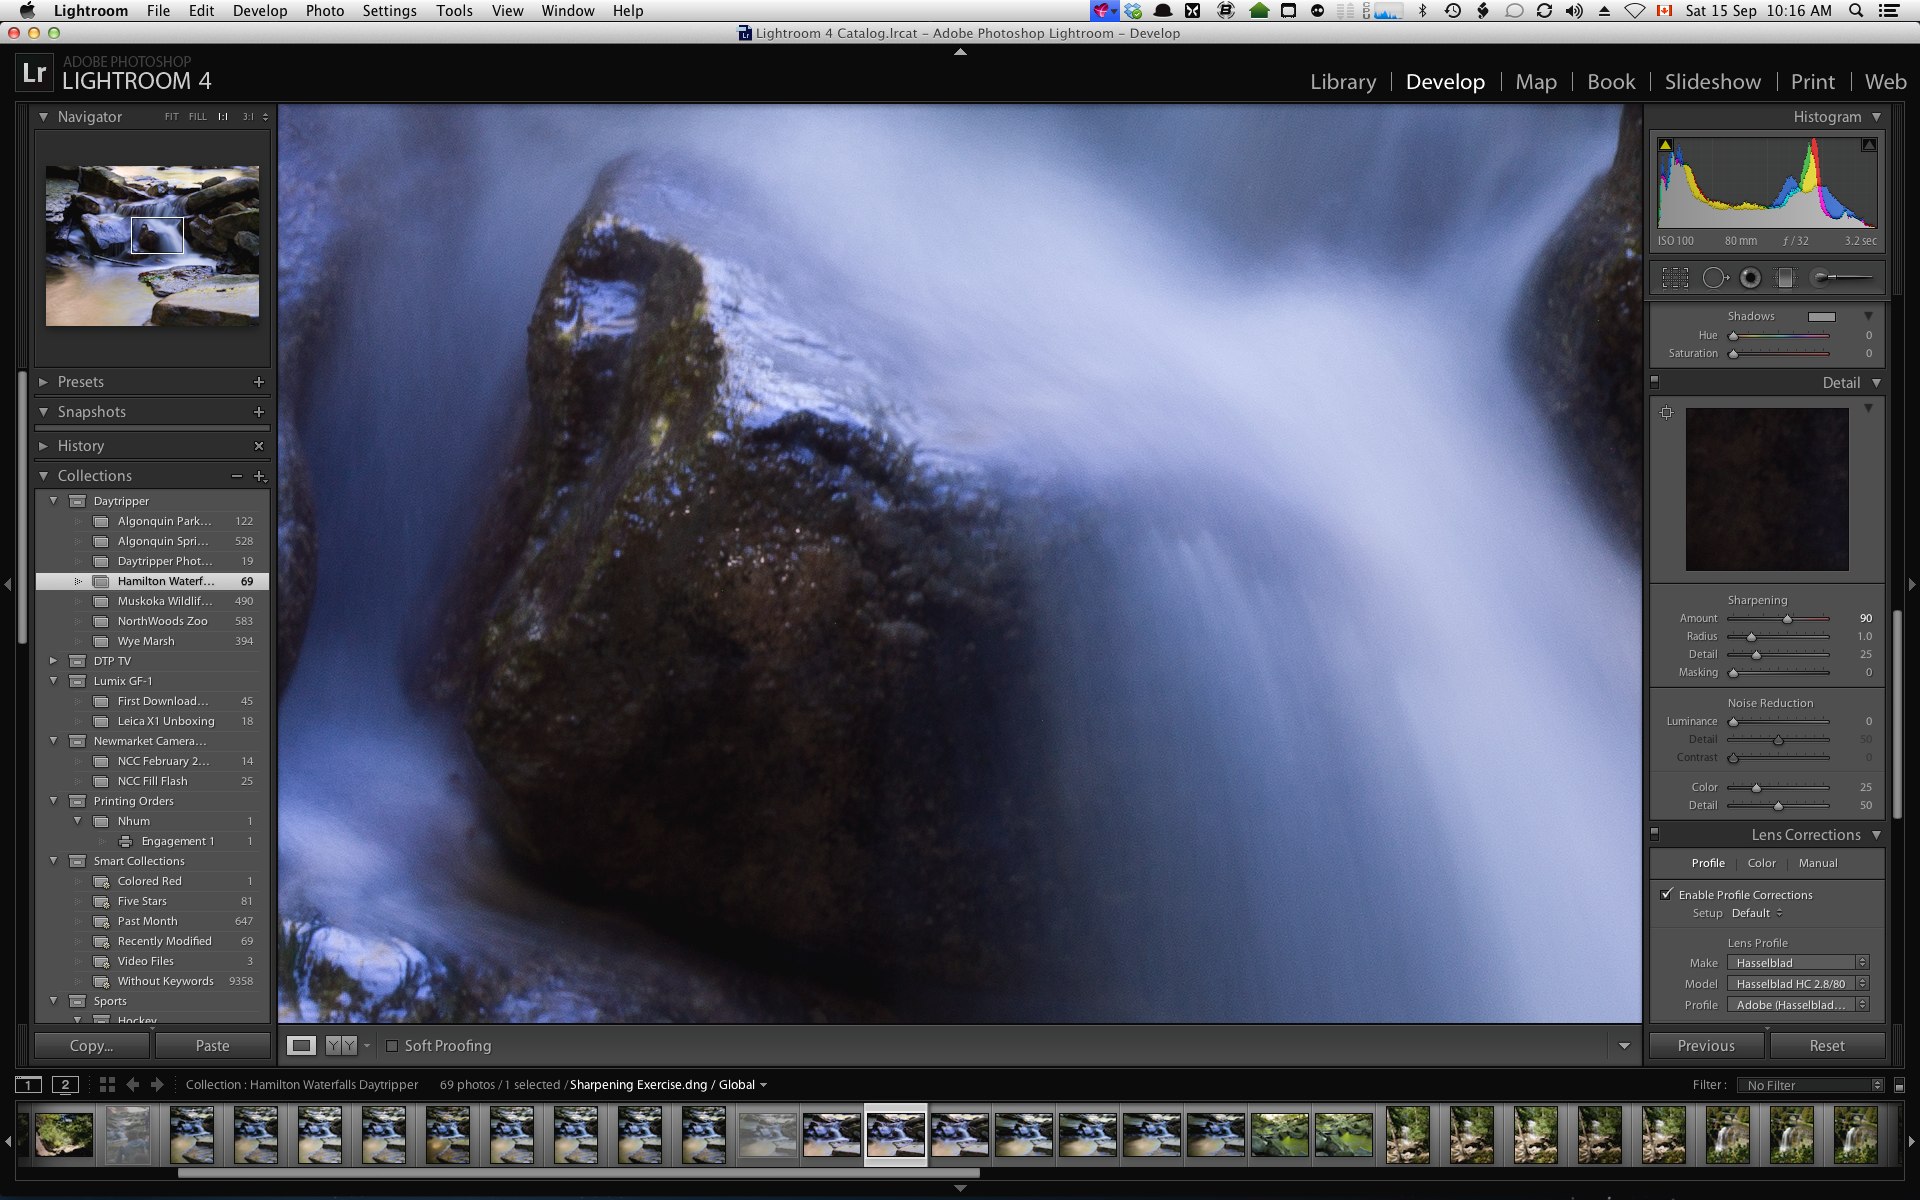
In the first screen grab we see an image in Lightroom that will be a nightmare for generic sharpening.  It has areas where we want plenty of sharpness (the rock detail)  and areas where we definitely do not want sharpening (the flowing water).  Applying global sharpening here could be really bad.

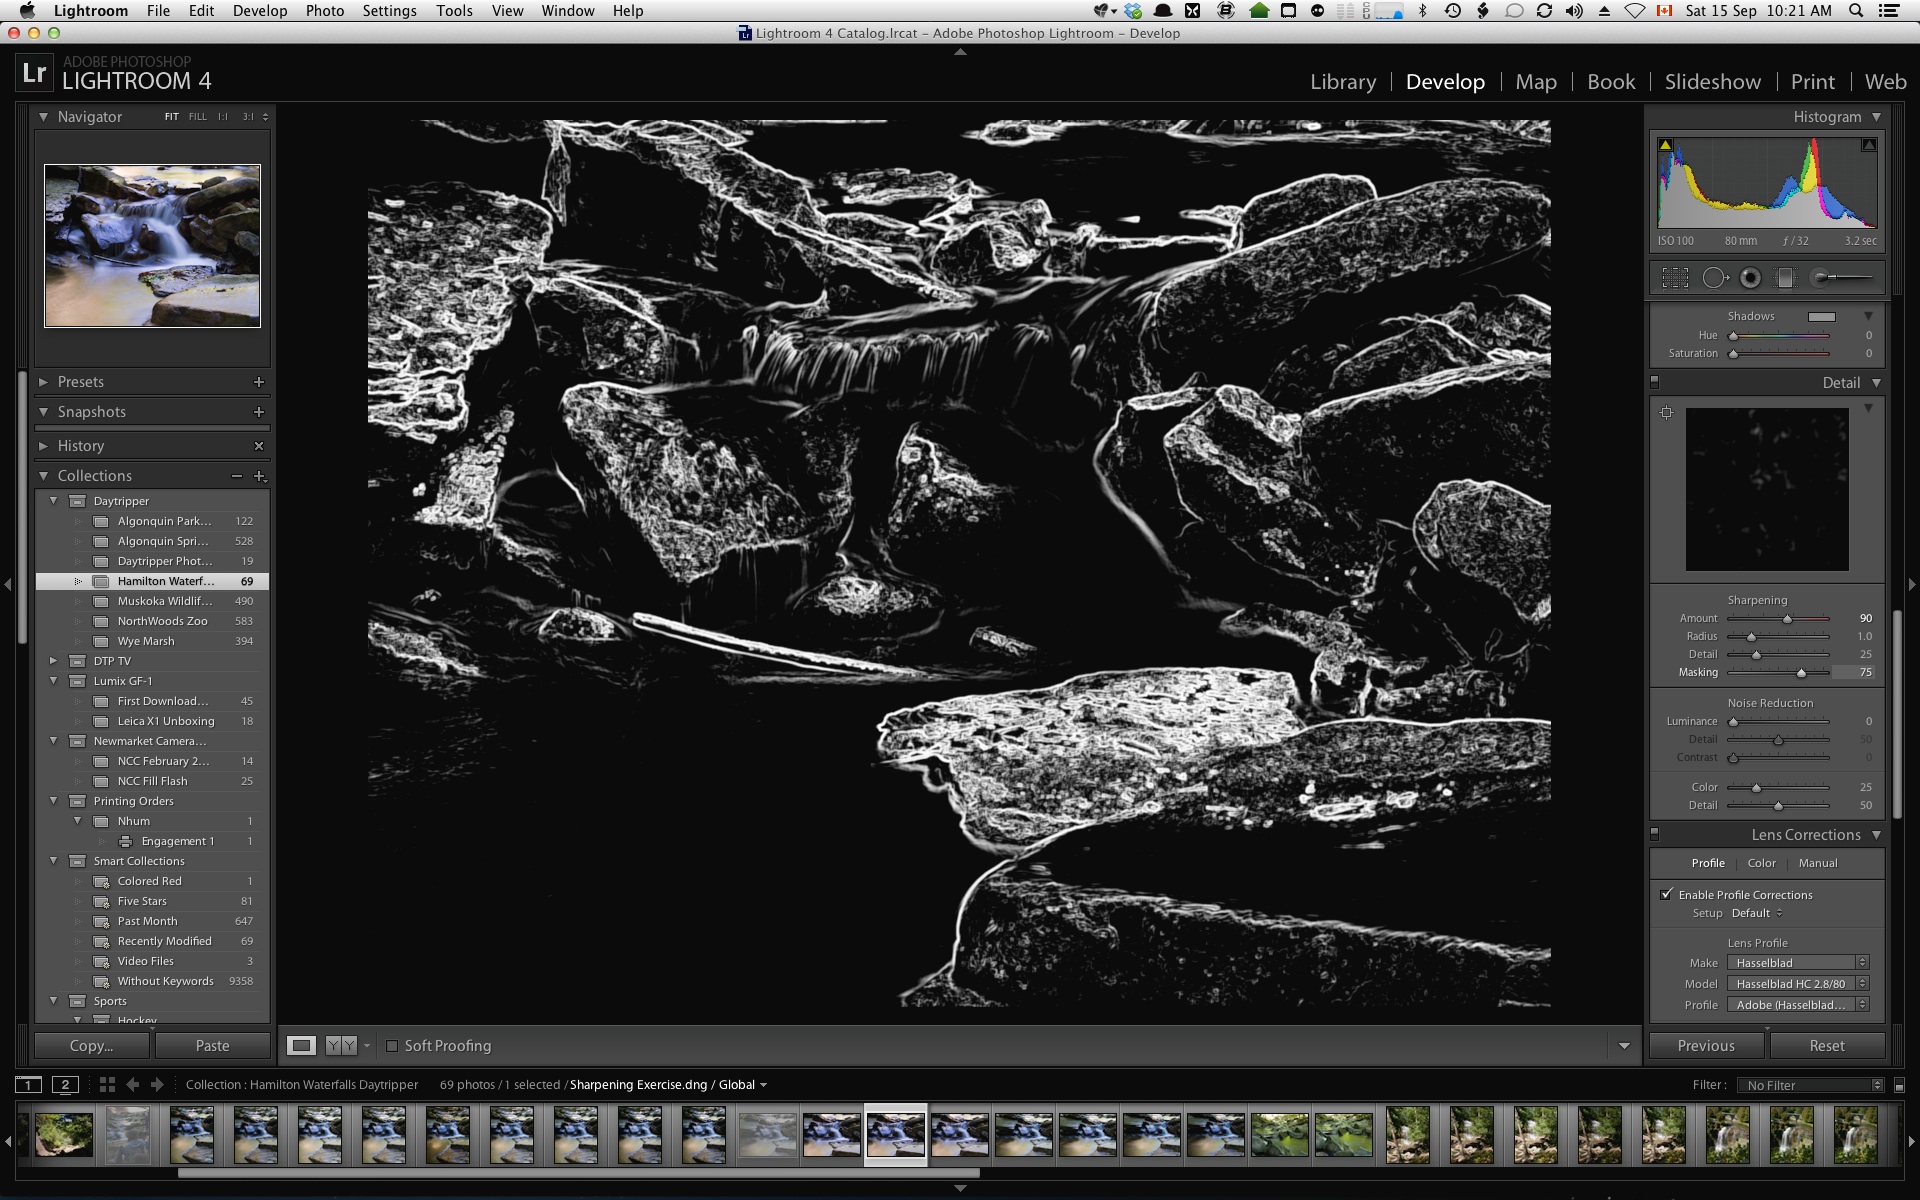
This next screen grab shows the use of the masking slider with the magic trick engaged, holding down Option (Mac) or Alt (PC) while moving the slider.  In this case we see very close to the default of zero, pretty much all the edges the sharpening engine finds will be sharpened.  No, this is definitely not what I want.  Anything that is white in this view will be sharpened.

This next screen grab shows the masking slider adjusted so almost none of the water areas are sharpened but that I am still sharpening the rock areas.  This is a much more pleasant level of control and results in a better image.  We see a much tighter level of control of what will be sharpened, only the white areas, much like the popular high pass filter sharpening in Photoshop, but without all the work.

Next we go into Local sharpening mode using an Adjustment Brush.  You'll see that I have the auto-mask turned on and that I am also using the overlay mask option.  Remember that the O key toggles the overlay mask on and off.

One of the real benefits of using an Adjustment Brush is that the changes you make are non-destructive.  As you can see in the image below, Lightroom can leave a telltale behind to show you where the adjustment brush settings are so you can find and adjust them later on.  By selecting an Adjustment Brush control point you can remove all the changes made by that brush by hitting the Delete key.  Or, simply select it and go to the controls panel and reset the control settings for that brush to suit.  This would be like leaving all the Layers intact in a PSD file so you can make changes later on.

Brush Settings

You see in this capture that the adjustment brush can have multiple settings made to a single brush.  For example when using the Sharpening brush on the green leaves I also pushed up on the Clarity.  This changed the brush type to Custom but did not remove the initial Sharpening setting.  We mostly all understand that Size refers to the overall brush size and that Feather refers to how quickly the brush edge forms.  What many folks don't understand is the difference between Flow and Density.

Brush flow allows you to control how many passes or how much pressure is required to apply the maximum effect.  For example if you set Flow to 25 and Exposure to +1, your first pass would only increase exposure by 1/4 stop.  You'll need four passes to achieve the full stop allowing you much more granular brush control.  Brush density defines the maximum that any effect can possibly have.  Think of this as a safety valve.  Suppose you set a brush with Exposure +2 but Density at 50.  Now no matter how hard you press or how many passes you make with the brush, the exposure adjustment by the brush will never be more than 50% of the maximum value.  This really enhances your level of granular control and protects against overdoing something.  I want to thank Julianne Kost of Adobe for explaining this to me.

Conclusion

While you can certainly leverage sharpening in Photoshop or marvellous third party tools such as Nik Software's Sharpener Pro, as a Lightroom user, you owe it to yourself to explore just how rich Lightroom's sharpening experience can be in advance of spending money on other software.


The Photo Video Guy Podcast - Episode 33

A very busy week. Fuji releases the X-E1 and new glass, Zeiss announces a ton of new ZE lenses and rumours of a new ZM. Pentax annnounces the K5 II and new glass. Hasselblad announces the H5D and a new lens. Sony unloads a bunch of new cool stuff. Tamron has new glass, Sekonic has a new meter and rumours solidify on the Canon 6D. Nikon releases the long awaited D600

Backup targets for your images and videos

It's allegedly common knowledge that a file is only as good as its verified backup. I work on the basis that if I don't have at least two backup copies of an image or video, I have no integrity at all. My workflow is as follows;

1. Copy the files from the device or memory card to a hard disk inside the computer. For me, this is a Mac Pro with four internal drives, one dedicated to unedited media. 2. Import and add the files to my editing program catalog. For images that is Lightroom and I maintain a separate copy of each image. For video it is Final Cut Pro and it links to the original. 3. Back the original drive and the LR directories up daily to an external drive. In my case this is a Drobo S drive array. 4. Use a cloud service to backup both the original files and the Lightroom repository. I strongly recommend Crashplan. 5. Verify each backup daily and do a test restore of random files from the cloud weekly.

This works pretty well for me. The riskiest piece in my current workflow is the Drobo. While it is very cool technically, I've had a lot of trouble with the Drobos that I own and when they next die, I will replace them with an alternate solution. I am presently leaning towards a Cal Digit array.

The other important consideration is the quality of the physical drives you buy. Drobos are extraordinarily hard on drives so I have a stack (literally) of drives that have died before their time when used in a stressful environment like a Drobo. My greatest success has been with Hitachi disks. I have never lost a Hitachi, and note that Apple uses them as the internal drives in their desktop machines, indicating some level of serious testing. I have also had good to very good success with Western Digital Caviar Black drives. Western Digital has recently released a new series of disks called Red that are suited to NAS (Network Attached Storage) solutions available in 1TB, 2TB and 3TB versions. I have no experience with them personally, but initial reviews look positive. Western Digital Velociraptor drives are superb but VERY expensive for home use.

I cannot say similar good things about other drives. Yesterday I had two more Seagate Barracudas do their impersonation of Ontario roadkill, bringing my total stack of dead cudas to five. There are three more still in production and I will replace them as quickly as I can afford to do so. I have never had a Barracuda larger than 1TB make it halfway to its Mean Time Before Failure number and do not recommend Seagate drives to anyone. They used to be excellent, but not so lately. While I appreciate the eco-friendly idea behind Western Digital Caviar Green drives, I cannot recommend them either. The Drobos eat Caviar Greens like they are candy. While you can likely pull the drive and reformat it in a standalone enclosure for short term use, this is risky based upon my personal experience.

I would strongly suggest selecting drives that run at 7200rpm and having a large onboard cache. The Hitachi drives I am buying now are all 7200rpm drives with 64mb cache. Good luck!

Announcing the Hasselblad H5D

I love Photokina week. Our friends at Hasselblad have announced the follow-on to the proven (and IMHO wonderful) H4D series with the H5D. Don't get too excited because it won't be available until December 2012 at the earliest but it looks freaking beautiful. The new camera looks at this point as more evolutionary rather than revolutionary. Setting aside the new lens and macro converter, the camera will have more focus performance and an upgrade to the existing True Focus function. The ergonomics are improved with a new display style and larger buttons. Weather sealing is improved. You'll be able to get JPEGs right out of the camera and will have the option of compressed RAW files for increased shooting performance.

I confess I don't have a use case for these last two features as I don't shoot sports with my H4D, and actually prefer the current uncompressed RAW to the compressed RAW that some other vendors push out. Fast processors are a given and always nice to have. Physically the camera looks more compact with a lower profile to the viewfinder. More information will come as we get closer to the release date.

The camera will be available with a variety of back configurations in 40MP, 50MP, 60MP as well as multi-shot versions of 50MP and 200MP.

Specifications courtesy Hasselblad USA

New HCD 4.8/24mm lens New Macro Converter More accurate focusing with True Focus II New Immediate Focus Confirm New print ready Jpeg files New compressed multi-shot RAW files for faster and smoother workflow New Camera Configurator Larger and more ergonomic buttons Larger, easier to read display style Updated Graphics User Interface More programmable buttons New and improved weather sealing New and faster processors implementing Hasselblad Image Processing Architecture

Announcing the Nikon D600

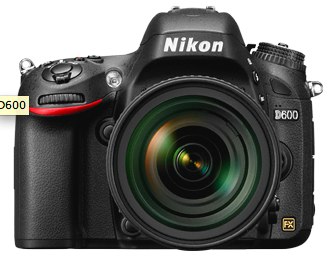
After literally months of speculation and a near endless list of anticipated specifications, Nikon has announced the D600. It is Nikon's physically smallest FX format DSLR delivering a 24.3MP CMOS sensor in a new body format that weighs only 760g (body only).  As one would expect it shoots both uncompressed RAW in Nikon's NEF format as well as a variety of JPEG compression levels.  The camera supports all Nikon F mount lenses and current Nikon FX and DX format lenses.  Internal storage is via SD, SDHC or SDXC cards with two slots provided.  Because of the high pixel density, don't cheapen out on your choice of card, go with something of at least 60mb/s read/write performance.

Shutter speed range is from 1/4000 to 30s with maximum burst mode of 5.5fps, shutter speed permitting.  ISO range is 100-6400 with a 1 stop pull (50) and 2 stop push (12800, 25,600) option set available.  Exposure metering uses a 2016 pixel array.  Modes are the usual PASM suspects and exposure compensation follows the ±5 EV trend in 1/3, 1/2 and full stop increments.  This wide range that can be leveraged in auto-exposure bracketing modes makes HDR captures simple and fast.

Autofocus is user selectable between single point, 9 point, 21 point, 39 point and 3D 39 point AF.

The D600 is fully video ready capable of recording at 1080P at up to 30fps in H.264/MPEG-4 formats.

The D600 fully participates in Nikon's Creative Lighting System (CLS) for flash photography and offers automatic flash bracketing and flash exposure compensation over a 3 stop range.  Native flash sync speed is 1/200s.

The camera uses Nikon's standard EN-EL15 battery and MH-25 charger.  Kudos to Nikon for not introducing yet another battery and charger combination.  Nikon estimates 900 frames per charge.  There are numerous in camera image processing options available and of course proper RAW formats for more creative post processing alternatives.  Capture NX is renamed NikonView and a CD is provided with NikonView NX2.

Pricing is advertised at $2179.95 (body only) according to Nikon Canada.

[iframe]<href="http://www.bhphotovideo.com/c/product/892428-REG/Nikon_D600_Digital_Camera_with.html?BI=8977&KW=&KBID=10426&img=12245-NikonD600-728x90.jpg"> [/iframe]

Full specs are found at the bottom of the post and are provided courtesy of Nikon.

  • Type
    Single-lens reflex digital camera
  • Lens Mount
    Nikon F bayonet mount
  • Picture Angle
    Nikon FX format
  • Effective Pixels
    24.3 million
  • Sensor Size
    35.9mm x 24.0mm
  • Image Sensor Format
    FX
  • Image Sensor Type
    CMOS
  • Total Pixels
    24.7 million
  • Dust-reduction system
    Image sensor cleaning
  • Dust-Off Reference Photo
    Yes
  • Image Area (pixels)
    FX-format (L) 6,016 x 4,016 (M) 4,512 x 3,008 (S) 3,008 x 2,008 DX-format (L) 3,936 x 2,624 (M) 2,944 x 1,968 (S) 1,968 x 1,312
  • File Format Still Images
    JPEG: JPEG-baseline-compliant; can be selected from Size Priority and Optimal Quality JPEG: JPEG-Baseline compliant with fine (approx 1:4), normal (approx 1:8), or basic (approx 1:16) compression NEF (RAW): lossless compressed, compressed or uncompressed 12 or 14 bit TIFF (RGB)
  • Picture Control
    Landscape Monochrome Neutral Portrait Standard User-customizable Settings Vivid
  • Storage Media
    SD SDHC SDXC
  • Card Slot
    2 Secure Digital (SD)
  • File System
    Compliant with DCF (Design Rule for Camera File System) 2.0 DPOF (Digital Print Order Format) EXIF 2.3 (Exchangeable Image File Format for Digital Still Cameras PictBridge
  • Viewfinder
    Eye-level pentaprism single-lens reflex viewfinder
  • Viewfinder Frame Coverage
    FX (36x24): 100% Horizontal and 100% Vertical Approx. DX (24x16): 97% Horizontal and 97% Vertical Approx.
  • Viewfinder Magnification
    0.70x Approx.
  • Viewfinder Eyepoint
    20.6mm (-1.0m¯¹)
  • Viewfinder Diopter Adjustment
    Built-in diopter adjustment (-3 to +1 m⁻¹)
  • Focusing Screen
    Type B BriteView Clear Matte Mark VIII with AF area brackets (grid lines can be displayed)
  • Reflex Mirror
    Quick-return type
  • Lens Aperture
    Instant-return type
  • Depth-of-field Control
    Yes
  • Lens Compatibility at a Glance***
    AF-S or AF lenses fully compatible Metering with AI lenses
  • Compatible Lenses
    AF NIKKOR lenses, including type G and D lenses (some restrictions apply to PC lenses) and DX lenses (using DX 24 × 16 1.5x image area), AI-P NIKKOR lenses, and non-CPU AI lenses (A and M modes only). IX NIKKOR lenses, lenses for the F3AF, and non-AI lenses cannot be used.
  • Shutter type
    Electronically controlled vertical-travel focal-plane
  • Shutter Speed
    1/4000 to 30 sec. Bulb
  • Fastest Shutter Speed
    1/4000 sec.
  • Slowest Shutter Speed
    30 sec.
  • Flash Sync Speed
    Up to 1/200 sec. Synchronizes with shutter at 1/250s or slower
  • Bulb Shutter Setting
    Yes
  • Shutter Release Modes
    Continuous low-speed [CL] mode; 1-5 frames per second Continuous high-speed [CH] mode; 5.5 frames per second Mirror-up [Mup] mode Quiet Shutter Release Self-timer mode Single-frame [S] mode
  • Continuous Shooting Options
    FX-format CH: Up to 5.5 frames per second CL: Up to 1-5 frames per second
  • Top Continuous Shooting Speed at full resolution
    5.5 frames per second
  • Self-timer
    2, 5, 10, 20 sec. Timer duration electronically controlled
  • Exposure Metering System
    TTL exposure metering using 2,016-pixel RGB sensor
  • Metering Method
    Centre-weighted: Weight of 75% given to 8mm circle in centre of frame Matrix: 3D colour matrix metering II (type G and D lenses); colour matrix metering II (other CPU lenses) Spot: Meters 4mm circle (about 1.5% of frame) centered on selected focus point
  • Metering Range
    0 to 20 EV (3D colour matrix or centre-weighted metering) 0 to 20 EV (spot metering)
  • Exposure Meter Coupling
    CPU AI
  • Exposure Modes
    Aperture-Priority (A) Manual (M) Programmed auto with flexible program (P) Shutter-Priority (S)
  • Exposure Compensation
    ±5 EV in increments of 1/3, 1/2 or 1 EV
  • Exposure Bracketing
    2 or 3 frames in steps of 1/3, 1/2, 2/3, 1 or 2 EV
  • Exposure Lock
    Yes
  • Mirror Lock Up
    Yes
  • ISO Sensitivity
    ISO 100 - 6400 Lo-1 (ISO 50) Hi-1 (ISO 12,800) Hi-2 (ISO 25,600)
  • Lowest Standard ISO Sensitivity
    100
  • Highest Standard ISO Sensitivity
    6400
  • Lowest Expanded ISO Sensitivity
    Lo-1 (ISO 50 equivalent)
  • Highest Expanded ISO Sensitivity
    HI-2 (ISO 25,600 equivalent)
  • Expanded ISO Sensitivity Options
    Hi-1 (ISO-12,800 equivalent) in 1/3, 1/2 or 1 EV Hi-2, (ISO-25,600 equivalent) 1 EV
  • Long Exposure Noise Reduction
    Yes
  • High ISO Noise Reduction
    Low Normal High Off
  • Active D-Lighting
    Auto Extra High High Normal Low Off
  • D-Lighting Bracketing
    2 frames using selected value for one frame 3–5 frames using preset values for all frames
  • Single-point AF Mode
    Yes
  • Dynamic AF Mode
    Number of AF points: 9, 21, 39 and 39 (3D-tracking)
  • Auto-area AF Mode
    Yes
  • Autofocus System
    Nikon Multi-CAM 4800 autofocus sensor module with TTL phase detection
  • Detection Range
    -1 to 19 EV (ISO 100, 68°F/20°C)
  • Lens Servo
    Autofocus (AF): Single-servo AF (AF-S); continuous-servo AF (AF-C); auto AF-S/AF-C selection (AF-A); predictive focus trackinga ctivated automatically according to subject status Manual focus (MF): Electronic rangefinder can be used
  • AF-area mode
    9, 21 or 39 point Dynamic-area AF Auto-area AF Single-point AF 3D-tracking (39 points)
  • Focus Lock
    Focus can be locked by pressing AE-L/AF-L button Focus can be locked by pressing shutter-release button halfway (single-servo AF)
  • Focus Modes
    Auto AF-S/AF-C selection (AF-A) Continuous-servo (AF-C) Face-Priority AF available in Live View only and D-Movie only Manual (M) with electronic rangefinder Normal area Single-servo AF (AF-S) Wide area
  • Maximum Autofocus Areas/Points
    39
  • Autofocus Sensitivity
    -1 to +19 EV (ISO 100, 20°C/68°F)
  • Autofocus Fine Tune
    Yes
  • Built-in Flash
    Yes
  • Flash Bracketing
    2 to 3 frames in steps of 1/3, 1/2, 2/3, 1 or 2 EV
  • Built-in Flash Distance
    12m (ISO 100)
  • X-Sync Speed
    1/200
  • Top FP High Speed Sync
    Up to 1/4000
  • Flash Control
    TTL: i-TTL flash control using 2,016-pixel RGB sensor are available with built-in flash and SB-910, SB-900, SB-700, or SB-400; i-TTL balanced fill-flash for digital SLR is used with matrix and centre-weighting metering, standard i-TTL flash for digital SLR with spot metering
  • Flash Sync Modes
    Front-curtain sync (normal) Rear-curtain sync Red-Eye reduction Red-Eye reduction with slow sync Slow sync
  • Flash Compensation
    -3 to +1 EV in increments of 1/3, 1/2 or 1 EV
  • Flash-ready indicator
    Lights when built-in flash or optional flash unit such as SB-910, SB-900, SB-400, SB-80DX, SB-28DX or SB-50DX is fully charged
  • Accessory Shoe
    Yes
  • Nikon Creative Lighting System (CLS)
    CLS Supported
  • White Balance
    Auto Choose colour temperature (2500K–10000K) Cloudy Direct Sunlight Flash Fluorescent (7 types) Incandescent Preset manual (up to 4 values can be stored) Shade
  • White Balance Bracketing
    2 or 3 exposures
  • Live View Shooting
    Photography Live View Mode Movie Live View Mode
  • Live View Lens servo
    Autofocus (AF): Single-servo AF (AF-S); full-time-servo AF (AF-F) Manual focus (MF)
  • Live View AF-area mode
    Face-priority AF Wide-area AF Normal-area AF Subject-tracking AF
  • Live View Autofocus
    Contrast-detect AF anywhere in frame (camera selects focus point automatically when face-priority AF or subject-tracking AF is selected
  • Live View Scene Auto Selector
    Aut mode Auto (flash off) mode
  • Movie Metering
    TTL exposure metering using main image sensor
  • Movie Maximum recording time
    20 minutes at highest quality 29 minutes 59 seconds at normal quality
  • Movie File Format
    MOV
  • Movie Video Compression
    H.264/MPEG-4 Advanced Video Coding
  • Movie Audio recording format
    Linear PCM
  • Movie
    HD 1,920x1,080 / 30 fps HD 1,920x1,080 / 25 fps HD 1,920x1,080 / 24 fps HD 1,280x720 / 60 fps HD 1,280x720 / 50 fps HD 1,280x720 / 30 fps HD 1,280x720 / 25 fps
  • Movie Audio
    Built-in microphone, monaural External stereo microphone (optional)
  • Monitor Size
    3.2 in. diagonal
  • Monitor Resolution
    921,000 Dots
  • Monitor Type
    Wide Viewing Angle TFT-LCD
  • Monitor Angle of View
    170-degree wide-viewing angle
  • Monitor Adjustments
    Brightness, 5 levels Brightness control using ambient brightness sensor
  • Virtual Horizon Camera Indicator
    Yes
  • Playback Functions
    Auto Iimage Rotation Full-Frame and Thumbnail (4, 9, or 72 images or calendar) Highlights Histogram Display Image Comment Movie Playback Movie Slideshow playback with Zoom Slideshow
  • In-Camera Image Editing
    Colour Balance Colour Outline Colour Sketch D-Lighting Distortion Control Edit Movie Filter Effects Fisheye Image Overlay Miniature Effect Monochrome NEF (RAW) Processing Perspective Control Quick retouch Red-Eye Correction Resize Selective Colour Side-by-Side Comparison Straighten Trim
  • Image Comment
    Yes
  • Interface
    Accessory Terminal: Remote Cord: MC-DC2 (available separately); GPS unit: GP-1 (available separately) HDMI Output: Type C mini-pin HDMI connector Headphone Connector Hi-speed USB Stereo Microphone Input
  • Wi-Fi Functionality
    Eye-Fi Compatible WU-1b Wireless Mobile Adapter
  • GPS
    GP-1 GPS unit GP-1A GPS unit
  • Save/Load Camera settings
    Yes
  • Total custom Settings
    50
  • My Menu
    Yes with customization
  • Recent Settings
    Yes
  • Supported Languages
    Arabic Brazilian Portuguese Chinese (Simplified and Traditional) Czech Danish Dutch English Finnish French German Greek Hindi Hungarian Indonesian Italian Japanese Korean Norweigan Polish Portuguese Romanian Russian Spanish Swedish Thai Turkish Ukrainian
  • Date, Time and Daylight Savings Time Settings
    Yes
  • World Time Setting
    Yes
  • Battery / Batteries
    EN-EL15 Lithium-ion Battery
  • Battery Life (shots per charge)
    900 Battery Life (shots per charge) (CIPA)
  • AC Adapter
    EH-5b AC Adapter Requires EP-5B Power Supply Connector
  • Battery Charger
    MH-25 Quick Charger
  • Tripod Socket
    1/4 in.
  • Approx. Dimensions
    Width: 5.6 in. (141mm) Height: 4.4 in. (113mm) Depth: 3.2 in. (82mm)
  • Approx. Weight

    42 oz. (760g)

    camera body only
  • Operating Environment
    0–40 °C (+32–104 °F)
  • Supplied Accessories
    • EN-EL15 Rechargeable Li-ion Battery
    • MH-25 Quick Charger
    • EG-D2 Audio Video Cable
    • UC-E15 USB Cable
    • BM-14 LCD Monitor Cover
    • DK-21 Rubber Eyecup
    • AN-DC8 Strap
    • DK-5 Eyepiece Cap
    • BF-1B Body Cap
    • BS-1 Accessory Shoe Cap
    • NikonView NX2 CD ROM

Sony announces new cameras for still and video

Sony-DSC-RX1-Full-Frame-Digital-Camera-DSCRX1-BH-Photo-Video.jpg
Sony has announced three new cameras today.  The next podcast will have more detail, but here's the gist.

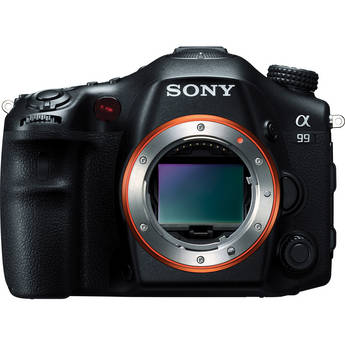
Sony A99 DSLR - 24MP full frame, dual autofocus system, OLED viewfinder, HD video and 14 bit RAW, internal stabilization, 6fps $2798 USD available for pre-order now


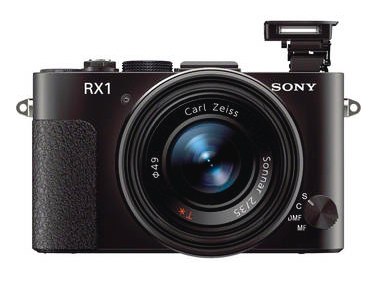
Sony RX1 - Full frame compact with 35/2.0 fixed Zeiss lens. 24MP, 14 bit RAW, 5fps $2798 USD available for pre-order now


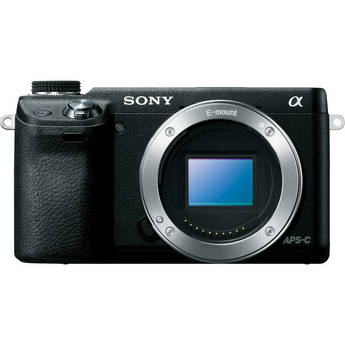
Sony NEX-6 - 16MP APS-C sensor, 10fps, OLED EVF $848 USD available for pre-order


Sony VG-30 Interchangeable Lens Video Camera - with 18-200 E series zoom lens, OLED EVF, 16MP APS-C sensor including 16MP still capability, quad capsule spatial array microphone, external mic in with level controls $2698 USD available for pre-order

The prices listed are MSRP, so we'll have to wait for shipping to see what street looks like.  Initial thoughts are that the pricing is quite a bit higher than prior releases and with the exception of the RX1, everything else is an incremental upgrade over an existing offering.

VIDEO : Introduction to Macro Photography

Orchid-Canon-180-Macro.jpg

In this video, I introduce viewers to macro photography, discussing concepts, equipment, lighting, exposure techniques and supplemental tips.  I close with some ideas to encourage viewers to make macro photographs quickly and with plenty of learning opportunities. [iframe]<iframe width="640" height="360" src="http://www.youtube.com/embed/2fyHsoHbHlA?rel=0" frameborder="0" allowfullscreen></iframe>[/iframe]

The Photo Video Guy Podcast - Episode 32

A new lens for the Nikon 1,  Sony builds the sensor for the D800.  Canon issues fw update for the 1Dx.  New 24-70 arriving soon.  Canon issues new patents.  Canon dives deeper into video with two new cameras and four new lenses.  Sony releases the NEX-5R.  DP Review likes the RX-100. Pentax K30 hits retailers.  Adobe has LR 4.2RC and ACR 7.2 RC.  Specs for the Fuji X-E1.  The Lenskirt.  SmugMug price explosion

Quick Tip : Eyedropper colour selector in Lightroom 4

If you use Lightroom, it's possible at some time that you wanted to use a brush to adjust colours. It's easy enough to do, or appears so.

  1. Click the brush tool
  2. In the drop down select Color
  3. The Color Picker box shows up and you click on the colour you want

But that's not really what you want.  What you want, is to be able to select a colour from the image you are working on, not some arbitrary picker from a box or worse trying to find a place in the box that matches the colour you want to work with.

Despite lots of great UI work, I think Adobe has dropped the usability ball on this one because while it is simple, it's not obvious or well documented.  I give full credit to Rob Sylvan for teaching me how to do this.

When the colour picker box appears, click in it anywhere and hold the left mouse button down.  Without releasing the mouse, drag the eyedropper into the image.  You'll see the swatch box in the upper left of the Color Picker change to match wherever the eyedropper is stationed at any given time.  When you find the colour you want in the image, release the mouse button and the colour is loaded into the swatch and the brush is loaded with that colour.

It really is simple, but the implementation could stand to be more intuitive.  I tried to grab a screenshot but neither Skitch nor Grab would capture the image of the eyedropper, so you'll have to experiment yourself.

You can stop hating your Canon printer

You may remember a screed from me about Canon's Pixma Pro printers and how they made me see red by printing things too red.  I discovered SO MANY people had this issue, that even after going through the time consuming process to build custom ICC profiles for a few papers, I invested my hard earned dollars in an Epson 4900 and never looked back. I recently was requested to generate a stack of small prints, generic 4x6s on glossy paper. The kind of thing that people carry around and hand out to friends and family.  Running these on the Epson would be easy enough, but I have the 9000 Mk II and 9500 Mk II just sitting there, so I thought since no custom ICC profiles were required, I'd give them a shot again.  This is a downside of being a printer.  You become the target for everyone in your family to come to instead taking the card over to the local Walmart.

One of the good things about Canon Pixma Pro printheads is that they have tons of holes and so jams are rare.  They do happen, and the printer utility offers a cleaning option and a deep cleaning option.  Use with care because although the software warns you that ink is used in the cleaning process, two passes of deep cleaning will eat up about 1/8 of each ink tank.  At about $20 retail per, that's frakking expensive for waste.  Not having been born yesterday, I understand that the manufacturers treat printers as loss leaders and make all their money on the ink.  (Can you hear me HP?)

The rule I've used for Canon printers is that so long as you let the printer make the decisions and print only on Canon paper, you'll get decent results.  However, using ICC profiles and custom printing from Lightroom or Photoshop is a good way to raise your blood pressure because frankly the output sucks.  This is common to Canon printers.  Canon used to have a plug-in for Photoshop called Canon Easy-Photoprint Pro, that allegedly allowed the use of proper ICC profiles and different papers and that would give you good prints.  Unfortunately, it was crap.  Fortunately this sad state of affairs is changing.

After printing a run of 4x6s on Canon Glossy paper with Lightroom set to let the printer manage output, that turned out just fine for the project, I decided to see what updates Canon may have made and not told anyone about.  Amongst the many I found was a new version of the plug-in.  I said what the heck, I'll give it a shot.

Running the installer it detected Lightroom 4, Photoshop CS5 and Photoshop CS6 and offered to install itself.  The downside is that these are plugins that bypass the native print engine in the application.  The upside is that it doesn't fark up the native print engine.  Canon makes fine cameras and lenses.  Contrary to their own opinion, they are not a software company as evidenced by the lack of continuity checking and execrable user interface.

Kvetching aside, the new plug in actually does a decent job.  It's slow to launch and not particularly intuitive, but when you use it, you can actually use third party paper and ICC profiles and get a decent quality print.  It's still not up to the IQ of the Epson, but it is definitely not as likely to make you pop a blood vessel.

At many tradeshows I take the time to ask the Canon printer specialists why their printers print red from every app but the Canon printing apps.  Only once was I told by a young guy, who was friendly and helpful, that Canon "knows" people like warm looking prints and that's the way they come.  I pointed out the if you print on Canon paper from Canon's Digital Photo Professional that you actually get fairly lifelike colour.  He smiled and noted that very few people use DPP.  Fair enough, although I know many pros who have sunk $$$ into Canon printers who use DPP for all their printing because it has been the only way to not get cat-yack out of the printer.  Every other Canon representative replied that if I use only Canon paper and just let the printer manage everything all will be well and that using third party papers would not give optimal results.  No wonder that everyone who makes great papers does the ICC profiles for Epson seemingly first.

I do find that the Canon printers are ink pigs.  If you are doing lots of Black and White, or want to, stay away from the 9000, only the 9500 Mk II is really good enough for serious black and white.  It's a lot slower though.

Were I starting fresh with my own photographic printing, or more usefully, if you are, I would still suggest going with an Epson photograph printer.  All in ones are pretty consistent (crap) from all vendors.  Go dedicated if you are or think you might be, serious about making prints.  However if you already have one of Canon's Pixma Pro series of printers, use the Easy-Photoprint Pro plugin with Lightroom or Photoshop, don't print through the native engine, and you will get better prints and waste less ink and paper.

There's really nothing like a print to get a viewer excited.  It's tactile and it's so much more telling than an image on a screen.  If you only need prints once in a while, use one of those Kodak kiosks in retail stores, or if you have a Costco nearby, use their lab.  A lot of the Costco folks are Certified Photographic Counsellors, they do know their stuff.  But if you are taking the time to edit, tune and enhance your images, making photographs instead of just taking pictures, you probably owe it to yourself to learn to print.  If you're going to go that far, you're going to want good looking prints and this tip will help you if your printer is a Canon Pixma Pro.

The Photo Video Guy Podcast - Episode 31

Bye bye to Kodak film.  Nikon drops the D700 and maybe the D7000, adds an Android powered point and shoot.  Canon files a patent for the 2nd gen 300/4L.  Canon announces new large format printers.  A fix for the 40/2.8 sticking problem and rumours of new bodies.  I close with a quick look at Sigma's 300/2.8

REVIEW : Sigma 300mm f/2.8 EX APO DG HSM

Lens reviews are tough to write.  Some readers want the really deep detail spec review and while I can understand that, I dont have the resources of a DP Review and the idea of shooting photos of focus charts makes me somnolent.  I value that information, I just dont have it in me to create it. I prefer to review a lens as I would use it, and with the kind support of the people at Gentec Canada, obtained short access to Sigmas 300mm f/2.8 super telephoto.   After humping the thing around for seven hours on day one and using it exclusively, I am very impressed thus far.  All images were shot with the lens mounted to a Canon 1Dx.

What All The Acronyms Mean

I think that the focal length and maximum aperture are pretty clear.  The others, perhaps not.

  • EX - refers to the finish of the lens body, both in terms of tactile structure as well as look.  For me not slippery matters and EX delivers
  • APO - refers to apochromatic elements which allow for very large elements without visible distortion, and in this lens the elements are ELD glass (see below)
  • DG - means works on digital and film cameras, hence compatible with full frame bodies
  • HSM - means ultrasonic focusing motor

The Build

  • Construction - 11 elements in 9 groups
  • Angle of View - 8.2 degrees
  • Blades - 9
  • Aperture Range - f/2.8 - f/32
  • Closest Focus - 250 cm / 98.4 in
  • Filter Size - 46mm Rear drop in
  • Dimensions - 119 x 214 mm / 4.7 x 8.4 in
  • Weight - 2400g / 84.7 oz

First Impressions

If youve never handled a lens that is nearly 2.5 kilograms (just over five pounds) this is a new feeling.  While some reviews refer to the lens as lightweight, I cannot agree.  Its not light, but it is compact given what you are carrying.  A giant front element gathers lots of light and that could mean internal flare, but Sigma incorporates a pair of ELD (Extraordinarily Low Dispersion in their nomenclature) elements that make this a non-issue.  The lens can be used with teleconverters and Sigma understandably recommends the use solely of their own converters.   I did have either of Sigmas converters as part of the shoot and so cannot comment.

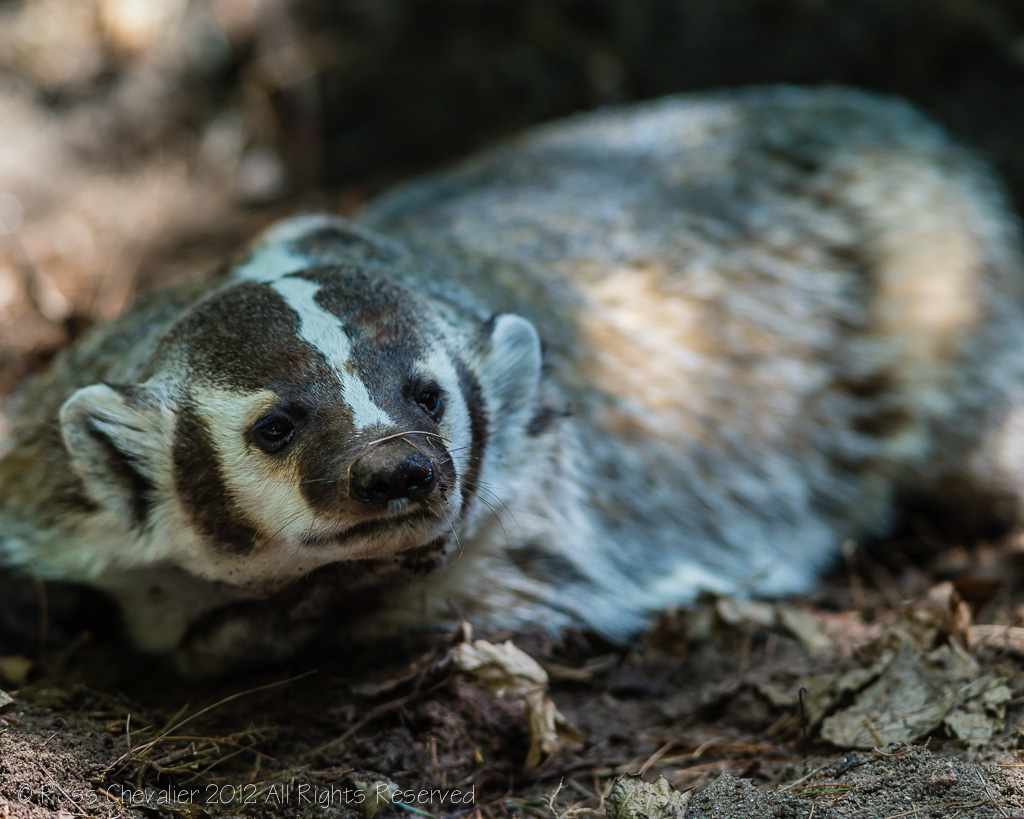
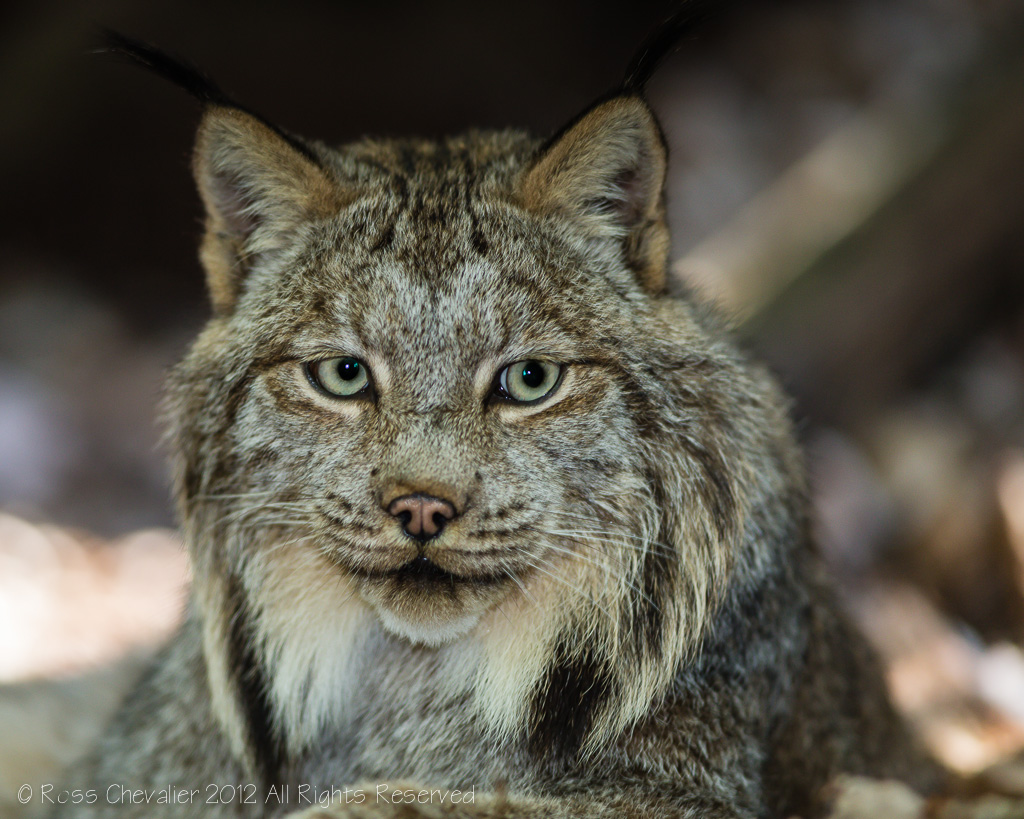
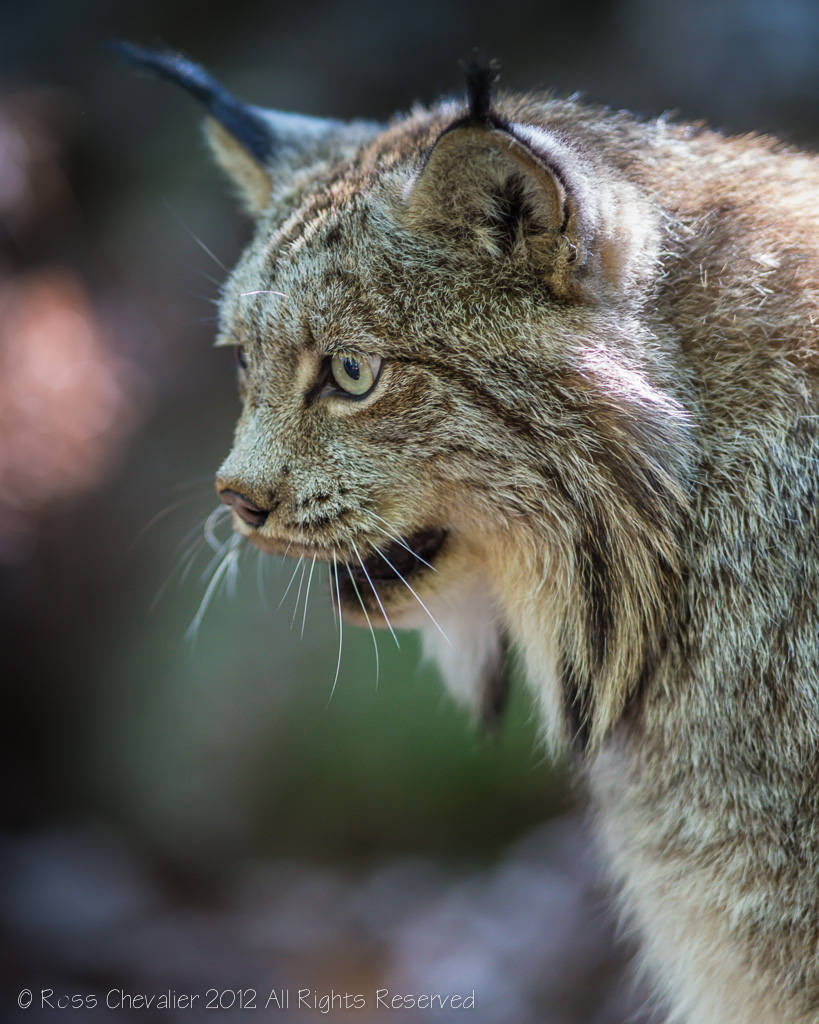
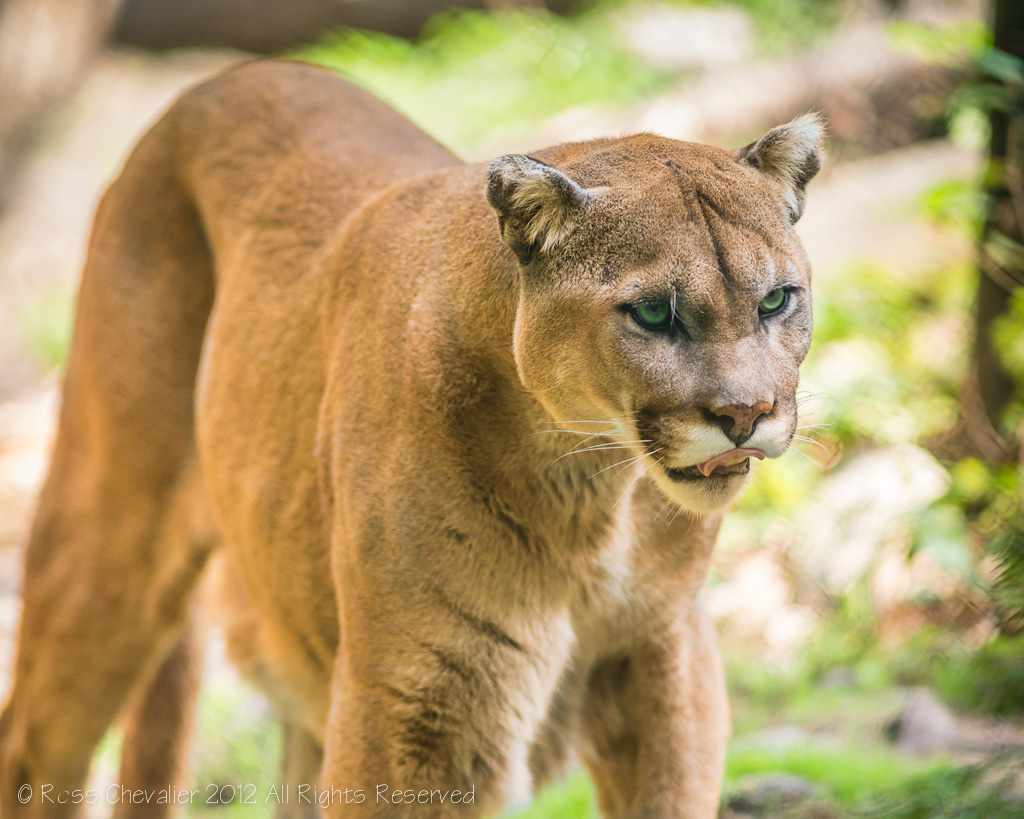
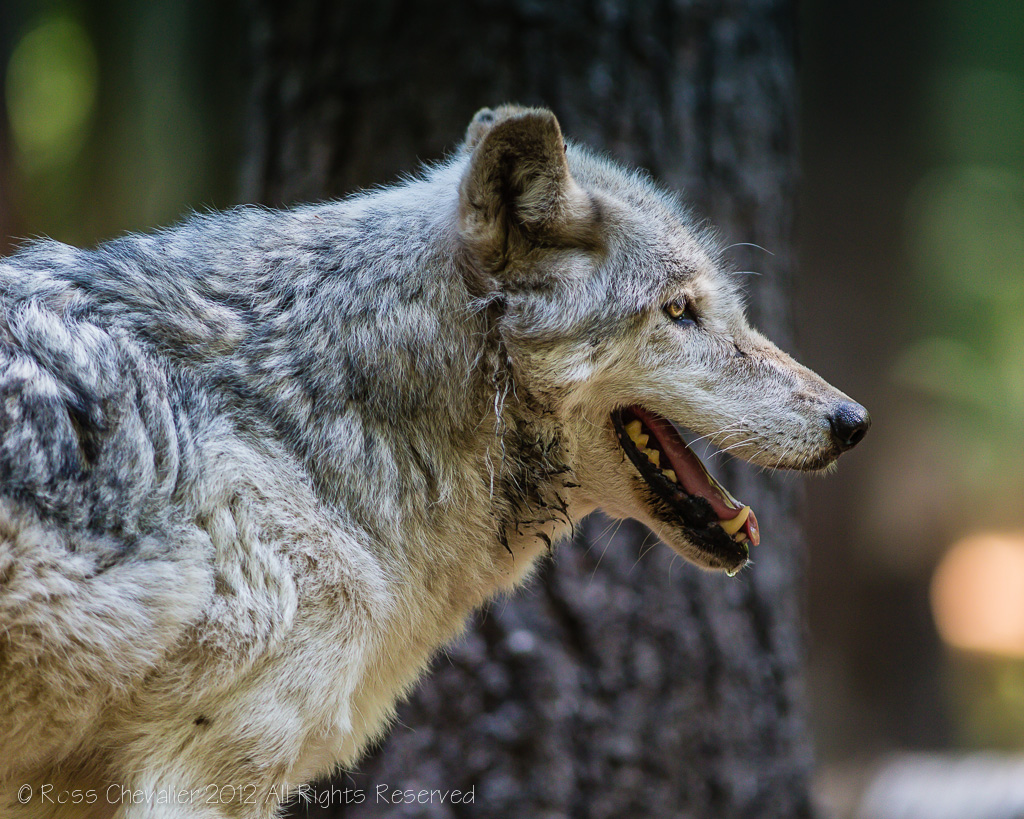
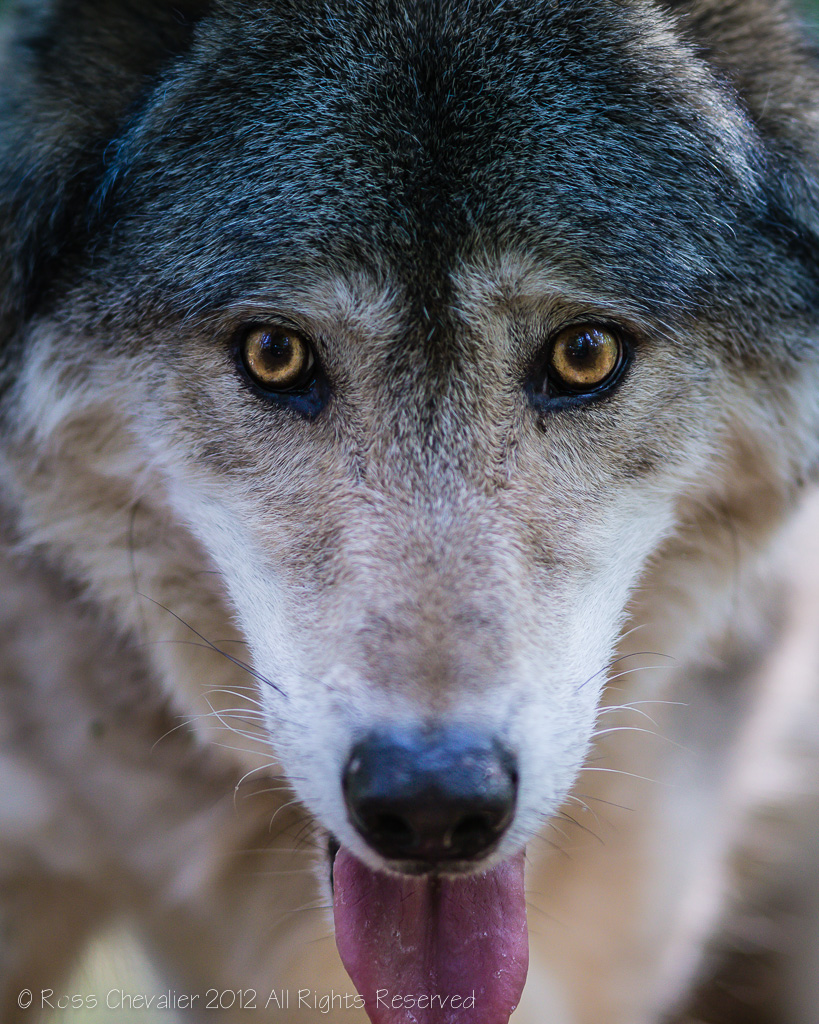
Forcing myself to work with one lens only, (I did carry my Canon 100-400L in my ThinkTank bag just in case) was fruitful.  The days shoot involved getting into the pens with lynx, wolves, badger and owl plus close work with a mountain lion (although not in the pen with it).  Depth of field at f/2.8 is what you would expect it to be, ultra-shallow.  Focusing on the closest eye, the images are tack sharp when I did my job.  The falloff into out of focus is soft and not jarring.  I can see why wildlife pros like long and very fast glass.  Stopping down as far as f/6.3 increases the depth of field as you would expect, but at that point, frame elements even off in the distance can become distracting and even net mesh in front of the subject (in the case of a bald eagle) still were apparent as bands of softness and low contrast.

Autofocus on the 1Dx is often referred to as screaming fast, and with the 300/2.8 mounted it snapped pretty quickly but I would not call it fast.  The system is moving a lot of glass there, and while the HSM motor is very quiet, its not blazingly fast.  I missed a couple of shots with a moving animal because focus couldnt catch up but it wasnt a serious problem.  What was impressive is how much contrast the lens passes so the AF would work even on low contrast subjects.

Handling

The lens comes with a reversible bayonet mount lens hood with a lockdown screw.  Mounting and unmounting is fast and easy.  The lens cap is enclosed in a nylon tube thing that fastens over the hood but only when it is reversed.  It does collapse mostly flat for stowing in a vest pocket but I would prefer the ability to use it securely when the hood is mounted for photography.

The lens also has (as it should) a tripod collar.  This is a requirement and it works but if it were up to me, I would make a couple of changes.  First is that it rotates freely and thats good but I would prefer to have landscape and portrait orientation notches or at least markings milled into the mount area.  When the grub screw is backed off, the lens can rotate but it isnt smooth.  Sigma uses a sort of grippy finish on the lens barrel which is I think a very good thing but I would have preferred that the area under the ring enable smooth rotation with a couple of milled stops as noted.  The collar foot is very short, to accommodate the hood when reversed.  Thats ok, but I would have preferred that the stand-off between the foot and the lens barrel be greater so I could mount a Really Right Stuff or other Arca Swiss style lens plate on more securely than I could.  WIth a lens like this getting it on and off the head should be very fast and it could be better oriented to be quicker.

A taller foot would offer you more grip options as Sigma does on their 120-300/2.8 or 150-500/6.3 lenses and I would hope that they will consider this change.

Other reviewers have suggested that the lens should have strap lugs built on, and I agree.  Some have sad you can get them after the fact but Sigma did not list them on the accessory page for the lens.  You could of course screw a Black Rapid strap into the tripod hole or if using a plate as I do, connect it to your strap with a Really Right Stuff FAB-2.

Shooting handheld with the tripod collar on is absolutely possible although less than comfortable.  If you want a more forward grip you are on the focus ring and with the short foot and short leg the hand tires more quickly.

Internal Filters

Internal filters only make sense on a lens like this.  I like that Sigma went the route of being able to use standard 46mm filters in the drop in tray (some vendors require custom filters or gels only).  The tray is a positive lock type.  There is also a filter rotation ring (and as the lens came without documentation there was guessing as to what it was for) that allows the use of a polarizing filter in the filter drawer.  Seems like a small detail but it is well executed.

The Shooting

Light conditions varied from specular to harsh sun, to full shade.  In every case the lens performed very well.  I was able to have the 1Dx in AI-Servo (continuous tracking focus) when photographing the wolves and it was keeping up even at 5fps.  Balance was decent handheld and when mounted on the Gitzo monopod with RRS MH-02 monopod head, it was plainly a joy to shoot.  I was spoiled by the bright image and the razor thin depth of field quickly and I had a higher than average keeper ratio than I am accustomed to with moving wildlife.  I used the 600EX-RT for fill flash in many cases with Flash Exposure dialled to -1EV so as not to fully balance the daylight and only fill in eye sockets and the eTTL II flash metering worked as it should.  I did not expect otherwise although I have read that sometimes fill flash exposure gets wonky when using very long lenses with very fast apertures.

There are a few sample images at the end of the post so you can see how sharp the lens is.  All are converted to DNG on import to Lightroom and have basic processing applied before exporting as web ready JPEGs at lower resolution and 72dpi.  When bringing the images in to Lightroom I was very pleased to discover that Lightroom had a lens profile defined for this lens and that is was recognized by the profile engine automatically.  Lens profiles provide basic correction for vignetting and distortions and while I can see the differences with the profiles on or off, the adjustments are subtle, unlike some other lenses I have tested.

When you look at other options in this space, the glaring difference is that the Sigma 300/2.8 lacks optical image stabilization.  While one can argue about whether OIS matters on wide angles, it is a boon on long telephotos, especially for sports or wildlife where you subject isnt sitting on a posing stool waiting for you to get on with it.  For me, thats the single biggest gap the lens has.

Next Steps

The next step is to do a shoot comparison with Sigmas 120-300 f/2.8 zoom.  Through the courtesy of Gentec and their relationship with Daytripper Photos Bryan Weiss, whom I teach for,  I will get a chance to shoot the lenses side by side.  The zoom is less expensive than the prime in retail environments and has optical stabilization where the prime does not.  Where the prime has ELD elements, the zoom has FLD elements, and fluorite was first introduced in glass back in the 70s to combat chromatic aberration.

Pros

  • Sharp
  • Great bokeh
  • Handles quickly
  • Terrific contrast
  • Rear drop in filter

Cons

  • Tripod foot design
  • Lens cap design
  • No image stabilization

Thanks for reading.  If youd like to purchase this lens, please use my link to B&H to support The Photo Video Guy.

For Canon

For Nikon

REVIEW : The Upstrap - really non-slip camera strap

UPstrap-Camera-Straps-The-Non-Slip-Camera-Shoulder-Strap..jpg

Looking through the storage drawers for gear I had to pull out a veritable octopus of camera straps.  I don't use the manufacturer's straps because I don't want to advertise the type and model of camera I carry.  I've tried leather, neoprene, nylon, and canvas.  They are all in the drawer.  Up until recently I either used the Domke strap from Jim Domke or the Black Rapid sling system. The Domke's are comfortable but I like to sling the camera off my shoulder and they just don't grip enough for me.  The Black Rapid dual sling is terrific but the single sling rubs my neck and over the course of time creates an unpleasant state of "man-boob".  Neither comfortable or a good look.

I was watching a video cast a while back and Matt Kloskowski and RC Concepcion both were advocating the Upstrap.  RC is barrel chested like I am and so I thought I would take a chance on the recommendation and order one.

The strap worked out so well, I ordered two more.  The Upstrap is really non-slip.  You cannot even make it slide around if you want it to.  It holds your camera firmly on your shoulder even as you move and bend, and is also comfortable if you have the camera around your neck.  I have both the traditional camera attachments for the Canons and the Vectran attachments for the Leica.  All have proper quick release buckles if you don't need the strap and the Kevlar material is incredibly durable.

Best strap ever, may sound like hyperbole, but for me, it is.  I'll be ordering a couple more today as I am extremely happy with the product, one for the Hasselblad and one for the remaining Canon.  We spend a lot of money on gear.  There's absolutely no reason to worry about it slipping off your shoulder or being uncomfortable.

Highly recommended.

REVIEW : The Photographer's Go Bag that doesn't scream "CAMERA"

Retrospective™-20-Black-Shoulder-Bag-Think-Tank-2.png

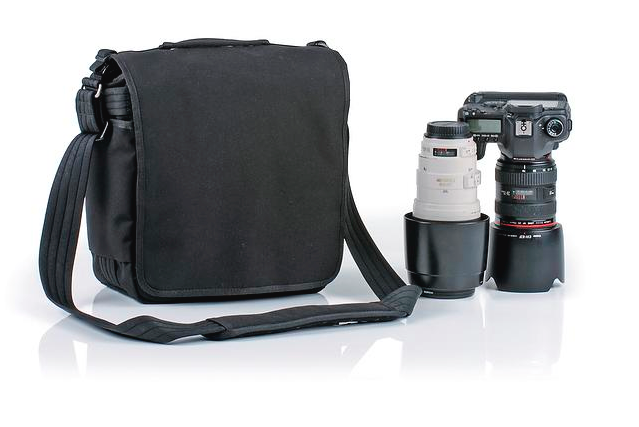
I like camera bags. Family has said I am with camera bags like some people are with shoes. Based on the closet, and the shelves and beside the chair, they're right. I am a huge fan of the bags from Think Tank. There are many fine manufacturers, but when I add up all the kit I have spent hard earned buckolas on, most of it is Think Tank gear. From belt kits, to airport sized backpacks, to little bags to big bags, I tend to use my Think Tank bags as "go bags" - pack what I need for the gig / assignment / event and go.

After being robbed of my gear in Barcelona in 2011, I am VERY SENSITIVE regarding camera bags that look like camera bags. Enter the Retrospective series from Think Tank. Recently I had a project / assignment to shoot a Polo match. I knew I was going to be moving around a lot, that I would be using mostly long lenses and a monopod. So I went out and invested in the Retrospective 20.

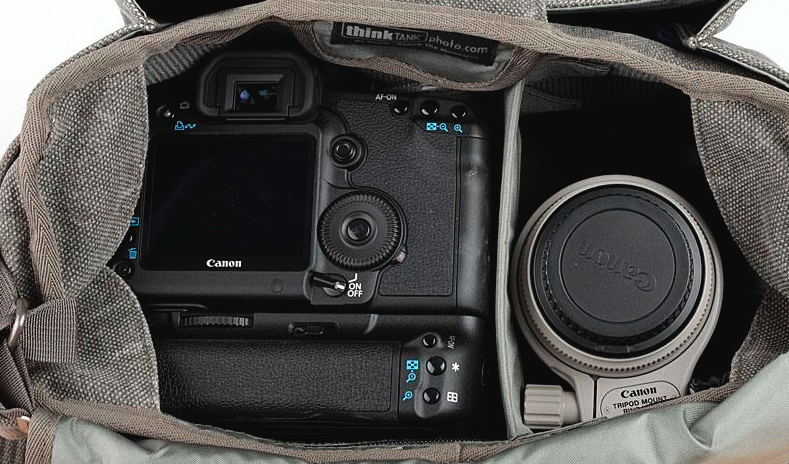
It looks like a messenger style bag. It has no visible logos. It has a great strap that is comfortable all day and that is long enough that I can sling it across my body or hang it from a shoulder. It's quick to get into, has good padding and its size belies just how much kit you can get in it. The giant bellows pocket on the front is really deceiving. For my Polo work I carried in this relatively small and highly innocuous bag the following gear;

Canon 1D Mk IV with Canon 100-400L mounted Canon 7D Body Canon 2x Converter III Metz 58 AF-2 flash with off camera cord RRS Flash bracket Think Tank Memory Card holder Lenspen Microfibre cloth

The bag was comfortable all day and held my gear safely and securely. The front flap velcros closed with good sized velcro patches and they have silencers sewn on so you can open the bag with no noise at all.

Think Tank has a graphic that is reminiscent of an X-ray to give you an idea of how the bag could load up.

The point is that it can be accessed quickly, holds a camera with a long zoom or prime attached and carries well.

I also own the Retrospective 5 in the Pinestone finish and the Retrospective 30 when I feel the need to carry a lot of stuff into the field.

As kind of a useful aside, Think Tank's material that lines their bags is 18% grey so it's also your portable grey card.  We all know that when you really need a grey card, you don't have one, but with Think Tank you do.

If you are in the US, support the Photo Video Guy by buying your bag online through these links.  Black. Pinestone, Blue Slate.  I am not sponsored by Think Tank and pay for my own gear.

REVIEW : Canon 180/3.5L Macro Lens

Introduction I enjoy macro photography and have worked hard to try to build a bit of skill on the subject.  While many lens claim to be "macro", to be true macro lenses they need to deliver 1x life-size on the sensor.  This means that if you have a full frame sensor of 24mm x 36mm, then the lens must be able to produce an image of the subject that is 24mm x 36mm in real life.

Macro photography can be challenging because depth of field diminishes as the image plane gets closer to the subject.  This is just optics math in action, so consequently, small apertures are used for the closest shots to avoid having only a pinpoint deep focus depth. At the same time, macro lenses need to be optically fast to aid focusing in poor lighting conditions.

Macros are best done from a stable platform, such as a tripod because you might find yourself with slower shutter speeds to accomodate the small aperture, and you want to avoid pushing the ISO too high to maintain the highest possible resolution and low noise.

When we shoot close, we also often need to manage the light as proximity might create shadows or block out the light entirely.  The sample images included here were done with multiple flashes because the ambient light just would not work.  Flash is very useful in macro work because our subjects may be moving, and when very close, even subtle movement can blur the photograph.

I have owned the Canon 100/2.8L macro for some time and like it very much.  I do not advocate macros shorter than 100mm because with a shorter lens you must be physically very close to the subject.  This distance between the front element and the subject is referred to as "stand-off distance".  By the same token, we also know that as focal length increases at a given aperture and camera to subject distance, depth of field is reduced so to go too long will result in depth of field compromise.

After listening to noted photographer Bill Fortney advocate Nikon's 180mm macro lens, I arranged to borrow a Canon 180mm f/3.5 L series macro for testing purposes.  Even the 100mm when shooting life-size requires you to be very close and as I wanted to use softboxes and octas as my sources, I knew I would benefit from the increased stand-off distance the longer lens affords.

Lens Specifications

  • Focal Length : 180mm
  • Maximum Aperture : f/3.5
  • Construction : 14 elements in 12 groups
  • Angle of View : 13 degrees 30 minutes
  • Closest Focus Distance : 0.48m / 1.6ft
  • Filter Size : 72mm
  • Size and Weight : 3.2" x 7.3", 2.4 lbs. / 82.5 x 186.6mm, 1,090g
  • Includes : Reversible Lens Hood, Tripod Collar

Thoughts

The lens is very sharp and focus is quick because of the Ultrasonic motor.  Focus is internal and of the floating type.  This method is more costly to make but the value returned is minimized aberration as focus distance changes.  It's one of the distinctions between a proper macro lens and a generic one.

The tripod collar increases size and weight but I wish I had one on the 100mm that I own.  Changing camera orientation does not change the image centre, allowing for creative positioning without massive amounts of reset work from a focus and cropping perspective.

In very low light, I found that autofocus with the 1D Mk IV was not effective.  This isn't surprising as the flower petals were not particularly contrasty and even when manually selecting focus points, there just wasn't enough light to make AF accurate.  Switching the lens to manual focus completely decouples AF and the manual is fast and light.  Subjects snap in so I am quite impressed.  I also use an old Minolta angle finder to avoid neck strain and on the rare occasions where I just need more magnification, use Live View and a Hoodman loupe.  The net of it is that obtaining critical focus is simple and consistent.

I was using a set of Metz 58 AF-2 flashes in Westcott Apollo striplights and octas as the primary source and a third Metz with Rogue gels firing at the background paper.  I was using Pocket Wizard radios and their AC3 zone controller and as documented earlier was underwhelmed with the zone control performance.  As the shots were being captured between f/29 and f/32 I was pushing the Metz flashes in the softboxes very hard.  Moving the flashes to manual output from eTTL gave me more control.  This is a Pocket Wizard Zone controller issue, not a flash problem and I've documented it elsewhere.  Once past a number of false starts with the lighting, I was able to get to where I wanted to be.

Colour rendition from the lens is excellent.  As I always do, I used a B+W UVA filter on the lens.  B+W filters are superb and I still wanted the protection for the front lens element in case of something very bad happening.  I used a Jobu lens foot to convert the standard tripod mount to one that would fit the Really Right Stuff bracket that I use.  This is not a flaw in Canon's tripod foot, it is entirely done to suit my tripod configuration.

On the 1D Mk IV, the effective focal length is 234mm due to the 1.3x crop factor in the camera.  That's about as long as I would care to go for macro.  Mounting the lens on the 1Dx full frame makes this lens a really fine portrait lens too, although I don't think I would switch to it away from the 700-200/2.8L that is my portrait "go-to" lens.

I did not experience vignetting or sharpness falloff centre to edge and you shouldn't with a high end macro lens.  I opened the RAW files in both Lightroom and DxO Optics Professional and was pleased to see that the lens profiles in both were needed not at all to address lens issues.  This simple test is a strong indicator of where design issues exist in lenses.  Lightroom's profiles are excellent and in my opinion, those from DxO Optics are the best in the business.  When these acclaimed profiles make only miniscule corrections, this is indicative of superlative lens design.

Conclusions

I have to return the lens soon and will be sad to see it go.  If I did not already own the similarly excellent 100/2.8 L macro, I would not be returning the 180/3.5L.  Knowing what I know now, it's the one I would buy if I could have only one macro lens.  I want to thank Nathan Reeder at Henry's for assisting me in obtaining the lens for the review.

Highly recommended.

Where to for Pocket Wizard's eTTL offerings?

Pwmini.jpg

I made substantial investments in the Pocket Wizard TTL radios to use with my Canon cameras over the last couple of years.  I bought the Mini TT1 to use as the primary transmitter and a number Flex TT5s as receivers, and an AC3 zone controller.  I've also purchased the AC7 hard shield because the Canon 580EX II is known to be susceptible to radio interference, particularly when installed in one of Westcott's Apollo soft boxes. For the most part I've been using the Pocket Wizards in a very general manner for distance triggering of TTL flash.  And for the most part, they work quite well.  I do find the need to program them through the Pocket Wizard utility to be a nuisance and Pocket Wizard's documentation would need to improve significantly to achieve the level of suck.  So, as long as you don't need anything more than triggering, they're fine.

The real point though should be to be able to manage flash zones and output by zone for eTTL flash just as you can in the manufacturer's infrared systems.  I use the term eTTL because I have Canon cameras, but Pocket Wizard does support iTTL for Nikon with the appropriate devices.

Recently Canon replaced their optical triggering system with radio in the new 600EX-RT flashes and the ST-E3 controller.  Infrared works fine indoors with line of sight, but it doesn't go around corners and often fails outdoors.   Hence the demand for radio.  Initially I was surprised at Canon's decision because of the apparent lack of backward compatibility with the older flashes.  This has proven to be false as the new flashes can use infrared if you wish.  The ST-E3 is radio only, no infrared.

To get zone control with radio Pocket Wizards, you use the AC3 zone controller and this is where things start to fall down.  The AC3 provides for control of three zones, each zone being configurable for Off, TTL and Manual.  Manual puts the remote flash in manual mode but still allows for eTTL exposure control on other channels.  The theory is that in eTTL mode, you would have +-3 stops of exposure control for each zone, plus whatever control you apply globally on the camera.  The reality is that in a lengthy test, this was not so.  Despite multiple manipulations and test firing there was no demonstration of a six stop range.  Using the AC3 to put the flashes in manual mode actually allows you to vary the power from full to 1/64 power and it works extremely well.  But, I really wanted full eTTL control, and did not get it.

i recall Joe McNally saying at a seminar that Pocket Wizards were decent triggers but that zone control performance was inconsistent at best.  Joe is a big fan of Nikon's Creative Lighting System of course, but not a fan of Pocket Wizard.  He calls them not ready for prime time, and based on tests across several hundred exposures, I have to agree.  This brings me to the question I ask.

A decent powered eTTL flash for Canon or Nikon will run between $400 and $600.  Add another $250 for a Flex TT5 receiver and then $100 for an AC3.  Comparatively, even Canon's 600EX-RT at $729 retail is a better value, the radio is built in, the user interface is extremely elegant and it works consistently.  You will also need a transmitter on the camera and zone manager, so just under $400 for Canon's ST-E3 or about $330 for a Mini TT1 and an AC3.  Simplicity suggests that the Canon solution might be better.  Pocket Wizard says you can use Flex TT5s to control the power of studio flash in non-TTL mode but it's spurious because it works only with a special receiver add-on for a limited number of studio heads.  Since most better studio heads have their own remote system, this is less valuable than one might think out of the gate.  For example, Elinchrom's Skyport radio system comes with their head kits and allows power control from the camera in a single transmitter.

So given that Canon is down the road on radio and is anticipated to replace the 430 EX II with an RT model this fall, why would a photographer without an existing Pocket Wizard investment buy Pocket Wizards at all.  To even use the new CTL software in conjunction with your light meter, you have to replace the radio transmitter in the meter that you already have for about $140.  It's ridiculously expensive for what it is.  The latest CTL software still doesn't work with the 5D Mark III or the 1Dx and there is no date announced when the update will be available.

Based upon the state of Canon's movement into radio and the reasonable probability that Nikon will add radio in the next round of flashes, building on their excellent Creative Lighting System, where does this leave Pocket Wizard?  Unless there are significant price drops and significant usability improvements, I fear that they are on a slope to irrelevance.  Speedlite-ista Syl Arena has reached the same conclusion.

Bowens has ceased delivering PocketWizard receivers for their studio heads because of customer complaints that the Mini TT1 and Flex TT5 units when in transmitter mode won't fire the heads creating customer dissatisfaction, and even with the very nice Plus III transceivers, there are less expensive solutions out there for the studio.  Elinchrom's solution is far more elegant and robust.

I have gotten decent use out of my investment and as simple radio triggers for flash, they work consistently and well.  So long as you don't care about zones, even the eTTL remote functionality works.  But the zone controls are extremely flaky and I had lots of burned shots, despite reading the docs and watching the tutorial videos by Mark Wallace on YouTube.  At no time did I experience accurate eTTL output control with the AC-3, completely inconsistent with my experience using Canon's infrared system and now their radio control system.  If the internet is any indicator, I'm not alone, and Pocket Wizard's zone eTTL radio model is broken or at best unreliable.  i will be keeping my stuff until I can replace all my infrared controlled flashes (a very expensive proposition) and will continue to use the Plus II and Plus III triggers with my studio flashes as they all have Pocket Wizard receivers installed already.  What I won't be doing is spending any more money on anything from Pocket Wizard.  I'm disappointed and don't see them as a viable solution for  truly flexible eTTL flash configurations.

The Photo Video Guy Podcast - Episode 30

Will Canon release a 40MP iteration of the 1Dx?  Canon increases the scope of the recall of the T4i/650D.  Leica announces their financial results and remains stable despite economic downturn.  M Monochrom cameras start arriving in Europe.  Buyers of the M9 or M9-P in the US can get a $1,000 gift card with purchase.  Instagram adds a mapping feature.  Nikon wins the EISA awards with the D4 and D800 named Cameras of the Year.  Sony unveils an amazing pro video camera, the NEX-EA50EH.  Rumours of an A99 at Photokina.  We close with a snapshot of my review of the Canon 40/2.8