What's Black and what's White?

As some of you know, I recently bought myself the gift of an old 4x5 film camera, and in order to refresh my knowledge and to rejuvenate my enthusiasm I went back to basics.  I'm still there of course but wanted to share a couple of things I relearned. One of the many places I chose to look was to the writings of Ansel Adams, in this scenario, his book The Camera.

As I rejuvenate my knowledge of the Zone System, I'm reminded of the reality of black and white.  i don't mean film or as colours but as representation of tone.  I'm bridging the world of film to the world of digital and there is a clear parallel here.  In the Zone System, Zone V is what we think of as the mid tone, basically 18% grey.  Zone 0 is black.  And in this case, this means there is nothing there.  It's just like an RGB rating of 0,0,0.  In digital we can and should leverage the ability to manipulate exposure in post processing, which is analogous to push or pull processing with film negatives.  The challenge is that if the histogram for the image in review is up against the left border, and we drag the histogram to the right, we aren't recovering anything, because there's nothing there to recover.   Similarly if we pull the histogram to the left and it starts touching the right border, we aren't reducing the highlights on anything because there is nothing there to see.

In film, black and white define the presence of no emulsion at all on the negative (black) to no removal of silver at all (white).  Adams noted that because we see more "zones" than our cameras / film can that the full range of zones should not be used when thinking about exposure.  He also proposes not to put a lot of investment in Zone I or Zone VIIII because of the limitations in rendering this wide a range.  This makes a great deal of sense in digital as well since our best sensors can only see 6.5 stops.  If we agree with Adams' premise, we make the decision not to be dependent on the full ten stop range of zones, leaving out pure black and pure white and avoiding expectations of content in Zone I and Zone VIIII, then we are really only depending on a six stop range and we have a very solid opportunity to maximize our tonal range.

When we do this, now we have the choice to push or pull our histogram without starting on one of the sides, meaning that there is content that we can make darker or lighter for some level before it drops out or blows out.

Why does this matter?  When we see an image, prior to capturing it, we make decisions as  to where the midpoint in the range should be, because some times what we want at the midpoint is not what is actually 18% grey.  If we maximize the mapping of exposure zones in our image collection, we leave ourselves more latitude in the digital darkroom, which is very much like how Adams and the masters of film used the Zone System to give themselves more latitude in the chemical darkroom.

In the end our point and fire metering gives us pretty good images the majority of the time, but what if we could actually do more at the time of capture to improve our post processing experiences?  Think about it, because we can.

The Photo Video Guy Podcast - Episode 47

CES not a big deal.  D5200 ava, Nikon radio wireless.  Broken Night shot on D800.  New Canon cine lenses.  Sigma delivers.  Fuji updates. Pentax enthusiast. XQD.  Printing and 2013 predictions

20 for 2013 Photography Predictions

I like to let the other guys get their predictions out of the way first, so by the time you get to mine you're either a) completely cynical or b) looking for some honest non-vendor serving opinion. Whatever works for you :)

In no particular order...

  1. Instagram will continue to be very popular despite its complete flaunting of privacy and intellectual property because a) lots of people only take pictures to share and get compliments and b) lots of people like to take okay pictures and make them look old and crappy and call it art.
  2. The Point and Shoot camera market is dead.  The manufacturers know this and are hoping that you don't.  Mobile devices are now well beyond "good enough" for snapshots and the point and shoots have such tiny sensors that they can never achieve the image quality that a DSLM or DSLR can deliver.  P&S will continue to sell in vertical markets such as for those who don't have / want a smart mobile device, those who want a pocket camera solely for snapshots to share electronically or as 4x6 prints, for element protection, and for serious photographers looking to capture ideas for serious photographs.  But overall volume will plummet.
  3. Crossover cameras will continue to drag.  Nikon's Android experiment failed to launch.  The coming not really Polaroid, Polaroid won't be a huge success.  Android is a very powerful OS, perhaps overkill for a camera, and creates a lot of security risks because it is so hackable.
  4. DSLM cameras will be successful when they focus faster and more accurately particularly in low light.  Manufacturers will be working on improving power efficiency because right now, none of these devices are particularly battery friendly, certainly insufficient for a busy photo day.
  5. There will be more super high megapixel cameras this year.  Not because photographers actually NEED more megapixels but because manufacturers liked the success that they had in the last megapixel race.
  6. Printing will continue to be a small part of the photographic experience as tablet and web delivered portfolios replace prints more frequently.  The contrast to this will be those who pursue photography for personal joy who discover how wonderful a physical print is.
  7. Despite drops in wireless costs, and the increasing availability of very low cost WiFi interfaces, manufacturers will not drop the astronomical prices of their WiFi adapters for their high end cameras, preferring to rip off those customers who must have WiFi connectivity.
  8. WiFi will become a de-facto standard on all cameras, much like video.  And, much like video, while many will ask for it, complexity and inconsistency will make adoption very low.
  9. We will see an influx of next generation prime lenses to take advantage of the high quality, high megapixel density sensors appearing in mid to high end cameras.  Many of the primes in the market have been around for over ten years and won't deliver on the capabilities of the sensors.
  10. Medium and large format digital sensors will continue to act as a synonym for Highway Robbery.
  11. While most all cameras will have video, adoption of video will continue to be slow, albeit not as slow as in the past few years as accessory vendors stop dropping acid before setting ludicrous prices on milled aluminum gewgaws.
  12. As cool lighting continues to evolve, expect more powerful CFL bulbs to fit the existing enclosures to push more light and reduce issues with slow shutter speeds.
  13. Google+ will continue its march to become the de-facto social media outlet for photographers.  Despite changes at Yahoo, Flickr will not gain it's prior position and serious photographers will be jumping off Facebook and its properties through the year.  Twitter is already over.
  14. Manufacturers other than Sony will embrace the concept of "in app purchase" to add services at a surcharge to their camera.  Sony already have a slew of features for the NEX-6 that are not included with the camera but can be purchased as electronic downloads.  It's a practice that works and it is direct incremental revenue that completely bypasses the reseller channel.
  15. Individual photography stores will become more dependent on manufacturer funded rebate programs in lieu of internal "specials" as margins on gear erode and the last margins from photofinishing dry up.
  16. Photofinishing (the developing and printing of traditional film) will continue to disappear with the service becoming hard to find anywhere by the end of the year.  Even micro labs cost a lot money to run so prices will increase and turnaround times will also increase.
  17. Manufacturers will go with smaller production runs of models, shortening product lifecycles so they can get new gear out sooner, without having a glut of outdated gear on shelves.  An example of this problem held up the North American release of the Nikon D5200.  Expect lifecycle maximums of 24 months for DSLRs, sub 12 months for Point and Shoots.
  18. Memory card manufacturers will continue to release higher performance read/write capabilities on their cards, resulting in customer issues when their older cameras cannot use the newer cards.  This has already happened with Lexar's 800x and 1000x cards.
  19. Shorter lifecycles in products and rush to market will create an increase in electronic related failures in new products, particularly in the lower end making extended warranties on bodies a bit more viable, but falling prices will discourage buyers who come to see the devices as "disposable"
  20. Demographic differences will continue to fracture the feature delivery resulting in devices that only appeal to a certain demographic, creating model glut and customer confusion over too many models that are "almost" identical.

Ok that's it for now.  Speak soon.

Ross

The Photo Video Guy Podcast - Episode 46

Amazing rebates are now over.  Petapixel story on a black bear being the photographer.  Nikon DSLR rumours.  Nikon J1 #1 DSLM in Japan.  Canon officially ends the 5D Mk II.  Canon confirms 200-400/4LIS 1.4x this year.  Intro to web review of Olympus OM-D E-M5

REVIEW : Olympus OM-D E-M5

OM-D-32Bit-HDR-Ornament.jpg

A number of photographers have been asking me to take a closer look at the latest Olympus M4/3 camera, the OM-D E-M5 so with the support of Nathan Reeder at my local Henry's Camera store, here goes. What Is It?

Olympus along with Lumix really started the entire mirrorless marketplace a few years ago and while many vendors have entered the space and done well (Sony, Fuji) and others have entered the space with underwhelming offerings (Canon, Nikon) the bellwether vendors remain the originators.  The PEN series from Olympus look pretty much like everyone else's entry but the OM-D E-M5 (hereafter referred to as the OM-D) is a very different cat.

It really defines the whole idea of Digital Single Lens Mirrorless.  It looks like a DSLR even including the pentaprism housing (sans pentaprism) but is a mirrorless using the now standard micro 4/3s sensor.  When you first look at the OM-D and first pick it up, it's like a DSLR that is malnourished or forgot to eat its Wheaties for those readers old enough to remember those ads.

So M4/3 sensor, interchangeable lens, electronic viewfinder, touch screen OLED, battery grip, good lens assortment, HD video, TTL flash, full Auto to full Manual in a very small package.

Basic specs are as follows, detailed specs at the bottom of the post.

  • M4/3 16MP Sesnor
  • 5 Axis image Stabilization
  • Full HD Video 1080/60i
  • 4:3, 3:2,16:9 Aspect Ratios
  • EVF with previews for exposure compensation, white balance adjustment
  • 3.0 inch 610K dot articulating OLED display with touch capability
  • 1/4000-60s plus B Shutter speed range
  • 200-25600 ISO Range
  • Metering range from EV0 to EV20
  • Single Shot, Continuous, Manual, Manual +AF focusing
  • TTL Flash including GN 7 flash in kit
  • Exposure compensation and up to 7 shot bracketing

So at a glance, it looks like a decent mid level DSLR from a feature / function perspective.  And that's really what it is but more on that later.

Unboxing and First Impressions

Olympus still hasn't figured out the Apple boxing principle, but the kit that includes the 12-50mm power zoom is easy to unpack and thoughtfully laid out.  The battery came with about 60% charge in it and is good sized Lithium Ion cell.  Olympus doesn't provide an average shot count, but in my own tests it takes about four hours to charge and while I surely didn't drive the shutter count up super high, mathematically it looks to me like the battery might last to 300 shots.  Others are experiencing a bit less.  So a potential downside will be the need for more batteries if you will use the camera heavily.  Upside is that the battery charges in an external charger, so you can use the camera with a second battery while the first one is recharging.  I wish Sony would learn that lesson.

The camera is light, under 1lb with a memory card and a battery in it.  The upper left deck has the mode selector dial with PASM, plus SCN, Movie, ART and iAUTO settings.  Top deck right has two unmarked wheels, the rear one adjusts the aperture or shutter speed depending on mode and the front one provides for exposure compensation.  You can program the dials as you like, but the defaults are pretty usable.  Far right is the programmable Fn2 button and the separate video start/stop button.  The shutter release sits atop the front adjustment dial.  Middle top deck has the hot shoe and a removeable section cover to allow mounting the including tiny flash or Olympus shoe mount accessories that also need access to the camera electronics.  Layout is simple and easy to follow.

Looking at the rear, the OLED is big and bright,  Although the fonts are very small, it's still very legible. Left of the eyepiece is the diopter adjustment and to the right is a push button that controls Live View.  Further to the right are the Playback button and the programmable Fn1 button.  Immediately below them is the needed thumb rest but it does make hitting the buttons a dexterity test as they are tiny and recessed.  Below the thumb rest are the usual suspects of Menu and Info buttons then a multi-axis controller with selector in the centre and below that a trash button and the on-off switch.  The switch is flush to the back and recessed so you won't be turning the camera on and off by accident.  As noted the screen is articulating for overhead or low shots, but it does not swing away from the camera to face front as found on some DSLRs.

The left side of the camera has a USB port and micro-HDMI connector hidden under a rubber cover.  You have to move the rear display to be able to free the rubber cover.  There are three tiny holes for the built-in speaker in front of the cover.

The right side has the door for the SD card slot.  A push rearward releases a very positive catch.

Looking at the bottom we find the metal tripod screw socket threaded for 1/4-20, a removable rubber plate for when you are connecting the accessory battery grip and the hinged door to the battery compartment.

From the front, there's a decent grip built into the right side, and the lens release button occupies the left side.  There's a tiny self-timer lamp / focus assist lamp on the top front panel.  Otherwise the front face is very clean and clutter free.

Of course the camera has strap lugs on either side and the first thing I noticed holding the camera is that the right side lug is in a position where it's ALWAYS poking me in the hand.  This placement makes the camera unpleasant to hold and if it were mine, that three sided strap holder would be gone and I'd be using a Black Rapid strap right away.  It's too bad because the strap lug placement really farks up the whole feel for me.

The Kit Glass

The kit lens in the unit I looked at is the new Olympus 12-50/3.5-6.3 Digital Zuiko.  It takes a standard 52mm filter, something the Fuji gits could learn to emulated.  The lens is plainly not optically fast, but is small and lightweight and provides a full frame equivalency to 24-100, a very nice working range.  Particularly attractive about the lens is that it has three modes of operation.  Keep the zoom ring to the rear and it's a smooth manual zoom. Push it forward and the zoom ring no longer rotates but engages a smoothly operating power zoom function.  It's a bit easy to knock it from mode to mode, but I think that's an acclimatization thing.  The macro mode is quite brilliant.  Press in the Macro button and move the zoom ring forward and the lens locks into macro mode and I must say it works pretty darn well.  There's also a window that advises you which mode the lens is in.  The only downside to me is the slow lens speed.  If I were buying, I'd likely opt for the 17/1.8 and the 45/1.8 in addition so I had some nice high speed glass.  I did borrow the 45mm and will discuss it further on.

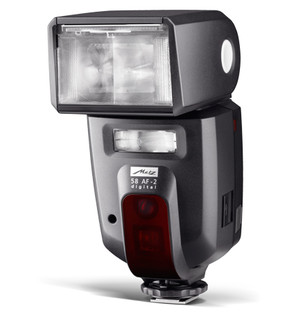
The FL-LM2 flash that's included is not built-in, you remove an access cover and slide it on.  Like the popup flash on your DSLR, use it only under protest.  With an ISO100 Guide Number of 7, you won't be bouncing this light anywhere.  The best thing that can be said for it is that it comes in the box.  If you want proper flash, you'll be buying one.  Just like with any other decent DSLM.

Now that we've had a quick look at the unit, let's move on to its usability, starting with the menu system

The Menus

Olympus deserves credit for not making the menu system so convoluted you want to stick a fork in your eye.  The pages are mostly a single screen long and it's fairly intuitive with the more common functions nearer the top.  It took me a long time to find the Format card function because unlike most other cameras, it's at the top of the list not buried in some deep layer.  Gold star for that.  All the menu items have integrated help panels which are very useful as you are getting comfortable with the camera.  I expect you can turn this off at some point but did not look to find out if this is possible.  I was able to use the menus without referring to the docs.  Speaking of docs, the printed doc is a VERY short quick start guide, the real documentation is provided on the CD.  I would have looked at it, but my MacBook doesn't have a CD drive.  Fortunately the manual is also available for electronic download and is searchable as it is a PDF.  The version I looked at was in English and I found it easy to read and search.  Loading it into iBooks on the iPad and iPhone keeps it handy, although a bit hard to read on the small screen.

Shooting the Camera

When in shooting mode, the OLED display has three basic configurations.  Off, meaning black, meaning battery efficient, Full Info meaning ALL the information, much of it not specifically relevant to a given shot and intermediate giving you exposure info along with an  innovative level system.  Pressing Live View, does what you expect, with the similarly expected battery suckage.  The EVF is bright and easy to use and I like the layout very much.  I'm really enthused by the live presentation of how the exposure will look at different compensation settings or in manual mode.  This one function alone is killer in my book and it's so simple that you'll want it on all your cameras.

The shutter release is smooth to the half press where the autofocus kicks in.  Hold the button for auto-focus lock, and there's Fn1 whose default programming is Auto Exposure Lock.  Press it again to release the lock.  Pressing all the way through the shutter button captures the image.  Initially I found the shutter button throw to be very long, but after shooting the camera for a while, I got used to it.

in my first test shots, which were literally snapped at random, I was quite pleased with the automatic white balance correction, specifically how nice a job it did making the whites white.  I had a large Elinchrom softbox off to one side of the frame and with a proper exposure, it was white, not grey, blue or orange, despite horrible mixed lighting.  In my initial shots I left the ISO in Auto mode and set the upper threshold to 3200.  The ISO traversal is transparent but you always know where you are because of the information in the display.

i know that users don't read manuals.  I have spent over three decades in the computer industry and work part time in a photography store and this fact is reinforced for me every day.  So I tried to use the camera at first without reading the manual.  It worked fine but until I figured out how the touch display does and doesn't work changing the ISO was a pain in the butt.  Put the camera Info selection into full mode and tap the area of interest on the rear monitor.  It turns green.  Press the OK button at the centre of the multi-axis controller to drill down.  Now use the MA controller to move around and click OK to lock a setting.  If I'm supposed to be able to drill down with the touchscreen, I could not get that to work for me at all.

Frankly I gave up on the whole touchscreen idea pretty quickly.  I find the all info screen cluttered and having it turn off and on as I move my eye to and from the eyepiece got old really quick.  Instead I set the display to the basic exposure mode where a quick tap of the OK button in the MA controller brings up the full info screen and you can navigate around and drill down without hassle.  I'm still not convinced that touchscreens have a place on a camera rear display.

Practical Use

It was a beautiful morning so after the home chores, I took the camera and lenses out into the -10 celsius bright winter day.  I have large hands and shooting the camera wearing gloves was a non-starter for me, so I had to work with my right hand uncovered.  The first thing I noticed is that walking around with the camera is easy because it's so light.  I didn't connect the neck strap because the unit was borrowed for testing only, and just carried it in my left hand.  I would not care to walk around for ninety minutes holding my 1Dx or Hasselblad in my hand but the OM-D was hardly noticeable.  Serious points for light weight!

The camera focuses very fast and very accurately.  I was glad of the diopter adjustment and I was able to get to very usable images very quickly.  I shot in both aperture preferred and manual mode.  I did try to use the power zoom but for stills I found the manual setting preferable for me.  The macro configuration is super easy to use and makes the lens much more versatile.

Because the light was full sun with heavy shadows and not soft in any way, I made shots using exposure compensation most of the time.  White balance was excellent even in the highly reflective snow conditions.  I found that the usual guidelines for compensation in snow worked well with this sensor.

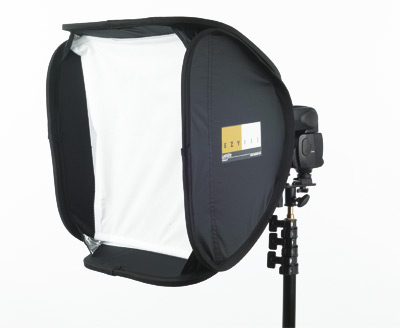
While I am not a big fan of the over the top implementations of HDR, there is a Lightroom / Photoshop trick that creates a 32 bit TIFF with incredible dynamic range.  Basically you select your images, choose Merge to HDR Pro in Photoshop and when the ACR window displays the image, select 32 bit, remove ghosts and then File Save.  You don't do an HDR tuning in Photoshop, and when you go back to Lightroom you have a TIFF file with up to 11 stops of dynamic range.  To make these images simply, I used the excellent bracketing capability in the OM-D.  The camera can automatically do a 3, 5 or 7 stop bracket with separations at 1, 0.7 and 0.3 stop intervals.  (Note that the 1 stop intervals are limited to 5 stop brackets).  Putting the camera into high speed burst, capturing 7 stop brackets is a breeze and handheld brackets are no problem at all in daylight.  In fact, I think that if I owned the camera and was shooting landscapes with it, this configuration could become my default practice, it's that simple and that effective.

Processing

Once I got home, I put the card in a reader and copied the Olympus RAW files to their own  dated subdirectory on a drive.  Once they were copied, I ejected the card and then opened Lightroom and imported the files to my library using my customary Copy as DNG mode.  Olympus' RAW has some minor level of compression but there was no discernable loss of image quality.  There is a converter in Lightroom so the files were read without issue.  Each file is around 15mb in size at full RAW in 4:3 aspect ratio.  I was a bit disappointed that there are no Olympus lens profiles in Lightroom.

Processing the images is the same as any other digital file.  I was very pleased with the results whether working on a single image or on a round-tripped 32 bit HDR.  The level of image quality produced by the OM-D is excellent and there is lots of good data to work with when editing the images.  I did not test JPEGs out of the camera.  I subscribe to the Sammonism that "Raw Rules" and in my work I don't use JPEGs, so they weren't part of my tests.  Neither were any of the Art modes built into the camera.  So I have no idea of whether they're any good or not.  The RAW images are excellent.  I have found that the EVF is a bit warm but I also discovered adjustments can be made for the display.

Despite being outside in the cold for over 90 minutes and shooting about 130 images, the battery indicator still showed a full charge.  After I'd been inside for a couple of hours, I fired it up to do some flash tests and the battery showed two-thirds and since then has fallen off slowly.  There is a battery guide calibration capability but I have not done it.

I also made time to shoot the 45mm f/1.8 prime lens.  With a 35mm full frame equivalence of 90mm, it's ideal for portraiture and of course short telephoto.  The lens is physically very small, about the same size as a Leica M series 35mm.  Filter size on the lens is 37mm.  While the 12-50 really needs a hood to manage flare, the 45mm was not so prone to flareout.  I did not get a chance to try the 17mm f/1.8 lens this time but other tests show it to be really nice and I would definitely have it in my kit.

Who's This Camera For?

All other notes aside, all cameras have a logical user fit, with some better suited to beginners than to pros.  The OM-D is not a beginner's camera.  That's not to say you cannot get great images out of the camera without knowing much about photography, but it's serious overkill for the person who really only wants an interchangeable lens point and shoot.  Get an NEX-F3 for that purpose, you'll be happier.  In my opinion, the OM-D is for the advanced amateur or professional.  It's not about being that good, but about being that capable.  Indeed, most recently, I have seen noted professional photographer Scott Bourne sell all his pro Canon gear and move entirely to the OM-D family.  I won't be doing the same but after shooting the camera for a few days, I have become more and more impressed with the usability and image quality.

There are still minor annoyances, as I still have not figured out where to set the post capture rear display duration, and that right side strap lug is infuriating me.  I suspect that if I bought the unit, I'd order the battery grip just to give me more to hang on to.  I'd also pass on the 12-50 lens.  Despite a nice range, it's slow and the macro feature while cool is not enough to warrant the purchase.  Since I don't shoot a lot of video, the power zoom is of no value to me.

I did not test the 4/3 adapter to use other Olympus AF lenses.  However, my friend Khalil has, and his kindest adjective was "slow".

My Kit If I Were To Buy One

  • OM-D E-M5 Body
  • HLD-6 Battery Grip
  • FL-600R Flash
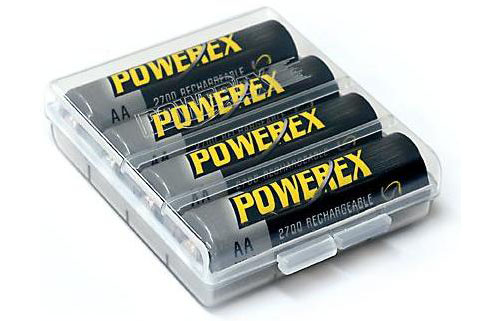
  • BLN-1 Spare Battery (2)
  • ED 14-150/4.0-5.6 Zoom and Hood (28-300mm equivalent)
  • 17/1.8 and Hood (35mm equivalent)
  • 45/1.8 and Hood (90mm equivalent)
  • ED 60/2.8 Macro and Hood (120mm equivalent)

Sample Images


Detailed Specifications

Full credit for these specs goes to the very excellent http://www.omd-em5.com/

TYPE Type Micro Four Thirds interchangeable lens system camera
a Media SD Memory Card (SDHC, SDXC, UHS-I compatible, Eye-Fi Card compatible)
Lens Mount Micro Four Thirds mount
IMAGE SENSOR Type 4/3 Live MOS Sensor
Image Sensor Size 17.3mm x 13.0mm (in 4:3 aspect ratio)
Total Pixels 16.9 Megapixels
Camera Effective Pixels 16.1 Megapixels
Processor TruePic VI
Color Filter Primary color filter (RGB)
Dust Reduction System Supersonic Wave Filter (dust reduction system for image sensor)
RECORDING SYSTEM Aspect Ratio 4:3(Default) / 3:2 / 16:9 / 1:1 / 3:4
Still Image Size Max resolution : 4608 x 3456 Other : 4608 x 3072, 4608 x 2592, 3456 x 3456, 2592 x 3456, 3200 x 2400, 3200 x 1800, 3216 x 2144, 2400 x 2400, 1824 x 2432, 2560 x 1920, 2560 x 1440, 2544 x 1696, 1920 x 1920, 1440 x 1920, 1920 x 1440, 1920 x 1080, 1920 x 1280, 1440 x 1440, 1104 x 1472, 1600 x 1200, 1536 x 864, 1584 x 1056, 1216 x 1216, 864 x 1152, 1280 x 960, 1280 x 720, 1296 x 864, 960 x 960, 720 x 960, 1024 x 768, 1024 x 576, 1008 x 672, 768 x 768, 576 x 768, 640 x 480, 640 x 360, 624 x 416, 480 x 480, 384 x 512
Motion Image [MOV] Full HD : 1920 x 1080, 59.94i Recording HD : 1280 x 720, 59.94i Recording [AVI Motion JPEG] HD : 1280 x 720, 30fps VGA : 640 x 480, 30fps
IS System Type Built-in (5-axis Image Stabilization)
Modes 3 modes (IS1, IS2, IS3), OFF
Electronic Viewfinder Eye Level Finder Type approx. 1.44M
Eye point / Diopter adjustment range Approx. 100% / Approx. 0.92×1 – 1.15×2 (-1m-1, 50mm lens, Infinity)
Live view 100% field of view, Exposure compensation preview, WB adjustment preview, Gradation auto preview, Face detection preview
Monitor Specs 3.0-inch tilting OLED monitor, Approx. 610k dots, Touch control
Tilting angle Upward tilting angle : up to 80 degrees Downward tilting angle : up to 50 degrees
FOCUS Type Contrast Detect
Focus Mode Single AF (S-AF) / Continuous AF (C-AF) / Manual Focus (MF) / S-AF + MF / AF tracking (C-AF + TR)
AF Mode Face detection / Eye detection / AF Tracking / 35-area multiple AFAll target, Group target area (9-area), Single target
AF Detective Range EV 0 – 20 (at normal temperature, 17mm f2.8, ISO 100)
AF illuminator YES
Metering System TTL Image sensor metering Digital ESP metering (324-area multi pattern metering), Center weighted average metering, Spot metering, Spot metering with highlight control, Spot metering with shadow control
Metering range EV 0 – 20 (at normal temperature, 17mm f2.8, ISO 100)
Exposure modes i Auto, P: Program AE, A: Aperture priority AE, S: Shutter priority AE, M: Manual, Bulb, Time, Scene select AE, Art Filter, Underwater wide / macro
ISO Sensitivity AUTO: ISO 200 – 25600 (customizable, Default 200-1600) / Manual ISO 200 – 25600, 1/3 or 1 EV steps selectable
Exposure compensation 3 EV in 1/3, 1/2, 1 EV steps selectable
AE Lock Locked at 1st release of shutter button (can be set to Fn1/Rec button)
Shutter System Type Computerized focal-plane shutter
Shutter speed 1/4000 – 60 sec. (1/3, 1/2, or 1EV steps selectable.) Bulb: default setting 8min.
Self Timer Operation time: 12 sec., 2 sec.
Bracketing Exposure bracketing 2, 3 or 5 frames in 0.3/0.7/1.0EV steps selectable, 7 frames in 0.3/0.7EV steps selectable
White balance bracketing 3 frames in 2, 4, 6 steps selectable in each A-B/G-M axis.
Flash bracketing 3 frames in 0.3/0.7/1.0EV step selectable
Flash System Flash intensity control method TTL Auto, Auto*, Manual, FP-TTL AUTO*, FP-MANUAL* (* Available on the external flash)
Built-in flash No
Bundled flash (FL-LM2) TTL flash, GN=10 (ISO200) / GN=7(ISO100)
Compatible external flash FL-50/FL-50R, FL-36/FL-36R, FL-20, FL-14, FL-300R, FL-600R
Art Filter Mode Pop Art, Soft Focus, Pale & Light Color, Light Tone, Grainy Film, Pin Hole, Diorama, Cross Proscess, Gentle Sepia, Dramatic Tone, Key Line
Art Effect Soft Focus Effect, Pin-Hole Effect, White Edge Effect, Frame Effect, Star Light Effect
Level Gauge Detection 2-axis
Digital Zoom Magnification x2
Playback Functions Playback mode Single-frame, Information display, Index display, Calendar, Enlargement), Movie, Picture rotation, Slideshow
Information display Histogram, Highlight/Shadow point warning, AF frame, Photographic information, OFF
Input / Output USB/AV/Remote controller connector USB: USB2.0 High Speed, Video: NTSC/PAL selectable, Optional Remote cable RM-UC1 can be used.
HDMI connector Micro HDMI (Type-D)
Flash attachment Hot shoe
Accessory Port 2 Available for VF-2/VF-3, SEMA-1, MAL-1 and PP-1
Micophone/Speaker Stereo/Mono
Power Requirements Battery BLN-1 Li-ion battery (included)
Power battery holder (Option) Power Battery Holder HLD-6
AC adaptor (Option) AC adapter AC-3
Dimensions / Weights Dimensions 4.8 x 3.5 x 1.7 inch (W x H x D)
Weight Approx. 15 ounces (with battery, Memory card) Approx. 13 ounces (body only)

The Joys of Being Frustrated - Developing as a Photographer (pun intended)

I think I may be one of the most frustrated photographers around.  Of course, it's probably not true and many of the photographers I admire and respect say the same thing,  I think it's important. There's a developmental philosophy that espouses that to grow, you should be open to frustration, what I call being "hopefully discontent" (with all thanks to Neil Peart).  I believe that this can really work when you want to grow as a photographer.

I noted in my 2013 challenge that I am frustrated.  I've been thinking on this and have identified a number of "itches" that if worked on, could make me better at my craft.  I have the luxury that photography is not my job, as it once was.  It is now a pastime, and without the monetary pressures and fiduciary responsibilities that depending on photography for one's livelihood, I have more latitude than some.  I am fortunate in this regard.

So without further ado, here's my frustration list

1.  When I go out, I capture lots of images, many of them identical.  Subtle exposure differences or minor repositionings make the editing process longer and more tedious.  Can I make fewer captures, without fear of "missing" something and spend more time working on things I like?

2.  Gear does not make one a better photographer, but proper use of gear can help a photographer make better images.  I'm fortunate that I have pretty much all the gear I need, although the want list is lengthy.  Am I getting a good return on the gear that I own?  Do I use it properly?  Am I leveraging the effectiveness of the tool?  When I was doing cabinetry I forced myself to cut dovetails by hand, because it was harder and required more attention, instead of using a more accurate and faster jig.  Should I take this approach with photography.

3.  I was working on landscapes and then got caught up in the whole HDR thing.  I've had an intervention fortunately and now am much less inclined to HDR images since it actually gets stale pretty quick for me.  As a decent generalist, can I pick one or two specialties and focus on them for a year without being distracted by the next thing?

4.  I'm not a people photographer.  Yet, that is an area I want to get better at.  I've taken the courses in portraiture and lighting, and been successful at it.  What steps can I be taking to do more people work?

5.  I capture shots that I think will be good, but upon review, end up deleting a lot because i don't care for the composition, or because I have missed some critical element.  Shooting film was very much a process, digital has become less so.  Should I force myself to go shoot film in a very workflow intensive manner to build my eye and ability to see properly?

Being frustrated should create a vehicle to become a better photographer.  I'm going to work to answer my own questions, as another photographer, why not take a shot at answering your own questions.

Peace.

A Proposal for your 2013 Photography Project - 10 Steps to Photos That Matter

Yeah, it's that time, the time for resolutions and self-promises and all manner of other stuff that generally develops a best before date of February 3rd. My proposal to you.  Build a plan to become a better photographer.

Sounds simple huh?  Really it is.  And like many ideas, it has been influenced by a number of sources and reinforced by the opinions of others that I will listen to from time to time. So here goes.

1.  Repetition is the mother of skill.  That's why you practice the same kata a thousand times in martial arts.  Even if you aren't making a photo, practice changing the key settings on your camera without taking the camera from your eye.  You'll be surprised what a huge difference this will make for you.  Repeat daily.  Test yourself.  Change the ISO without taking your eye from the viewfinder.  If you cannot do it, then you had best do some practicing.

2.  Shoot everything.  We're in this for fun and joy, not necessarily to earn revenue.   If you are really attracted to an idea shoot it a lot.  If you aren't, give it a try to find out if you might like it.  I'm not a fan of watching sports.  When I was first offered the opportunity to photograph Polo, I wondered why the heck anyone would want to photograph this, let alone watch it.  Turns out, I love shooting Polo.  Many of the people I can live without, but the athletes and riders impress me.

3.  Becoming a good photographer requires generalization, you should be able to competently shoot a variety of topics and styles.  Experiment!  The cost is pretty darn low.  Try new things, but expect that one shoot does not an expert make.

4.  Becoming great will require specialization.  Figure out what kinds of photography you really enjoy and invest time in that.  It doesn't matter what it is, but it's very hard to really push the envelope of learning if you are trying to do everything well.  It's easier than you think.  Ask yourself questions about the kinds of things you like and you don't like.  I can shoot weddings.  I don't.  I don't enjoy the process so I don't spend time becoming a great wedding photographer.  I love wildlife.  I buy books, learn biology, look at great wildlife photographers and try to copy what they do, and shoot lots.  Sometimes I even get images I want to keep.

5.  Don't fall into the "daily dose" claptrap.  This is the time of year where people sign up for 365 projects.  Don't do it.  While you may be able to make a decent photograph each and every day, odds are against you so why end up with hundreds of barely passable images.  Make images that matter, not images that fulfill a quota.  Think, plan and shoot.  365s are the equivalent of Fire, Ready, Aim

6.  Look at the great works of photographers in your areas of specialization.  If you are committed to street, look at Cartier-Bresson, if sports, look at Dave Black, if portraiture, look at Yousef Karsh.  Don't know where to look for inspiration?  Go to 500px.com and search your topic of interest.  Be prepared to be amazed and perhaps even a bit discouraged.  Seeing great work is challenging and we get to rise to the challenge.

7.  Seek critiques from photographers you trust.  Non-photographers don't see like photographers and won't be able to help you.  Flickr is not the place to seek help, because all you get is "great photo" suckups.  You can post an out of focus picture of a toilet bowl on Flickr and someone will tell you its great art.  I would not recommend sending images in to Scott Kelby's web show The Grid either unless you want your self-esteem eviscerated.  Mr. Kelby is an incredible instructor and I think he's a very talented and funny guy, but I don't care for his critique style.  The hosts take too much pleasure in being nasty when they don't see something that they like.   However, I'd pay Joe McNally for a critique because his approach is so developmental.  I'd also shy away from the pay by the hour booth style crap such as I've seen at the Imaging show.  I saw and heard a lot of really horrible guidance from alleged professionals there.  A good critique is about you, not about the person offering the critique.  Massive egos make lousy coaches.

8.  Learn to edit viciously.  Just because you went out for four hours to make images doesn't mean you will come back with greatness.  I have spent hundreds of hours shooting, and upon review on the computer, determined that I might be better off taking up wallpapering.  I am constantly frustrated by my own work.  The X key in Lightroom is your friend.  Don't lie to yourself about whether the image is good or not.  If you feel it's not, it's not.

9.  Take classes, workshops, One on Ones, video trainings, shoot days, field trips.  Get books by the photographers you admire, if not to learn their technique, to have something to emulate.  Focus on the things you want to learn.  Basics are fine, but they aren't enough. Be able to articulate what you want to learn and go learn those things.  Don't do a basic field trip if you want to get better at macro photography of wildflowers, unless that's the curriculum.  If you focus on portraits, make it complete and learn portrait retouching.  If you focus on landscapes, learn about the zone system and how to expose in camera and post-process effectively.  If you want to really learn about HDR, take a class, get a book and here's your first tip.  Clouds are NOT black.  If you want to work with studio flash, learn to use a light meter.

10.  Create constriction.  Go out with only one lens, or only one focal length on the zoom.  Pretend your memory card can only hold 12 images and make each one count.  Shoot only from a tripod.  Shoot only from one knee.  Shoot only in portrait mode.  Shoot only at ISO100.  Require motion blur in every image.  Not only think outside the box, smash the box to bits.

So that's it.  Your mission, should you choose to accept it.

Happy New Year!

Ross

The Photo Video Guy Podcast - Episode 45

Nikon says it's ok to breathe.  New 1 series coming at CES.  A patent for a digital back for SLRs.   More Canon rumours for 2013.  Pocket Wizard update.  Leica drops M9-P black and adds coffee mugs.  Instagram change of service isn't.  First look at the Sigma 35/1.4 Art

Tethering your Nikon to your computer

Canon owners are probably aware of the EOS Utility that simply allows tethering of your Canon DSLR to your computer whether running Windows or OS X.  It comes in the box with the camera,  Nikon users have to look further afield and a couple of club members were asking me for a tethered solution for their Nikons if they don't already own Lightroom or Aperture. If you use a Macintosh, the tethering app you want is called Sofortbild.  It's done by a fellow from Germany and he does a great job of keeping it up to date.  You can get it on the Mac App Store or download it directly from here.  It's a simple app that does what it promises giving you simple and efficient tethering from your Nikon to your Mac using a simple USB cable.

If you use Windows, check out Camera Control from www.diyphotobits.com  They have a compatibility listing posted on their site.

Both tools are free.  Be aware that there are a slew of chargeable apps for tethering but I wanted to focus on tools that work and don't hit your wallet.


The Photo Video Guy Podcast - Episode 44

Adobe updates software and screws regular license owners. Apple and Google tag team to acquire Kodak patents. Nauticam makes a housing for the D600. Pre Christmas rebates on the D800 and D600. Canon news and rumours. Sony 4K video price drop. Microsoft RAW catchup and Fuji delays.

Ross' Guide to Simple Flash Portraits

Over the years that I’ve been a photographer and a teacher, I’ve been continually annoyed by the tendency of some people to try to turn simple flash photography into some kind of black art. In the days of film, flash was more difficult requiring sophisticated metering and preparation, polariods and lots of correction.

Those days are past.  Our digital single lens reflex and digital single lens mirrorless cameras make great flash images pretty simple.   And, while I believe that every serious photographer needs to have and use a handheld light meter, what I will teach you here DOES NOT require you to have a sophisticated light meter.

For starters...

You’ll need a camera that can be set to manual exposure mode.  You’ll need a lens suitable for your subject.  Since most photographers would like to make better images of people, that’s the route this article will be oriented to.  You’ll also need a shoe mount flash that has a manual mode, and the ability to control its power output in manual.  At the core, that’s it but since you want better flash control, there’s a gear list coming up.  Before we get there, let’s talk about flashes. Oh and don't worry, I have a gear listing at the end for you.

Your camera probably has some variant of through the lens flash exposure control.  This is a wonderful feature and can be really helpful, and we won’t be using it in this session.  TTL flash is not the end, it’s a starting point on it’s best day because it can be fooled like any reflected light meter.  So for simplicity sake, we aren’t going to use it.

Your camera might also have some type of sophisticated remote flash control magic built in.  Nikon calls this the Creative Lighting System, Canon has one as do other vendors as well.  They can be awesome.  They can also be a major pain in the butt because they are line of sight, are dependent on infrared control and often fail when it’s most inconvenient.  So we won’t be using that either.

Your camera may or may not have a PC sync port.  Your flash, if you already own one, may or may not have a PC sync port.  Whether they do or don’t won’t matter because cables are a pain and we won’t be using them.

Before we get to the rest of the kit...

You need to know how to make some settings on your camera, so before we go further, let’s make sure you can make these settings.  First, put your camera in Manual mode.  This is often a dial or menu setting highlighted by a big capital M.  M means Manual.  This is a very good thing.  Next, you want to set your shutter speed to 1/125 of a second.  You do this be setting your shutter speed with dial, wheel, menu or however your camera does this.  Remember we are in manual mode so this is a simple manual setting.  Next set the aperture on the lens you are using to f/5.6 via whatever method your camera uses.  Last of all, set your ISO to your camera’s native ISO, which is the lowest ISO that you can set manually without having to go into a Low mode.  For most Nikons, this is ISO 200, for most Canons it is ISO 100.  If you don’t know or cannot tell or your camera doesn’t matter, pick ISO 200.  Set that via whatever means your camera uses.  Ok, that’s it.  Settings are basically done.  Time to move on to the rest of the kit.

The Flash

Not Barry Allen in this case, we mean the flash you will use on your camera.  Your camera might have a built in pop up flash.  Fortunately you won’t be using it, since its only real claim to fame is that it makes your photos look like crap.  I mean the flash that slides into the hot shoe of your camera.  If your camera does not have a hot shoe, best to stop reading now since you have a much bigger issue facing you.  If you already have a flash, make sure it can be set to work in manual mode and that you can control the output power of the flash.  By this I mean that you can set the output to full, 1/2th, 1/4th, 1/8th power etc.  Ideally it would go as low as 1/64th power but that’s not critical.  1/16th power is the least you should accept.  The head on your flash should bounce and swivel, but if it doesn’t, you’ll still be able to use the flash.

Metz 58 AF-2Flash is a lot like a race car.  In a race car, horsepower matters.  In a flash maximum output matters.  Fortunately there is a standard by which you can compare different flashes.  This is called Guide Number.  You probably don’t care how it’s calculated, you just want to know the Guide Number (GN) in either meters or feet for the flash.  I promise that there will be NO math.  Just remember that a higher guide number is ALWAYS better.  If you do not have a flash, go buy yourself a Metz 58 AF-2 for your camera type.  This flash is available to fit all major brands of camera, will integrate with the TTL flash capability of your camera for when you want to use TTL, has full manual power control capability and has LOTS of power.  Not surprisingly, it’s guide number is 58 in meters.  Canon’s 580EX II has a guide number of 58 in meters.  Nikon’s SB-910 has a guide number of 34 in meters.  The SB-910 has less power but still works well but I will suggest not going lower in output than a guide number of about 28 in meters such as found in Nikon’s SB-700.  Metz also has a model 50, a model 52 and a model 44 all with guide numbers matching their model designation.  Remember what I said first.  Power matters.  Buy the most powerful hot shoe mount flash you can afford.  There are now some clone flashes coming out of China that are very inexpensive like the Yong Nuo.  I’ve heard good things but since I’ve personally never used one, I won’t offer a recommendation.

powerex_batteriesNow go get yourself some rechargeable batteries with the highest milliampere hour rating possible.  You will readily find a variety of power ratings.  2100mAh is the minimum to buy.  I personally recommend the Powerex batteries from Japan that are rated at 2700mAh.  They are available in retail stores and online.

The Rest of the Kit

Bounce flashes can be bounced off of ceilings, or use bounce cards or reflector cards and any manner of Rube Goldbergian strap-on, tape-up, sticky mechanisms to diffuse the very small flash source into a larger source of light.  You can also put a diffuser dome on your flash head.  Whatever.  For this exercise we are going to bypass all this stuff and go right to a Soft Box.

What is a soft box?  A soft box is a relatively simple construct.  It is a device built to form a consistent shape, square, rectangle, octagon, that usually has a dark fabric exterior and that is lined with either a silver foil or highly reflective white surface.  Then a shoot through scrim velcros to the front edges to further diffuse the light.  Diffusers do not soften light, they spread it around.  Larger sources are softer than smaller sources at a given distance in general.  When the flash goes off, the light bounces around inside the softbox and comes out as a much larger area of light.  Moving the source closer to the subject makes the light wrap more, and therefore looks “softer”.  That’s it.  The trade off with soft boxes is really size and portability.  A giant box placed close is super soft but needs more power to light and is a transport pain.  A small softbox is easy to transport but may not be that soft.  Here’s a general guideline.  Anything smaller than 20” x 20” is not optimal for people, and anything bigger than 30” x 30” will need multiple heads or studio flash to get good light.

The softbox needs a way to be placed so you don’t have to have an assistant to hold it, it needs a way to attach the flash and it needs a way to be tilted.  So a softbox kit would include a light stand, a tilter bracket, a flash mount bracket that won’t short out the TTL pins on your flash’s foot and a bracket to hold the softbox in addition to the box itself.

EzyBoxHotshoe1I’ve looked at dozens of softbox kits and bought more than I should on the strategy of hope.  You don’t have to repeat my mistakes.  What you want to buy is the Lastolite Ezybox Hot Shoe Kit.  It includes a 21” x 21” softbox that folds flat, a mounting bracket, a flash bracket, a tilt adapter and a light stand, along with carry bags for the softbox and the rest of the kit.  It’s your money, you can buy whatever you want, but if you buy this product, it’s going to work, you won’t be frustrated and you will get better images

There are knock-offs of this kit also available that may save you some money.  I recommend the Lastolite, but you’re your own person.  One critical thing to note is that you will be altering the power of the flash often, so DO NOT buy a softbox kit that puts the flash inside the box, such as any of the Westcott Apollo umbrella type softboxes.  Once the flash is inside the box, your camera’s infrared control won’t work and making adjustments to the flash will make you nuts.  Plus the construction is not great and the umbrella framework bends if you stare at it directly.  Westcott products are generally very good.  I’ve just had bad experiences with this line.  They’re cheap though.  Get the Lastolite.

Other Kit

cactus_v5_onstandThere’s a couple of other must haves and some nice to haves.  The first must have is a radio trigger system.  Infrared is for people who want migraines.  Radio is not affected by walls, partitions, line of sight or other impediments.  You can buy very expensive radio systems such as those from Pocket Wizard.  Don’t.   Get yourself the Cactus Wireless Transceiver Set V5.  Do NOT buy the transmitter / receiver set V4.  It will save you $10 but will work only if it feels like it and you will be furious.  We’ve tested the V5 kit and it worked through brick walls from inside to outside.  For $100 you cannot beat the system.  Each unit can be transmitter or receiver.  The units come with table stands and can be light stand mounted.  The unit has a hot foot and a hot shoe.  There is no TTL but that’s ok because you won’t be using it anyway.

SandbagThe other must have is a sandbag.  Buy it empty and fill it with sand.  Drape it over the leg of the light stand so if you knock the stand, or you are shooting outdoors where there’s wind, your kit doesn’t demonstrate the consistent power of gravity by falling over and smashing your flash to bits.


ReflectorThe nice to haves are modifiers.  I like having a collapsible reflector around 20” in diameter, that at least can offer a silver side and white side.  5 in 1 kits are cheap and add gold and sunfire (white/gold) mix plus black to use as a flag.  The other modifier I really like especially for people are gels for the flash.  Flash light is more blue than orange and for some skin tones imparts an unpleasant bleached look.  I recommend the Rogue Flash Gel kit since it has every gel you’ll ever need, an easy way to attach the gels to your flash head and simple wallet to keep everything in place.  If budget is an issue, order yourself a sheet of 1/4 CTO and a sheet of 1/2 CTO and get some painter’s masking tape.  Cut several pieces of gels that will cover the flash head and throw them with the tape in your kit.

Rogue Flash Gel Kit


And now on to the shooting...

Position your model, who could be your family member, friend, drop in, or even an old store mannequin where you would like to photograph the person.  Move the softbox on its Simple Flashstand as close as you can to your subject without it being visible in your viewfinder.  Put it at a 45 degree angle to your subject so you get some shadowing and raise the softbox and tilt it so it’s pointing down at about 30 degrees.  You don’t need a protractor because these are starting points.

Turn the flash on and set it to 1/8th power in manual mode.  Turn your camera on and turn on your radios.  The one on your camera should be set to Tx (transmit) and the one under the flash should be set to Rx (receive).  I’m assuming you’ve figured out how to put the softbox kit together and to put the flash on the receiver and mount both on the bracket.  Push the test button on top of the transmitter and the flash should go off.  If not, check switch positions and batteries.

Ok now that the flash is going off, go make a test shot using the settings you made earlier on your camera.  Too bright?  Turn the flash power down.  Too dark?  Turn the flash power up.  Rather than adjusting aperture, shutter speed and ISO, try exhausting the power options on the flash first.  I have found that for the Canon 600EX-RT flash in this softbox kit placed close to the model that for these camera settings, I need the flash somewhere between 1/16th and 1/32nd power.  The reason you bought that high powered flash is that it doesn’t have to work too hard for each flash.  Batteries last longer and the flash is less likely to overheat.

If you cannot turn the flash power down enough, then move on to decreasing the aperture size.  Try f/6.3, then f/7.1 and on until you get the brightness level you like.  The flash ideally doesn’t look like it’s blasting like a laser cannon.  The initial camera settings will allow for some room or window light to be retained.

Once you get an exposure that you like, now you can work on posing your model.  If you keep the distance between the model and the softbox consistent you won’t have to be playing with your settings.  Try turning your model towards the light.  Try away from the light.  Try whatever you like, experimentation is fun and this is how we learn.

Once you’ve got your initial shots, take a break and look at the images on a larger screen.  That little LCD on the back of your camera is kind of useless for any real value judgements, so get the images onto your computer or tablet.  Does the light look a little too cool?  Want to warm up the skin tones?  Attach a 1/2 CTO gel to the front of the flash and do a couple of tests.  Too warm?   Switch to a 1/4 CTO.  Shoot some more.  I know that you can do all manner of magic in post production, but get things as right as possible in the camera and you will be happier.

Now look at the images.  You should see dimension because one side of the face will be brighter than the other.  Flat light is boring and makes people look like crap.  You want some shadows, but if those shadows are too dark or too harsh, pull out your reflector and try some shots with the white reflector opposite the softbox to throw some light back onto the darker side.  Don’t adjust your exposure, adjust the placement of the reflector.  (This is where an assistant or human reflector stand is very helpful).  Remember how reflectors work, they need to be pointed towards the source. Do you remember about angle of incidence and angle of reflection from high school science?  If not, check the little diagram for clarity.

Reflector Angles

There you go.  Of course there’s an entire process map for retouching and cleaning up images in post production but that’s not part of this article.  You now have all the gear you need, at the lowest expense possible, to make great flash portraits.  Now go make some shots.

Now in case you want to know how much all this will cost and where you might get it, I've prepared a little chart for you.  Please be advised that since I am in Canada, I used infomation from a couple of photographic retailers here.  Both have supported The Photo Video Guy site.  Sadly while most products are available everywhere, the Lastolite Ezybox Kit is only available in Canada at Vistek, so if you are not near a store, you'll be ordering it online.  US readers will find all this gear available from The Photo Video Guy sponsor B&H.  There's a link for the Ezybox from B&H at the bottom of the article.

Ross’ Guide to Simple Flash Lighting
Description Retail Webcode Store
Flash Metz 58-AF2 TTL Flash 419.99 VARIES BY CAMERA Henry’s
Weight Sandbag 29.99 357BOO003 Henry’s
Wireless Trigger Kit Cactus Wireless Transceiver Set V5 99.99 029BOO060 Henry’s
Gel Kit Rogue Flash Gels 34.99 131RED026 Henry’s
Reflector 5 in 1 Reflector Diffuser 24.99 360WEES056 Henry’s
Softbox Lastolite EZ-Box Hot Shoe Kit (includes 21” softbox, flash bracket, tilt bracket, light stand, extension handle, stand bag, softbox bag 279.95 240609 Vistek

Talk to you soon.

Ross

P.S. I want to thank Kevin Kertz for the awesome Strobist templates for Omni Graffle that makes diagramming setups so simple.

Want to learn more?  Contact me at ross@thephotovideoguy.ca


[iframe][/iframe]  

Using High Pass Sharpening to Enhance Edged Subjects

Screenshot-2012-12-13-1040-AM.jpeg

My friend Gabe just took an assignment photographing jewellery for an auctioneer and we've been talking a lot about lighting. One technique that I really like for sharpening edged subjects, like jewellery is to use High Pass filtering in Photoshop.

Here's how I do this, you may have an alternative method, but I promise this one works

  1. Open the image in Photoshop.  I'm using CS6 but high pass sharpening has been around for a while.
  2. Convert the background layer to a Smart Object.  This is a critical step in case you want to make changes after the fact
  3. Choose Filter | Other | High Pass
  4. In the dialog box that appears slide the controller to some level of sharpening balancing sharpness with haloing, click ok
  5. This creates a Smart Filter mask that you can alter after the fact.  Right click on the High Pass filter and change the blending mode.  Because the filter's transparent space is grey, using any of the blend modes in the Overlay group, will make the grey parts of the filter transparent.  Overlay adds a fair bit of contrast, Soft Light is less "edgy" but for jewellery, I tend to prefer Overlay
  6. Because this is a smart filter, you can always click on the filter and change the pixel settings in real world view to alter the amount of sharpening to taste.  Zoom in on the image, then right click the High Pass filter and Edit Smart Filter.  Now move the slider to set the sharpening to suit the image
  7. This last step is often missed and I think it's very important.  You probably don't want the entire image to be sharpened, especially backgrounds and other neutral areas.  Because you are working with a Smart Filter, this is easy to adjust.  Click on the Smart Filter to select it.  Set your foreground color to black (this means that you will be masking the effect of the filter) and taking an appropriate sized brush, paint over the areas where you don't want the sharpening to be in effect.  To make it easy to see where you've painted use Option-Click (mac) or Alt-Click (windows) to see the mask overlay so you can quickly paint over areas you've missed.
  8. That's it!  Now you have a really nicely sharpened image with a mask to control what part of the image gets sharpened and because it is done with a Smart Filter on a Smart Object, you can always go back and make changes later on.

Credit where credit is due, I learned this technique from the brilliant and talented Julieanne Kost of Adobe.

The Photo Video Guy Podcast - Episode 43

Stupid mall cops, breathing on your lens and Pirelli.  Nikon news and rumours, Canon news and rumours, Canon 6D quick look.  DxO Optics version upgrade.  Snapseed is FREE!  ThinkTank starts Mindshift Gear. Processing tools and the best tripod EVER.

REVIEW : Hahnel Giga T Pro II Wired / Wireless Release

The truth is that I have had this critter for nearly a year.  I bought it for its intervalometer and long exposure capability to use with my Canon DSLRs, particularly for night shooting and to shoot multiple images for stacking. It's not Infrared, it's radio and works in the 2.4GHz band.  Hahnel claims a range of 100m, I've tried it at distances of over 30m but then I get nervous about my gear and move in closer.

I had initially considered using Pocket Wizards as remote triggers, but discovered that the retail price of the PW cable is as much as the Hahnel full kit.  Have I mentioned how much the arrogance of the PW people bugs me?

Now I also wanted to be able to wirelessly trigger my Hasselblad H4D-40 and another member at the AWESOME Hasselblad Digital Forums had mentioned that he found that Canon Rebel appropriate wired remotes worked with the Hassy.  Since the Hahnel kit can be used wired or wireless I thought I'd give it a shot.

The Hahnel kit comes with cables for both the Canon pro bodies and the consumer bodies.  How convenient that the Hasselblad connection is the same configuration of the 3/32" (2.5mm) jack as the Canon Rebel.  So I connected the Rebel cable to the Hassy and to the transmitter.  Push the button and the shutter fires.  Cool!

Unplug the transmitter, plug in the receiver and walk across the room and press the button.  The shutter fires.  So I set up an interval sequence and yes that worked too.

Hahnel doesn't say anything about Hasselblad. Hasselblad doesn't say anything about Canon remotes.  All I know is that I now have a solution for the Hasselblad that cost nothing because I already owned the solution.  I got mine at Henry's, but I expect that they are widely available.

For more information on the Hahnel, go to http://www.hahnel.ie/index.cfm/action/productSearch/pid/80

The Photo Video Guy Podcast - Episode 42

Fuji X series frimware update improves AF performance.  Analysts see smartphones impacting compact camera sales.  Nikon patents 58/1.2.  Check your software for Windows 8 compliance before upgradiing.  Rest in Peace Bruce Bayer.  UK copyright idiocy. Canon 2013 rumours.

The Photo Video Guy Podcast - Episode 41

End of life for the Nikon 16/2.8 fisheye?  Nikon patents a 55-300/2.8-4.D600 sensor dust continues to show up.  Canon rumours for 2013 and a new Canon user forum.  Olympus releases a 17/1.8 in thime for the holidays, Sony's 16-50 sharp enough.  Apple updates Aperture and thoughts on what constitutes fast enough.

The Best Tripod I Have Ever Owned

TVC-34L.jpeg

And boy, have I owned tripods.... Like many of us who have been photographers for years/decades, I've accumulated a number of tripods over time, some I still have, many are long gone and others are "in process".  This week I received the tripod that is the best I've ever owned.

Following a series of conversations with the very helpful folks at Really Right Stuff, I ordered a leg set to go with my existing head.   My kit today consists of:

I love the construction quality of the RRS equipment.  While the legs and pano gear are new, I have used the other gear for some time on Gitzo GT3541 legs and loved it.  What I needed was a taller tripod that gave me stability without necessarily having to extend the centre column fully.  The 34L legs do that.  They are slightly larger in diameter than the legs of the Gitzo and have a refined construction method to their carbon fiber tubing.  The leg set is only nominally heavier than what it replaces and delivers the stability I want.  I like the wider domed rubber feet and that I can easily exchange the feet for rock feet or spikes should the need arise.

I added the quick column not because I really wanted a taller height but to give me flexibility on slopes.  I rarely find that the ground where I shoot is level or flat.  The wider diameter legs feel more stable, especially with the weight of the Hasselblad H4D-40 and 300mm lens mounted up.

On top of the column I mounted the TA-2-LC leveling base.  Mine was actually a universal base that I converted from a 3/8-16 screw on top to a Really Right Stuff lever clamp.  This way I can level out whatever head assembly I choose to use before adjusting the head.  It adds a bit of length to the unit and some weight but the fast levelling capability more than overshadows the additional size.

I added the TH-DVTL-55 dovetail plate to the bottom of my existing BH-55 ball head.  The BH-55 is without a doubt the best ball head I have ever used.  It handles everything, is easy to deploy and never creeps.  By putting the dovetail plate on it, it makes it easy to change heads or insert accessories such as the Panoramic clamp.  At some point I might want to get one of the Omni Pivot Packages and the ability to change heads quickly is appealing to me.

The PCL-1 Panoramic Clamp also has the PCL-DVTL plate on it so I can quickly mount it on top of the BH-55 or between the BH-55 and Levelling Base depending on my needs.  I find that the RRS Lever clamps are superb, fast to lock and unlock and take up less space than the knob style clamps.  Don't get me wrong, the knob style clamps are extremely secure, I just like the speed of the levers.  I also got the 192 Precision Plus rail kit to make it simple to find the nodal point and to be able to use either camera body or lens mount orientation on the rail, because the mini-clamp is rotatable.

The macro rail kit is extremely precise and very smooth.  I had been using the simpler Manfrotto macro rail before and it worked fine for lighter cameras but it was a bit awkward with the Hasselblad and macro lens.  I added the adapter in the package as my Canon 180mm macro is a collared lens, so I can mount either body or lens orientation quickly.

I do have other RRS gear purchased over time and have never been disappointed.  I am always impressed by their team's knowledge and customer first attitude.  I've never had a quality issue and the one time I thought I had an issue, it was actually my fault for using a clamp wrong.

The main reason that took me to Really Right Stuff was the ability via L-Plates on my camera bodies to switch from landscape to portrait orientation without altering the lens plane.  To some this sounds like an expensive solution to a simple issue, but for me, I took a chance and have been proven right.  All my Canons, my Hasselblad and the Leica have L plates.  Nothing to lose, fast and secure mounting and no hassle makes this system hard to beat.

I don't sell Really Right Stuff gear.  I'm just a customer.  But I have to say I think it's the best gear out there and well worth the investment.

Holiday Shopping Ideas

A lot of new stuff has come out this year, some still to come but I wanted to give readers a head's up on what I think is pretty cool and what's less so. Please understand that these are my own opinions and may not be congruent with others. The Entry DSLR

If ever there was a year to be able to get into the DSLR game with incredible quality at unprecedented prices this would be it. Nikon's D3200 is a 24MP powerhouse that is a terrific first step into the DSLR world. It does stills and 1080P video and can use most all Nikon lenses (they have to have an AF motor inside as the body does not). It is fast to use, quick to focus and a great launch point. You will see D3000 and D3100 models at low prices this season but given the light year step forward that the D3200 brings, my opinion is stay away from end of life stuff.

BTW, the Nikon D5100 has been replaced by the D5200 everywhere EXCEPT North America. If you want a current D5X00 buy a gift card and wait. The D5100 is a fine camera but is End of Life.

Canon is now six months in on the Rebel T4i. Rebels have always been a great value, but this Rebel knocks it out of the park. It is an 18MP sensor but in a move never seen before it uses 14 bit processing instead of the 8 bit processing usually found in consumer DSLRs. That means that the tonal range and the overall amount of information is the same as what you would find in a 7D, for a lot less money. The Rebel T4i is also one of very few DSLR cameras that can autofocus in video mode with Canon's STM lenses. Pair this with the 18-135 lens for a truly rocking kit.

The Serious DSLR

In my mind there is a killer choice this season and it's particularly grand if you are a Nikon user, or want to be one. The D600 is stunningly good. Many pros are using the D600 to back up their D3 and D4 bodies instead of the D800. It has a brand new 24MP sensor, speedy autofocus, great handling and when bought as a kit with the brand new Nikkor 24-85 zoom lens you have a good to go offering. The D600 is a full frame sensor so you are maximizing the use of the sensor and the image quality that the camera can deliver.

Canon should have the 6D out before the buying season really starts, although if I were spending coin on a new Canon body in this niche, I'd also look at the clearance pricing on 5D Mk II bodies. The 5D Mk II set the stage for DSLR video and while its autofocus is a bit slower than newer models and has fewer focus points, it is proven worldwide and well over $1,000 cheaper than the 5D Mk III. The 6D will also be full frame and have nominally better autofocus and a slightly higher burst mode fps as well as built in WiFi. The 6D will likely be a few hundred more expensive than the 5D Mk II body when it shows up

The Digital Single Lens Mirrorless

Kudos to Lumix for picking an acronym that finally makes sense. We've seen the Mirrorless Interchangeable Lens Format, the Compact Systems Camera and a variety of others.

In this space despite new versions of the Nikon 1 series replacing the unsuccessful J1 and the nominally more successful V1, Sony rules the space. The NEX-5R and the NEX-6 are unstoppable when it comes to image quality, performance and ease of use. The NEX-6 brings most of the functionality of the market leading NEX-7 to a much more attractive price point and the Sony glass in the space is as good as any other player. The NEX-6 is also a full APS-C sensor instead of the smaller 1" sensors and M4/3 sensors in some of the alternatives.

The Canon EOS-M has finally arrived and I'm sad to say it's not on my hot list. The construction is great, the fit and feel are good but the autofocus is glacial in performance. So long as those mountains in the distance don't move you'll be fine but forget any kind of action. Plus the NEX-6 also offers an eyepiece viewfinder in addition to the rear LCD.

The Lens Quest

Well the lens quest is always a big deal during the holidays. And there are always plenty of options out there so I'm going to try to synthesize the list down for you.

For the person looking for a very fast 50mm that is tough and tack driving sharp, go with the Sigma 50/1.4 It's optically better than the Canon or Nikon options, costs a bit more and uses larger filters. It's better glass and fits both full frame and APS-C sensor cameras.

Want an all in one walkaround lens? Nikon's 28-300 is hard to beat and while Canon's 28-300 variant is both expensive and heavy, it's also great. I cannot say the same for the Nikon 18-300 or the Canon 18-200 as neither fares well in independent testing. Sigma's 18-250 (not the old one, the new one) is a strong player in the space and reasonably priced for what it delivers.

If you have that super-telephoto wanter on your list, or you are that person, allow me to recommend a lens that is expensive, heavy and absolutely brilliant. It's Sigma's 120-300/2.8 zoom. It's actually less expensive than their fixed 300/2.8 and is a joy to shoot with. If 300mm is longer than you want to carry and you don't want to spend as much but want amazing image quality consider the Canon 70-200/4 L IS or the forthcoming Nikon 70-200/4 ED VR. Today's cameras do well at higher ISO so the one stop down from the more expensive and more massive f/2.8 variants will save you money and weight and give you amazing images. You can also consider the Sigma 70-200/2.8 as it will be in a similar price point to the Canon or Nikon f/4 lenses. Many of my TV co-host Bryan's students on Daytripper events have shot amazing images with the Sigma. It's great value for the money.

Tripods

This is the number one time of year for tripod sales. We all know the value of a good tripod but let me share a thought that both Bryan and I have shared on the TV show.

Buy your last tripod first

Sounds simple? It actually is. Most serious photographers find that they end up with multiple tripods or are trying to sell older tripods to fund newer ones. Save time and money and buy the best you can up front. My personal choice is ALWAYS the gear from Really Right Stuff, but as most people like to see before they buy, allow me to use two words. Gitzo and Manfrotto. It's hard to go wrong with either brand, although in keeping with the last first sentiment, also think carbon fiber or basalt. Manfrotto does carbon, Gitzo does both. Lighter is better than heavier if you are the person carrying the tripod and either material transmits less vibration than the less expensive aluminum versions. Your choice of tripod head will make a difference as well so sometimes a new head for an existing tripod is a good move. In this case, if still photography is what the photographer will do most, get a ball head. Those multi-arm heads are awesome for video but take more time to get aligned than a simple ball head. Again, if you go Gitzo or Manfrotto you won't be disappointed.

Looking for more ideas?

Send me an email with your query and I will try to help you out.

Model Releases, Copyright and Where to Learn More

Last week, the Canadian government changed the Copyright Act to ensure that the copyright to work produced by a photographer is the same as for any other artist.  Simply, you retain your copyright whether you do the work for yourself or are commissioned to do so.  In the past, being prior to November 7, 2012, commissioned work became the property of the commissioning agency unless specifically excluded by contract.  Well done Canada! I regularly listen to Frederick van Johnson who hosts the This Week in Photo podcast.  Like any podcast, some episodes are more interesting than others depending upon what you are looking for.  A recent episode featured Mr. Jack Reznicki and Mr. Ed Greenberg of TheCopyrightZone.com and their critical book, The Photographer's Survival Manual.  (Link to purchase this book at the bottom of the post)

Even though I own the book and recommend it to students, repetition is the mother of skill and so I learn something whenever I listen to these gentlemen.  What was my learning this time?

Electronic model releases may not stand up in court because electronic documents can be edited.

I have looked at, and purchased, electronic model release systems for the iPad, and liked the one from the American Society of Media Photographers very much.  (Others left me underwhelmed).  Until Mr. Reznicki and Mr. Greenberg did their little role play, I missed completely how an electronic release could be challenged in court.  Paper is the way to go.  Listen to the episode of TWIP here.

Support The Photo Video Guy by purchasing the book from Amazon through this link.

[iframe][/iframe]