The Photo Video Guy Podcast - Episode 73

Nikon to release D610 and D5300. Nikon LD1000. Canon to upgrade all Cine cameras via firmware update. Canon and Zeiss announce new Cine lenses. Still coming, Canon EOS-M, 800/5.6L IS II. Sony reveals QX10 QX100. Sony announces 4K FDR-AX1. Wristwatch live view and HDR-AS30V from Sony. Ilford opens B&W processing lab in California. Adobe offers PS+LR for $10/mth. Cokin revamps. ASMP warns about Facebook changes to ToS.

onOne Software Announces Perfect Photo Suite 8

From my friends at OnOne Software onOne Software Announces Perfect Photo Suite 8 New Perfect Enhance module, Perfect Eraser, Perfect Batch utility, and re-engineered Perfect Effects module create a complete photo editing solution that seamlessly integrates into any workflow

Portland, OR – September 4, 2013 – onOne Software, Inc., a leading developer of innovative and timesaving solutions for digital photography, today announced Perfect Photo Suite 8—the photographer’s choice for photo editing. Perfect Photo Suite 8 is a full-featured, standalone photo editor that integrates seamlessly with Adobe® Photoshop®, Lightroom®, Photoshop Elements, and Apple® Aperture® and it includes all the best tools a photographer needs to create extraordinary images. Key new features include the Perfect Enhance module for essential photo adjustments, the Perfect Eraser with content-aware fill technology, the Perfect Batch processing utility for applying workflows to multiple images at once, and a re-engineered Perfect Effects module with twice as many filters, customizable presets, and integrated FocalPoint™ technology.

The new tools and capabilities alongside Perfect Photo Suite 8’s eight modules—Effects, Enhance, B&W, Portrait, Mask, Layers, Resize, and Browse—allow photographers to enhance, retouch, and stylize images in a layered workflow, replace backgrounds, create high-quality enlargements, prepare images for output, and batch process workflows. The modules share a unified interface, each targeting a specific imageprocessing task. Each module provides only the tools necessary to complete the job at hand, eliminating screen clutter and confusion for the user.

“We listened intently to the digital photography community about what they wanted for their image processing in today’s world of plug-ins, online apps, and subscriptions,” said Craig Keudell, president of onOne Software. “We made it a priority to respond quickly and design a cohesive new product that continues to focus on photography and is built for photographers of all levels, from enthusiasts to professionals. We’ve leveraged our extensive experience as a plug-in company and evolved the Perfect Photo Suite into a complete and powerful photo editor that, unlike existing plug-in collections, works as one, elegantly designed product that seamlessly integrates into any workflow.”

New in Perfect Photo Suite 8: • Perfect Enhance module – Perfect Enhance provides essential tools for basic enhancements. Use it to adjust brightness and contrast, remove a color cast, remove dust spots and power lines, and add sharpening and vignettes. It is an ideal module to start with when using Perfect Photo Suite 8 as a standalone application or when quick corrections are needed. • Perfect Eraser – Using content-aware fill technology and simple brush strokes, the Perfect Eraser removes objects and automatically reconstructs the image with realistic results. • Twice as Many Filters – The Effects module now includes new adjustable filters including: HDR Look, Dynamic Contrast for tonal clarity, Vintage, Grunge, Antique, and more. • Customizable Presets – All built-in presets included in Perfect Photo Suite 8 may be deconstructed by their filter settings and personally customized. • FocalPoint is now in the Effects Module – The best parts of FocalPoint technology to create bokeh, tilt-shift, and selective focus effects after the shot, are now in the Effects module as the Lens Blur filter. • New Browse module – Images can be browsed and directly accessed from Perfect Photo Suite wherever they are stored—on the computer, an external drive, a connected network, and even on a cloud-based storage service like Dropbox, Google Drive, or Apple’s photo stream. • Perfect Batch Utility – Powerful batch processing of actions from one or multiple modules, including the insertion of a watermark. • Multiple File Handling: As a photo editor, you can now open and work with more than one image at a time. Move between images to edit or copy layers from one file to the next. • Improved Masking Bug: Redesigned Masking Bug in the Effects and Layers modules make mask creation easier and more intuitive. • Higher Quality Effects: Performance enhancements improve effects by minimizing artifacts without sacrificing processing speed. • Improved RAW file handling: Open and process RAW files faster and with better quality. Support for new cameras also added. onOne Software Announces Perfect Photo Suite 8, a complete photo editor for every workflow

Availability and Pricing The new Perfect Photo Suite 8 will be available November 26, 2013. Pre-orders are available immediately at www.ononesoftware.com/store. Perfect Photo Suite 8 is available in three editions: Premium, Standard, and an edition for Adobe Lightroom & Apple Aperture. The Premium Edition works with Adobe Photoshop, Lightroom, Aperture, Photoshop Elements, and as a standalone application. Owners of previous versions of Perfect Photo Suite Premium Edition can upgrade for $99.95. New users may pre-order the Premium Edition for $179.95. For a limited time, pre-orders of Perfect Photo Suite 8 Premium Edition will include a complimentary Essential Video Guide to Perfect Photo Suite 8, which provides a comprehensive collection of getting started training videos for Perfect Photo Suite 8 ($40 value).

Perfect Photo Suite 8 for Adobe Lightroom & Apple Aperture works with Lightroom, Aperture, Photoshop Elements, and as a standalone application. It is available for $129.95 | $79.95 upgrade. The Standard Edition works as a complete standalone photo editor and is available for $79.95. New users who pre-order Perfect Photo Suite 8 will immediately receive a complimentary license for Perfect Photo Suite 7.5. Customers who pre-order Perfect Photo Suite 8 will receive all upcoming Loyalty Rewards that will be delivered monthly to owners of the Perfect Photo Suite 8. For those who have purchased Perfect Photo Suite 7.5 on or after August 1, 2013, onOne Software will issue a complimentary upgrade to Perfect Photo Suite 8 via download when it is available. For more information on Perfect Photo Suite 8, please visit http://www.ononesoftware.com.

About onOne Software onOne Software, Inc., is a leading developer of innovative software tools and apps for digital photography and offers time-saving software solutions for photographers of all levels, from enthusiasts to professionals. Leveraging its extensive history as successful plug-in developer for Adobe Photoshop, Photoshop Elements, Photoshop Lightroom, and Apple Aperture, and continued development of cutting-edge technology, onOne publishes unified solutions that offer both full-featured photo editing capabilities and the flexibility of traditional plug-ins. Founded in 2005, onOne Software is a privately held company located in Portland, Oregon. For additional information, visit www.ononesoftware.com.

Press Contact: Amy Chan, onOne Software, achan@ononesoftware.com, 503-968-1468 x 137 General Press Inquiries: press@ononesoftware.com onOne Software Announces Perfect Photo Suite 8, a complete photo editor for every workflow

Online Press Center: www.ononesoftware.com/press onOne Software Blog: www.ononesoftware.com/blog Facebook: www.facebook.com/onOneSoftware Twitter: www.twitter.com/onOneSoftware Google+: www.ononesoftware.com/plus ©2013 onOne Software, Inc. All rights reserved. onOne Software, the onOne Software logo, and Focused on Photography are registered trademarks and Perfect Photo, Perfect Enhance, Perfect Effects, Perfect Eraser, Perfect Batch, and FocalPoint are trademarks in the United States and are the property of onOne Software. Adobe, Photoshop and Lightroom are registered trademarks of Adobe Systems, Inc. Apple and Aperture are registered trademarks of Apple Computer, Inc. All other trademarks are property of their respective owners.

Quick Look : Stick & Stretch Gallerie Wraps

SS_fsAs I've been looking at alternative ways to display prints, I came across this item called Stick & Stretch Gallerie Wraps.  Or at least that's what they are called in Canada.  In the United States, you'll find them under the brand name Hahnemuhle Gallerie Wrap.  Different packaging, same thing. Basically they consist of four sticks, 1 ¼ wide in the Standard version and 1 ¾ wide in the Pro version.  Each stick has an adhesive strip pre mounted, is beveled at the corners and is notched to fit into these moulded corner braces.  You need a set of corner braces to make the system work, so your first purchase should be a Starter Pack that contains four sticks, reusable corner braces, a bottle of archival glue and some corner pins that look a lot like big heavy staples.

If you've ever done a Gallery Wrap the old way, with stretcher pliers and staple guns and hot glue, you know that while the final outcome can be beautiful, getting there is often arduous and frustrating.  Hence this kit.

There are a couple of videos on the web that show how to use the kit, one from Photoplus in 2010 with the inventor, and one with Phil Neilsen from Amplis Canada.  Both are excellent, Phil's is a bit easier to follow.

Making It Happen

  1. You collect your four sticks and by choosing different lengths and widths, you define your wrap size.  Let's say you take 2 14" sticks and 2 17" sticks.  You'll set up your print job to produce (for the standard sticks) a print that is 16 ½ x 19 ½, basically adding 2 ½ inches to the length of each dimension.  This leaves you enough excess canvas to complete the wrap.  If you are using the Pro series, you need to add 3 ½ inches to the length of each dimension.
  2. Print your image onto the canvas of your choice.  This may require a higher end printer, or that you send the image out to a lab.
  3. Once the canvas is dry, hold it up to the light and mark the corners of the printed image on the back.  This is important because you will use these marks to align the sticks.
  4. Peel back the cover of the adhesive on each of the beveled corners and then put the sticks into the corner blocks.  They only go in one way.  Standard corner blocks are blue, Pro corner blocks are red and they are not interchangeable.  Press the sticks down into the corner blocks so the back sides of the sticks are flush with your table.
  5. Peel the remainder of the covering on all the sticks.  Picking the frame up (corners and sticks) place it on the back of your print.  Use the marks you made on the back to align the corner blocks to the corners of the printed image.
  6. Press each stick straight down.  It will release from the blocks and adhere to the canvas.  Use lots of pressure, you are making a bond happen between the stick and the canvas.
  7. Run a razor knife along the outside edge of each stick to trim the canvas.  On larger prints you might want to leave an extra ½" to allow for an optional stapling step.  Extend your cuts square to the corners and remove the excess canvas.
  8. You know have four sticks glued to the back of your image, that are properly placed and what looks like a square canvas area in each corner.  Cut each corner at a 45 degree angle and fold back each section and adhere it to the exposed adhesive on the sticks.  This will produce really nice clean corners when you do the tensioning.
  9. Run a bead of archival glue down the inside edge of each stick.  When you tension, this glue will further adhere the canvas to the front edge of the stick and help address movement in the canvas over time.
  10. Starting with any adjacent pair of sticks, fold them upwards until their beveled edges meet in a nice corner.  Take one of the staples and press it into the predrilled holes.  Don't push it all the way in yet.
  11. Repeat for the other three corners.  There is now nice tension on the canvas.  Inspect your corners and if you are happy, tap with a small mallet or use some flat object to press the staple all the way in, anchoring each corner.
  12. Take the supplied corner brace sticks and press them into place.  The mounting sticks have little notches pre-cut for these braces.  This takes a bit of pressure and then they snap right in.  This further tensions the canvas.
  13. At this point, I like to take a hard rubber roller and press the edges of the wrap again to assist the adhesive to bond.
  14. If you left extra canvas for your big print, now fold the excess over the back edges of the stretcher sticks and put a staple in every couple of inches.  The adhesive is very good but this is sort of belt and suspenders solution.

Thoughts

This is really dead simple.  My first one lost some tension about ten minutes after setting up, and that's why I added the step using the roller.  The second one remains taut as a drumhead.  The pricing for the sticks is pretty reasonable considering that they are all preformed and predrilled, the adhesive is decent, the archival glue works well and the staples are easy to work with.  You will need to buy at least one starter kit for each format to get the proper corner blocks but once you have them, you're good.  You can also buy glue as a standalone product as well as sacs of extra staples.

If you want to see someone do this before you buy, watch Phil's video on the Amplis Store page here.

---

Followup a day later.  I've changed my description of the strip adhesive from good to decent.  It doesn't stick consistently and to my disappointment, both wraps have sections that became unstuck.  So I'm changing my rating and going to call the company tomorrow to vent a bit.

The Photo Video Guy Podcast - Episode 72

Nikon patents variable AA technology.  Nikkor 6mm fisheye only $80K.  Canon moving into security cameras.  Sony releases A3000, 3 E lenses and the NEX-5T.  Ricoh updates Pentax DA lenses with HD coating and releases two flashes.  First look at Canon 70D.

Breaking the "pro camera" barrier in DSLM

Digital Single Lens Mirrorless.  It's the name used by Panasonic in their marketing materials.  Being a mostly DSLR person, this is logical.  Compact System Camera?  Mirrorless Interchangeable Lens Camera?  Mirrorless Interchangeable Lens Format? How about "camera"?

When I talk to serious photographers who are DSLR (and larger format) shooters and ask them about mirror less cameras (and let's agree that this is a fundamentally stupid name), there are two reactions.  First is that it's not a real camera.  Okey dokey, enjoy your life on planet Denial (which is not a river in Egypt).  Second is that they love their smaller cameras but are less comfortable using them on paid gigs because they don't look professional.  This I definitely understand since Uncle Bob has a 5D Mark III and thinks he is a much better photographer than he actually is, because he thinks that the tool makes the photographer.  Uncle Bob is plainly visiting from planet Delusion.  Clients who are not photographers may expect big, bulky gear and much waving of hands and boiling of potions to make pro photography look like some kind of black art.

Some pros are actively using their new smaller cameras and letting their work speak for itself.  More power to them.  The camera is a tool.  No more.  One of the frustrations I see, and hear in stores, is the perception coming in the door, or created at the sales counter, that a camera that doesn't have a floppy mirror is not a real camera.  This is, a load of poo.

I bought one of the first Lumix micro 4/3 cameras.  It was pretty good, no better at anything than a DSLR and worse only in the number of lens options available at the time.  That used to be a credible argument.  It's not valid any more.  The average DSLR buyer has just under two lenses, so round up and you have a wide angle zoom and a telephoto zoom and that solves pretty much everything for the general consumer.  Sure an enthusiast might start looking at a macro, or an ultra wide or maybe demand a super fast big telephoto, and with the exception of the last option, those are also available.

Hang on though, a DSLR gives me way more override capabilities than one of these new mirrorless things, right?  Um no.  You have as much flexibility in an OM-D or NEX-6 as a similarly priced DSLR, and in some cases, more flexibility and more features.

Oh, but I have more flash options with a DSLR.  Bull hockey.  Most DSLR buyers never go near even a hotshoe flash, let alone anything of studio power.  If you want a bigger offboard flash, they exist, and they do TTL and slaving and sync and all that and you can always load up a Skyport or PocketWizard onto the hot shoe and trip your big studio lights.  Works fine.

But wait!  What about low light?  These smaller cameras cannot possibly have the same low light performance as a DSLR can they?  In many cases we are comparing APS-C sensor to APS-C sensor, sometimes even from the same manufacturer so that argument is spurious.  Yes my original Lumix was not brilliant above ISO 3200.  Neither was the Canon 40D I had at the time either.  Too high megapixel counts on too small a sensor make for small photosites and that is less low light efficiency.  Or at least that was the way it was three years ago.  Digital is as much about the software as it is the sensor and you can get excellent low light performance today that was not attainable at all only three years ago.

Well then, the lenses must not be as good.  Nope, wrong again honey.  Smaller?  Yes.  Lighter?  Yes.  More plastic in the construction?  Probably not statistically speaking.  The gap today is in lens speed.  We don't yet see the f/1.4 variants that we see in the DSLR space.  How many of those are sold to the average customer by the way?  Oh right, that would be zero.

So your question should be, what am I actually losing if I buy one of these smaller cameras over a DSLR.

Here's a list

  • physical size - less
  • weight - less
  • size of the bag to put it all in - less
  • really big filters - don't need em, need smaller filters

big super telephoto lenses with huge maximum apertures - yes these don't exist right now, but you may not be Bill Frakes or Dave Black anyway

Manufacturers aren't helping either.  Canon released the anti-enthusiast SL1, basically a Rebel with a lobotomy in a 1/4 smaller body in order to hit a size/weight target.  Sony releases the A3000 that has no pentaprism or mirror box but is built to look like it does giving the camera the feeling that it's filled with foam and cheap plastic.  Stupid marketing is stupid marketing.  Other vendors shoot themselves in the head by making their compacts less functional than their DSLRs because the divisions compete and they are afraid of eating their own lunch, more content to let a competitor do it.  Canon released the EOS-M with the world's crappiest autofocus performance and wondered why no one would pay nearly twice the price of an NEX-3 that could run circles around it.  Nikon released the 1 series with a smaller than M43 sensor creating a completely unique line and mount structure and then compounded the sin with the J1, the camera with the highest customer return rate I have ever seen.  The 1 Series is dead on the pad, yet the V1 and V2 were spectacular performers, virtually ignored by their maker.

Today's digital compacts with interchangeable lenses are for the most part functional equivalents to DSLRs.  You choose the size and style you want and have a tool that will enable you to make great photos if you do your part.  If humping a bunch of kit around is not what you want to do, you should take a serious look at this alternative.  It's interesting that in Japan this market is explosive but in North America it's not nearly as strong.  I put the why down entirely to misperception, misguidance and lies.

The Extremely Useful FRIO

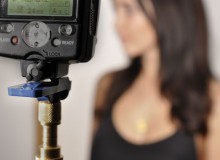
I like lighting.  It's one my my "things".  One of the challenges I have had with hotshoe flash is having them stay where I put them.  I used to own a bunch of Metz 58 units, great flashes all, but very suicidal, they kept jumping off where I put them.  Fortunately they are also Panzer tough and served me well despite their tendency to validate the equations for acceleration due to gravity. Frio2Face it, those screw down rings don't always screw down properly.  I had resorted to my other good friend, Mr. Gaffer Tape to be sure and then at the recommendation of Joe McNally's former lead assistant Drew Gurion (I wish you huge success my friend!) I discovered the Frio.  Drew mentioned these things to me at the last Photoshop World, and then I forgot, and then they were out of stock whenever I looked.  Suffice to say, I finally got some and they are as brilliantly simple as they are advertised to be.

Frio is not sold in stores, you order them online from EnlightPhotoPro.  Click here to go to their website.  Ordering is easy and the shipping is both fast and economical because they have shipping centres in different parts of the world,  Being in Canada, shipping here is usually an adventure in pocket-picking but these guys were awesome!

The Frio is a blue clip that you slide your hot foot encumbered device into.  It is a spring type clip lock.  Your device comes off the Frio when you decide it does and at no other time.  The Frio has a ¼-20 standard thread socket on the bottom so you can attach it to, you guessed it, anything with a ¼-20 post.  Like a light stand, (go figure), or a Gorillapod, or one of those Manfrotto Doc Ock style arm thingys, or a tripod, or even a freaking ¼-20 bolt that you've poked through something because you needed a cold shoe there.

Enlight Photo Pro also sells ¼-20 posts so if you have a clamp that takes a ¼-20 post like oh say a Justin clamp or whatever Manfrotto calls their version, you can mount your flash securely to the clamp.

I ordered a 5 pack and a couple of posts.  They showed up at my door in a couple of days, no hassle, no fuss.  As easy as buying from Amazon and that is a compliment in my book.  A Five Pack is $50.

FrioBut wait you say!  I need the ability to attach my Frio to a ⅜-16 post!  Whatever shall I do?  Simply unscrew the ¼-20 socket from the Frio revealing the not so hidden and not very secret ⅜-16 socket.

You need these things.  You know you do.  Click the link and order some.  The Frio images used in this post are courtesy of Enlight Photo Pro.  I didn't take these images on my camera, I took them from the vendor's website

The Photo Video Guy Podcast - Episode 71

Nikon D7100 wins EISA.  Nikon updates ViewNX.  Nikon still on track for new DSLRs despite forecast drop.  Canon releases STM version of 55-250, stack of point and shoots and all in one printers.  70D should be in stores in the next week or so.  Voigtlander Nokton 42.5/0.95 now ava.  Garmin enters the POV action camera market.  ASMP says instagram terms are too far reaching.  Kodak bankruptcy plan approved.  Apple RAW update.  Fuji introduces Instax Mini 90

Canon Product Announcements August 22, 2013

My friends at Canon passed along this press release summary of the announcements that they made this week.  It's predominantly point and shoot and small printer offerings although there is a new, and much needed STM lens available.  Highlights and verbiage are courtesy of Canon ---

Canon PowerShot G16
  • First G-series to come equipped with Wi-Fi technology
  • Available October 2013 for an estimated $549.99
Canon PowerShot S120
  • Pocket-sized camera with Wi-Fi technology and a sharp 24-120 mm extra-wide angle lens
  • Available October 2013 for an estimated $449.99
Canon PowerShot S200
  • Built for users who are looking to explore advanced photography
  • Features a 24-120mm extra-wide angle lens with a DIGIC 5 image processor
  • Available September 2013 for an estimated $349.99
Canon PowerShot SX510 HS
  • Incorporates a 30x optical zoom and a 24mm wide-angle lens
  • Equipped with WI-Fi to share images easily
  • Available September 2013 for an estimated $299.99
Canon PowerShot SX170 IS
  • This camera offers a long zoom in a compact camera body
  • Includes 16x optical zoom with 28mm wide-angle lens and Optical Image Stabilization
  • Available September 2013 for an estimated $199.99
EF-S 55-250 mm f/4-5.6 IS STM Telephoto Zoom Lens
  • The perfect companion lens for the EOS 70D, EOS Rebel SL1 and EOS Rebel T5i
  • Offers high magnification in a compact and lightweight EF-S telephoto zoom lens with an Optical Image Stabilizer for shake correction
PIXMA MG7120
  • Advanced home office capabilities with key benefits for photo-printing enthusiasts
  • Available in white, black, red or brown
  • Estimated price: 199.99
PIXMA MG6420
  • Allows two-sided printing for energy and resource efficiency and produces high-quality images
  • AirPrint compatible allowing users to print directly from Apple devices without an app
  • Available in white or black
  • Estimated price: $179.99
PIXMA MG5520
  • Produces stunning high-quality images along with clean and clear documents for home or home office
  • Available in white or black
  • Estimated price: $129.99

The Photo Video Guy Podcast - Episode 70

Get all Nano lenses and two bodies for $90K.  Nikon drops the TC-14E II.  Magic Lantern dual iso crack now for 5D Mk II and 6D.  Canon wins 3 EISA awards.  Sigma gets great reviews and a new lens.  Lumia 1020 P&S killer.  GX-7 wows reviewers.  Thinktank has new bag line.  Are snapshots dead?

New Bag Series from ThinkTank : Turnstyle Slings

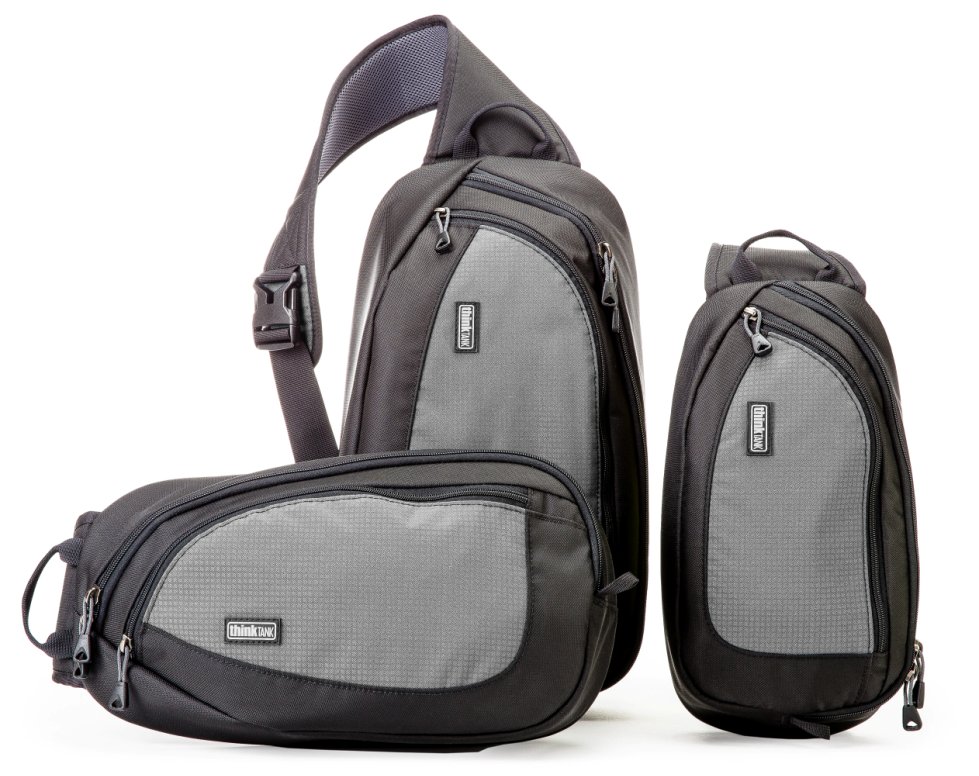
TurnStyle-Group.jpg

My friends at Think Tank Photo just announced the release of a new line of sling bags, the TurnStyle.  Lightweight with easy access, the three TurnStyle™ models are ideal for DSLRs and mirrorless systems. Their soft, body-conforming shape means all-day comfort and their tough water-resistant fabrics offer lasting protection. TurnStyle GroupEasy rotation gives you fast access to your gear, including a zippered tablet pocket on all three sizes. These hybrid bags can we be worn as a shoulder sling bag or as a belt pack for increased versatility and comfort.

  • TurnStyle™ 5: Fits a mirrorless system with two to four lenses plus a small tablet. The front organizer pocket holds memory cards and other small accessories. Examples: Fuji X-Pro1 with 50mm f/1.4 attached + 38mm f/2.0 + 60mm f/2.8 with hoods reversed OR Olympus E-P2 with 14-42mm attached + 17mm f/2.8 + 40-150mm f/4-5.6 + VF-2 viewfinder + FL-14 flash.
  • TurnStyle™ 10: Fits a standard size DSLR with one to three lenses plus a small tablet. The front organizer pocket holds memory cards and other small accessories. Examples: Nikon D800 with 24-70 f/2.8 attached + 50mm f/1.4 hoods reversed or Canon 5DMIII with 50mm f/1.2 attached + 16-35mm f2.8 hoods reversed.
  • TurnStyle™ 20: Fits a standard size DSLR with one to four lenses plus a large tablet. The front organizer pocket holds memory cards and other small accessories. Examples: Nikon D800 with 70-200 f/2.8 attached + 50 f/1.4 (or flash) hoods reversed or Canon 5DMIII.

And don’t forget, as a The Photo Video Guy reader, when you click on this link you receive a free gift with your purchase.  Unfortunately the promotional gift offering only works for readers living in the United States.

http://www.thinktankphoto.com/categories/sling-camera-bags/turnstyle.aspx?code=AP-743

The Photo Video Guy Podcast - Episode 69

Contour shuts its doors.  Nikon calls off profit targets, blames poor adoption outside Japan of mirrorless cameras.  Nikon 18-140.  Nikon SB-300 flash.  Olympus PEN sales drop 12%.  Canon to acquire a medium format line?  Canon has new firmware for the C300.  DP Review likes the Sigma 17-70/2.8-4 as an alternative to manufacturer kit lenses.

The Photo Video Guy Podcast - Episode 68

Nikon can repair a D4 in 20 miunutes.  Nikon patents two f/1.2 lenses.  Canon updates firmware for older 1D models.  Canon event on Aug 21.  Canon releases Vixia persoanl camcorder.  No 7D Mark II this year.  Sigma announces mount conversion service.  Sigma working on 24-70/2 full frame?  DP Review of Fuki X100s out.  Panasonic releases Lumix LX-7.  Panasonic announces 42.5/1.2 M43 lens.  SmugMug undergoes full redesign.  Adobe releases ACR 8.2RC and LR5.2 RC.  CIPA says camera sales are way off.  Ilford will file for bankruptcy protection.  Blackmagic drops the price of the Cinema Camera by $1000 and releases the Pocket Cinema Camera.

First Prints : Breathing Color Crystalline Satin

I'm one of those photographers who thinks that a photo is only truly complete when it becomes a print.  There's something very special about holding a piece of art in your hands, a tactile experience very different, and in my opinion, superior to seeing it on screen. I was recently listening to an interview with Tokyo based wildlife photographer Martin Bailey and he was raving (again) about Breathing Color paper and canvas.  I went online and tried to place an order as they only sell direct, but when the company got back to me, shipping was going to be more than the cost of the paper.  I live in Canada, and I guess sending stuff from parts of the USA is akin to launching a rocket to Mars.  That's not true for Red River Paper, they process orders and all the costs are included at excellent pricing, but I digress.

A tech support person at Breathing Color advised me that Amplis in Canada sold their paper direct.  Amplis has an online store so I went to it.  No Breathing Color.  It only appeared on the Dealer secure site.  I wrote back to Breathing Color and told them their Canadian option seemed broken.  The same young gent contacted Amplis and I was contacted in short order by Phil Neilsen and Pat Cameron.  Phil sells for Amplis.  Pat is on the order desk.  Both were very helpful.  Pat processed my order and I picked it up, with only a couple of hiccoughs, the same day.

I ordered five 17" x 20' trial rolls.  The new metallic paper was not in stock but the others were so I collected them.  Lyre Canvas, Crystalline Satin Canvas, Vibrance Matte and Optica One were my selections.  This morning I had some time and so unloaded the default roll of Epson Professional Premium Lustre that I typically have queued up in my printer.  After loading the roll of Crystalline Satin, I set to making some prints.

I love the Epson 4900 but it has its quirks.  Single sheet canvas handling is one of them.  Once I got the roll loaded and feeding properly, (more challenging than it should have been), I read the insert that came with the paper.  Breathing Color not only supplies setup instructions for Windows and Mac for their papers, they include screenshots to help you out.  Of course the screenshots did not match my world exactly, but there was more than enough information to create a printer preset for the roll of Crystalline Satin.

One of the other things I really like about Breathing Color is that when you go to download their ICC profile for a paper, the download contains all their ICC profiles in a single package along with an aliased installer to make installing them completely painless.  Every other paper company SHOULD learn from this simple and very customer-centric step.

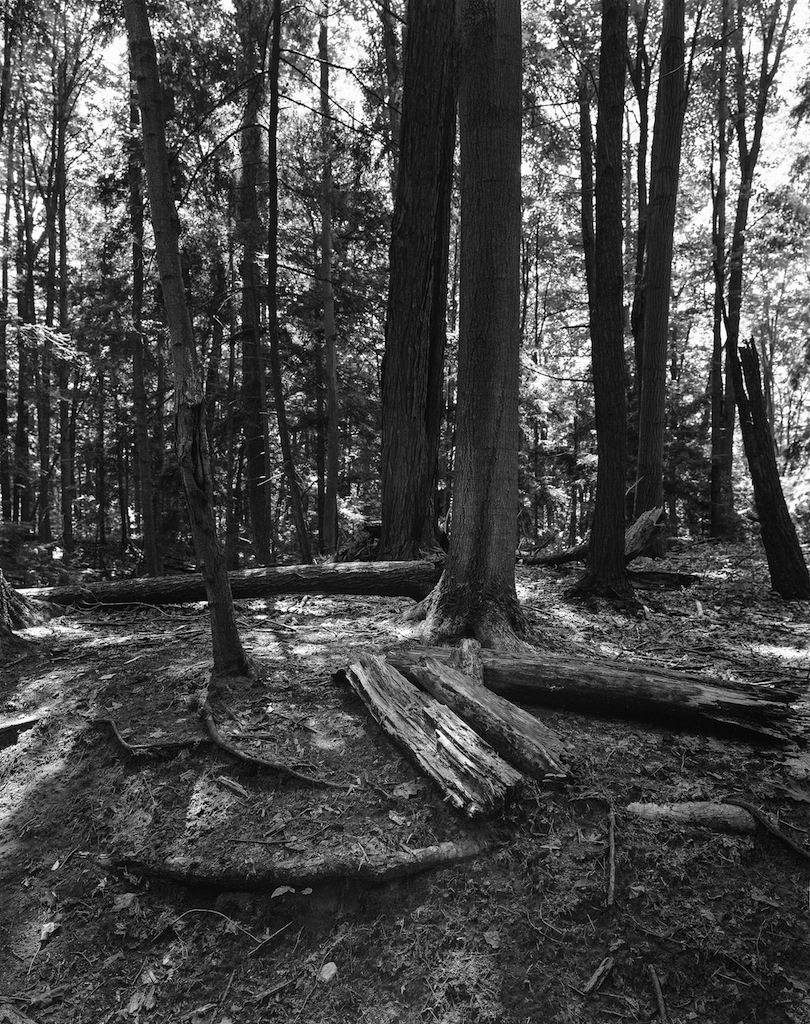
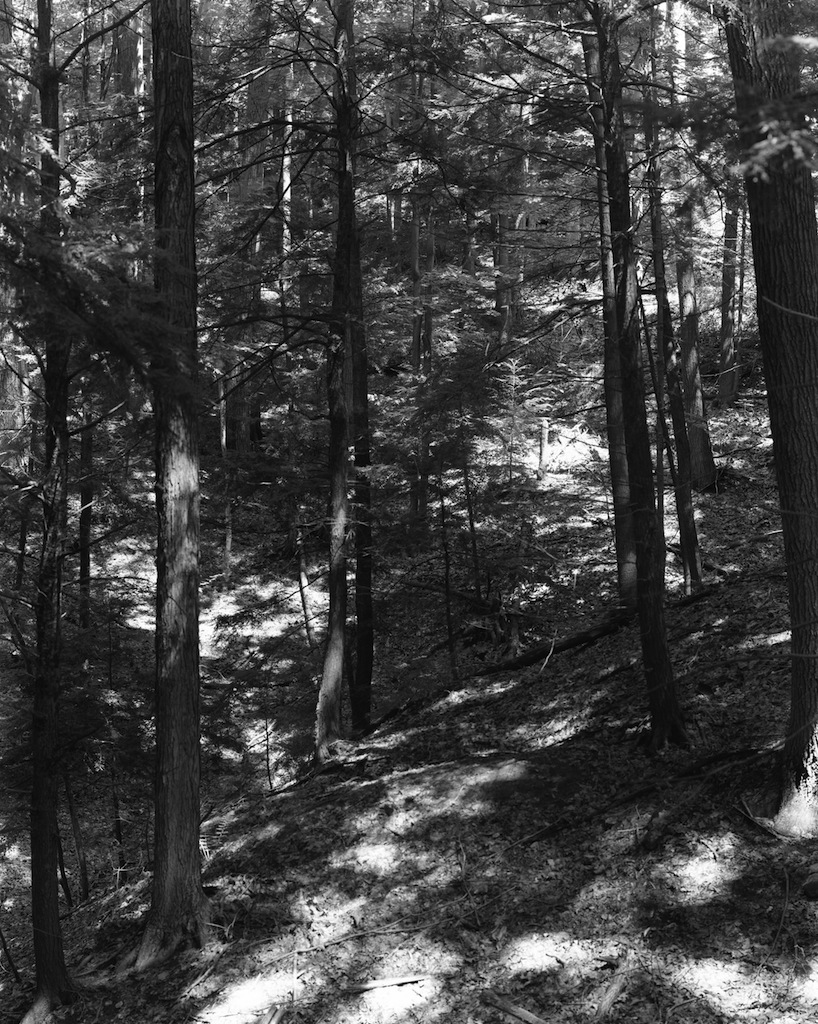
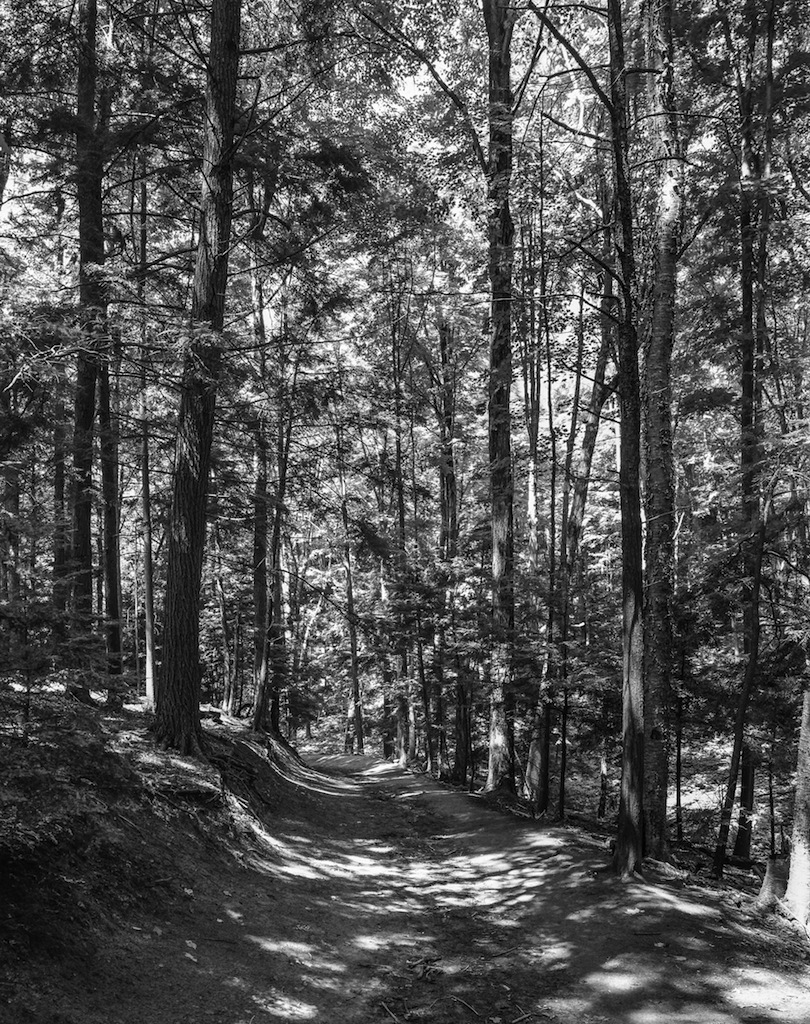
Lightroom 5.2 was used to make my prints.  Two shots were in colour, shot on a Canon 1D Mark IV with the 100-400 and 1.4x teleconverter, the first of a giant panda and the second of an african rhinoceros.   The third was a scan of a 4x5 TMAX 100 negative shot with a Nikkor 210mm on my Sinar P that I had processed earlier this week.  I thought it would be nice to try these different subjects on canvas.

Despite a first time feed error, once I unloaded and reloaded the canvas, the Epson 4900 did the job I bought it for.  It produced great prints in a reasonably timely fashion.  I liked very much that the ICC profiles worked flawlessly with Lightroom's proof print function and that I could see what the prints would look like before printing.  I have had issues where this did not work properly with other vendor's ICC profiles.  I keep my displays calibrated using a Color Munki Photo so I got out what I saw on screen after allowance for reflective textured media vs backlit display.

The canvas is very thick and Epson advises not to use the built-in cutter for canvas on the 4900.  I set the printer for no cut, and learned how to advance and then withdraw the paper once I cut it with an X-Acto after each print.  The 4900 does a great job of prepping the roll and my not straight cuts caused no issues with the next prints.

Once the pigments had dried for a while, I sprayed each print with Hahnemuhle's spray canvas protector.  You have to do this outside unless you want to go on a coughing jag.  Once the varnish was dry enough for handling, I took a tip from friends Kathy Constantinou and Simeon Tse and mounted the prints on foam core.

My usual response to printing is to frame stuff, but I had done an experiment with mounting a Moab Metallic Pearl print on foam core and I liked the outcome very much.  I have not yet bought gallery mount kits for canvas, (next week, Amplis has some great kits), so I thought, what the heck?  I sprayed the back of the canvas with 3M photographic spray cement and then placed the prints on the foam core.  I covered the print with parchment paper and used a rubber roller working from the centre out to lay the canvas down on the foam core and roll it flat.  It worked surprisingly well, so a big thanks to Kathy and Simeon for their initial coaching.  Once the glue had set up a bit, I used a steel straight-edge and the heavy X-Acto to trim away the excess foam core.  I bought a self-healing cutting mat at the Currys Art Supply store and it's perfect for this kind of work.

The canvas looks awesome.  Colours are bright, gamut is excellent and the canvas texture is very appealing without degrading the image quality in any way.  The black and white print from the Sinar looks stunning on the canvas.  I spent a lot of time making the shot and while there is always room for improvement, I love that I can see ten zones in the image.  Canvas is the perfect media for this kind of work.

I have not yet tried the other Breathing Color papers, but my first experience with their Crystalline Satin has been awesome.  They make a really fine product and handle the software end better than most paper companies.  Now that I know the trick to ordering the paper in Canada (call Pat at Amplis direct), I'll buy more in the future.

First round with the Sinar P 4x5

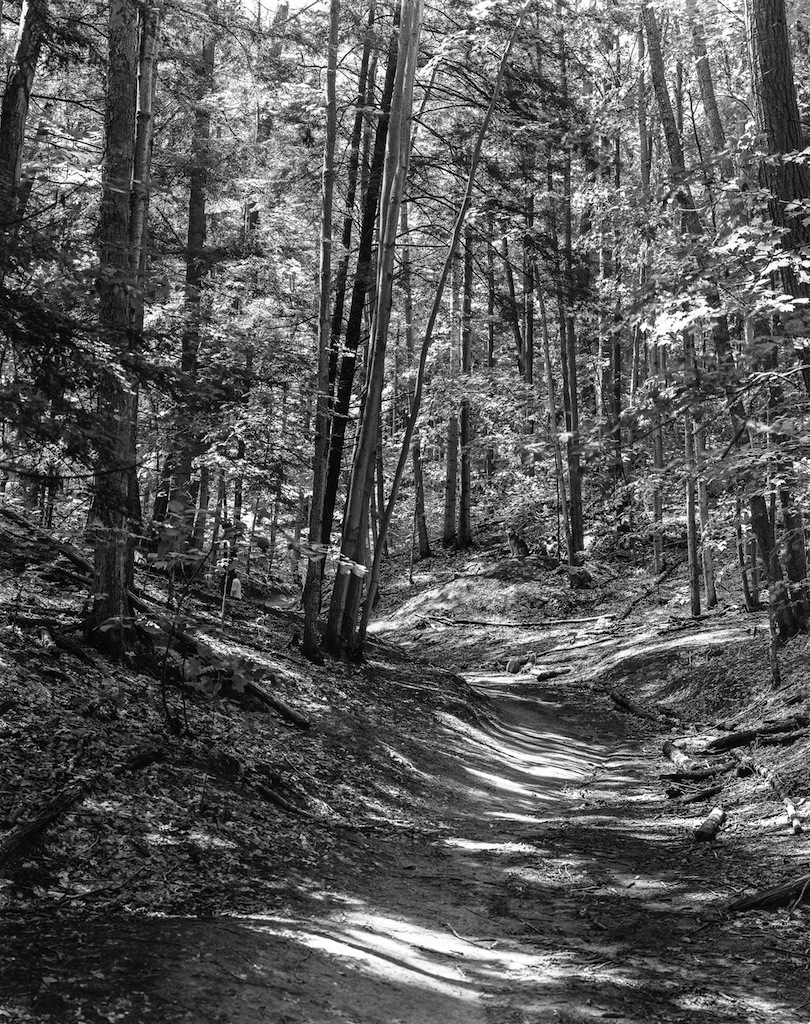
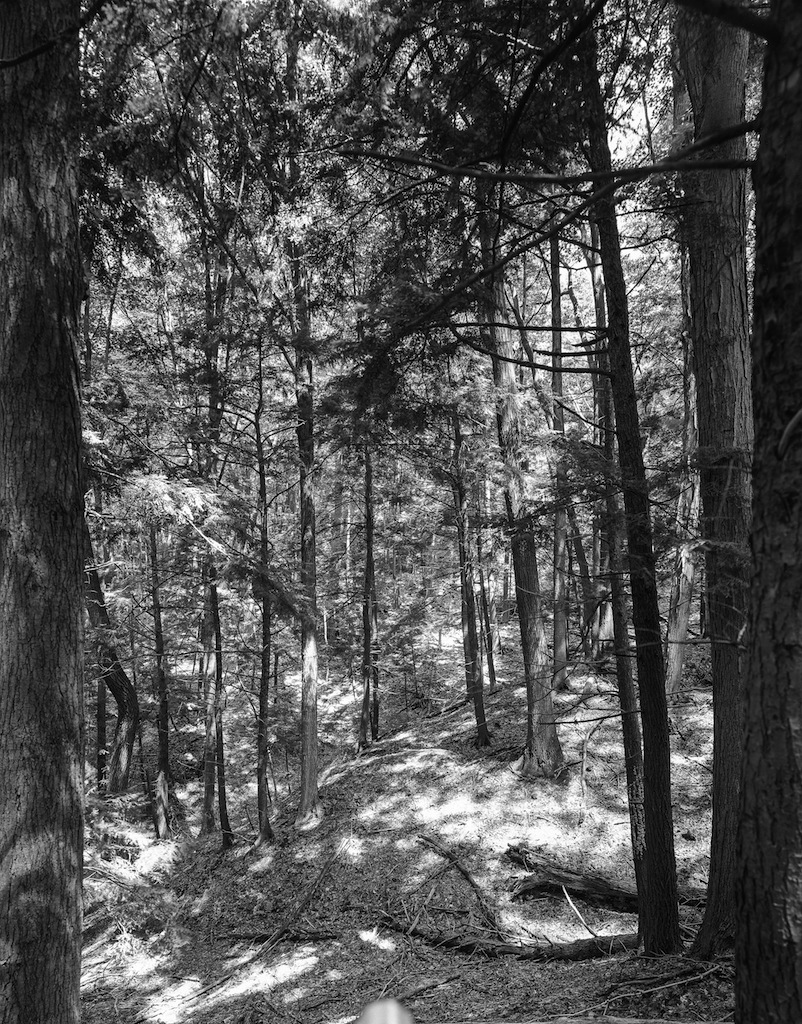
Just after Christmas 2012 I bought a used Sinar P and lenses from a fine gentleman in Illinois.  I loaded up five film holders and then proceeded to do pretty much nothing with the camera.  This past weekend, I took the four unexposed holders into the woods with the camera and kit and made eight exposures.  I processed the film myself.  Fortunately, I did not screw up the negative developing step and while it's been nearly three decades since I last processed my own negs, it was really a blast.

So I ended up with eight sheets of 4x5 Kodak TMAX 100 hanging on a piece of string in the mud room to dry.  Two out of the total ten that I shot, I screwed up the in camera part, forgetting to close the iris completely before pulling the dark slide on the film holder.  The other eight came out ok, but I have made a note to carry a spot meter in addition to my incident meter when I next decide that humping the Sinar, lens, tripod and related kit into the woods is a good idea.

One of the challenges with the 4x5 is that while I have very good lenses for it, with reliable shutters, the image on the ground glass, even when under the dark cloth, is pretty dark.  Using my old Nikon slide loupe for focus worked fine but I need a loupe with a bit more power, and I probably need to think about having more available light when I shoot as each exposure was 1 second with the aperture varying between f/13 and f/18.  You focus with the lens wide open, but even then I had some trouble checking the edges and in one case, when I first put the 75mm Nikkor wide angle on, I neglected to remove the monorail extension that is needed when shooting the 210mm Nikkor, so the frame has this silver cannon poking in from the bottom.  A real amateur mistake, but I caught it before the next exposure.  I've also got a light streak on one sheet so either one of the film holders is wonky, or one of the sheets was touching something in the tank.  It happens.

I am loving the 4x5 because there is absolutely no spray and pray, and while the images made this time are nothing that special, I was shooting for practice, not for art.  Even then, by the time you check the meter half a dozen times, make myriad tiny adjustments, play with the shift, the tilt and maybe some swing, making a single exposure takes a while.  After about two hours in the woods, I made eight exposures in total including the 1.5km hike in and out.

I processed the film in Ilfotec DDX because it was recommended on a forum for TMAX 100.  I had bought Kodak TMAX developer because it was recommended, and then I discovered that Kodak says not to use it on sheet film.  So I went all Ilford except for the Photo-Flo 200 wetting agent and everything worked out fine.  I had intended to go with tray developing, but I was able to get a Yankee tank designed for sheet film so the only real darkroom work was loading the sheets from the film holders into the slots in the tank sheet rack.  Once closed up, it was a room light experience.  I was very glad to have found my ancient timer, and for the web on guidance on agitation and timing for the chemistry.

After letting the negs dry and then spending a day out shooting, I sat down today to learn how to get the negatives into the computer.  I bought my Epson 4990 scanner several years ago, and I knew that it came with negative and slide holders.  So I had to discover where they were after over five years.  Fortunately, someone else in the house is organized and I found them quickly.  I loaded the first two sheets of film into the film holder and did a preview.  Then I played with the settings a bit and kept at it until the preview looked close to right.  About the time I was trying to determine the correct resolution to scan at, I came upon a very useful web site produced by Konrad at www.howtoscan.ca  The information there was well laid out and very helpful.  Konrad suggests that 900dpi resolution on a 4x5 negative is suitable for a 24x30 print.  So I decided to scan at 1200 dpi understanding that I would end up with larger files and a longer scanning step.

At first I scanned using the Epson Scan software that came with the scanner.  It seemed to work fine.  Then I read that post OS X 10.6 scanning should be invoked from the operating system, so I tried scanning from Photoshop CC.  The scanning part worked ok but the exposures were all very dark.  I remembered that the Epson Scan software had done a nice job so I gave up on scanning from Photoshop CC and went back to the Epson software.  Each image at 1200dpi scans to 49.3 megabyte files.

Then I opened the first image in Photoshop.  I'm not a Photoshop guru, but I did read a tip for people who are Lightroom / ACR types so I converted the image to a Smart Object and then used the Filter | Camera Raw Filter tool to make my very subtle adjustments.  There is so much tonal range in this film it is absolutely awesome.  When I saved the TIFF after the adjustments, the file size had loomed to about 230mb average.  So 8 shots consume about 2GB.  I have a lot to learn about working with scanned negatives in Photoshop but for a start, I'm pretty happy.  I'm sure I will look at these in a year and ask myself what I was thinking.

REVIEW : Westcott Skylux - Continuous Light in a Studio Flash Style Head

A big tip 'o' the hat to Chris Atkinson and Louise Booth at Henry's Store 005 in Newmarket Ontario for providing the Skylux for this review. I have six studio flash heads, 4 at 500ws and 2 at 1000ws.  Why?  When using modifiers, it's better to have enough power to be able to select the aperture you want for the amount of depth of field you want.  When it comes to flash, there's no such thing as too much power.

Most studio heads have modelling lights that help the photographer position the light to get the style he or she wants.  However, I find that sometimes users still struggle.  For some subjects, flash can be disconcerting or downright frightening so an alternative is needed.  A couple of years back I added Westcott Spiderlites to my arsenal, a TD-5 and a pair of TD-6 units.  For soft continuous light they are really nice.  The big drawback is that while you can control output by switching banks of lamps on and off, there is no continuous dimming function like you find on professional video lights, and so I've found myself going with my KinoFlos more than not when needing continuous light.

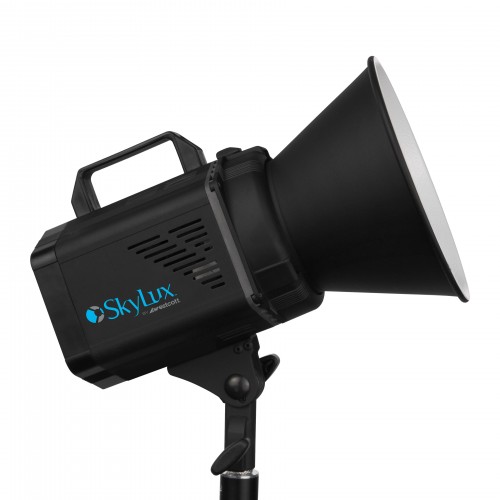
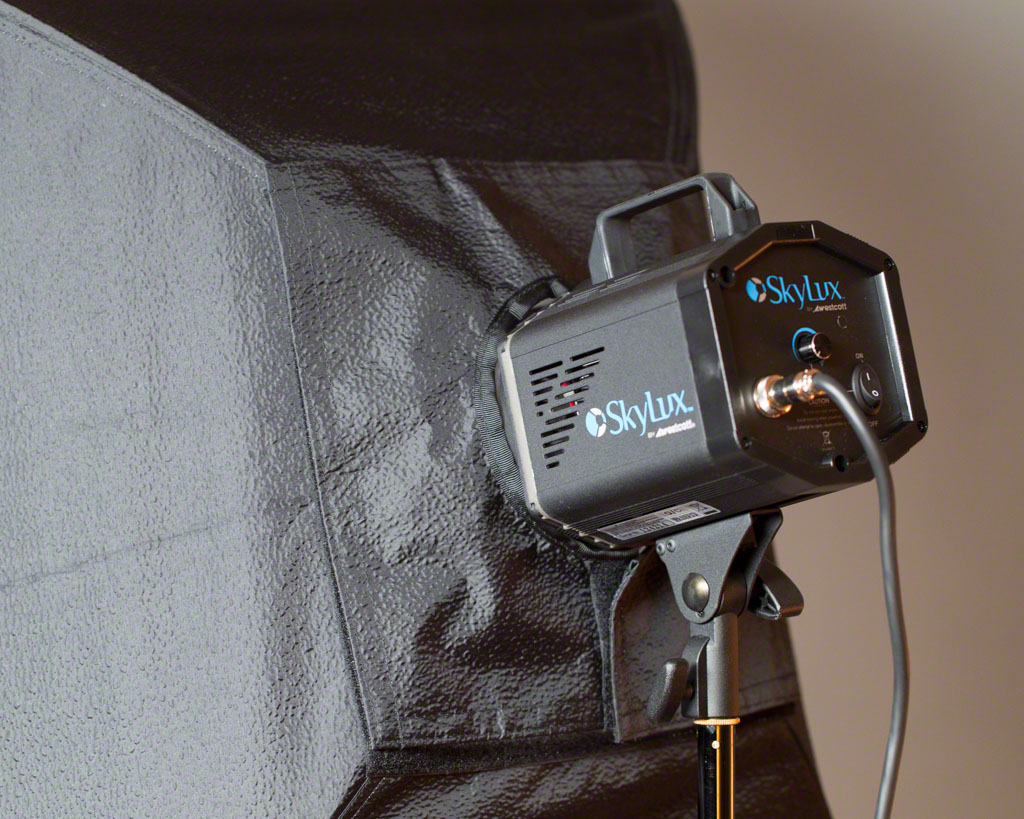
Skylux-Side-500x500Westcott has stepped up with a continuous light that looks and mounts like a studio flash head.  It's a frosted LED lamp head that accepts a variety of standard softboxes and octaboxes using Bowens speed rings.  In fact you can buy the head in a kit with Westcott Octas if you so desire.

Let's start of with what Westcott has to say;

  • Dimmable daylight-balanced LED for motion and still capture
  • Pristine 5600K continuous output
  • Cutting-edge 94CRI LED technology
  • Quiet operation essential for video
  • Lightweight, solid metal housing
  • Diffused front emits shadow-free output
  • Built-in tilter bracket and umbrella mount
  • Attaches virtually any light modifier
  • Regulated ballast for flicker-free output
  • Multi-voltage for international use

The Skylux is equivalent in output to a 1000 watt photoflood, that you can dial down to 30% output or about a 300w light.  The LEDs are colour-balanced to 5600K, equivalent to daylight.  LEDs typically run very cool, but the head has a built-in fan that will keep temperatures down.  Normally fans are anathema to videographers because of the noise, but this fan is very quiet, not silent as sometimes articulated but still reasonably quiet, so this makes the Skylux good for videography as well as stills.  The head is of metal construction as is the tilter bracket, nicer than the plastic used by other vendors.  There is a carry / grab handle on top as well.

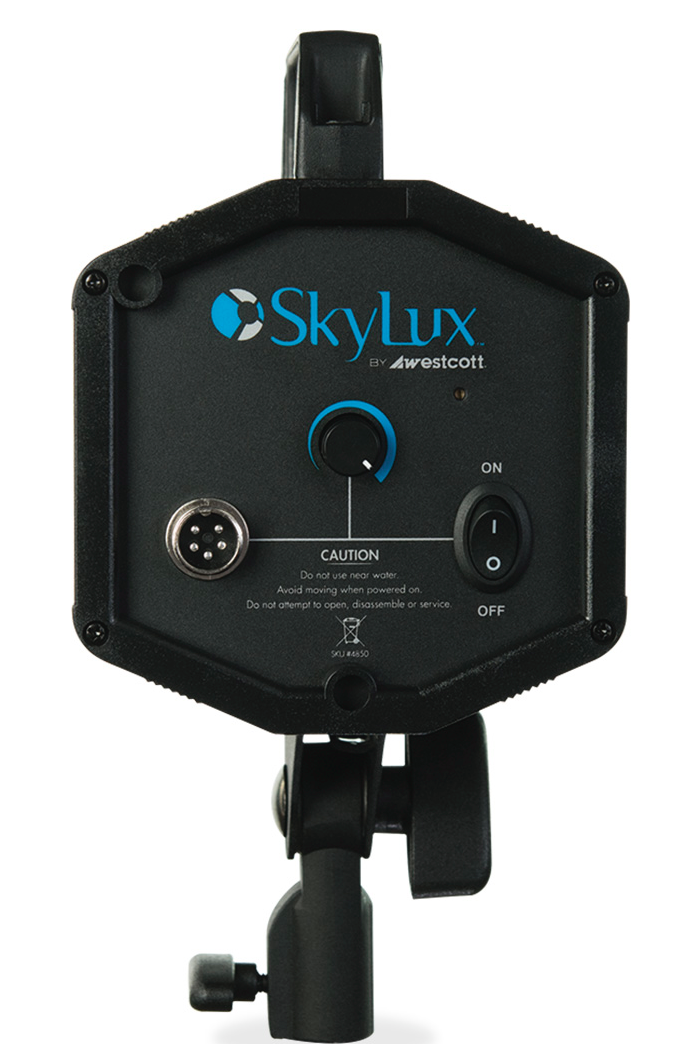
Skylux_LED_from_Westcott_LightingLooking at the unit from the back there is a connection for power, a dimmer for output and an on/off switch.

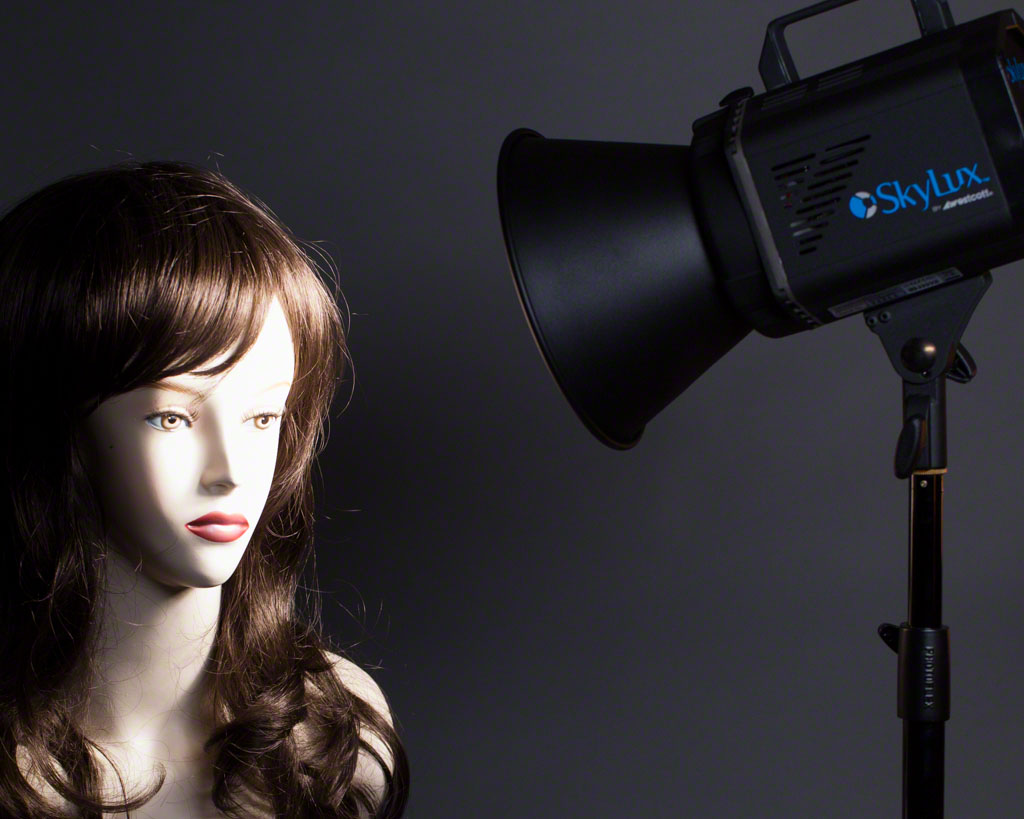
Looking face on, you see the LED arrangement, that is positioned to not cast edge shadows and has a diffusion panel mounted permanently.  The ring mount system is easy to use and the light comes with a mid-depth disk reflector so you can direct the light.  And I mean direct.  Expect harsh shadows from this arrangement.  Fortunately, the mount is a Bowens S Mount, so you can take anything that attaches to a Bowens Speedring and attach it directly to the Skylux.  Very handy in concept.  In execution, it was much more of a struggle.  The Bowens speedring fits the mount fine, but turning it to achieve a lock required more force and fuss than it should have.  As I was handling a medium sized soft box this was somewhat annoying.  I would have to work on this if I owned one, but when I tried the Bowens Maxi-Lite reflector, it connected quickly and correctly.

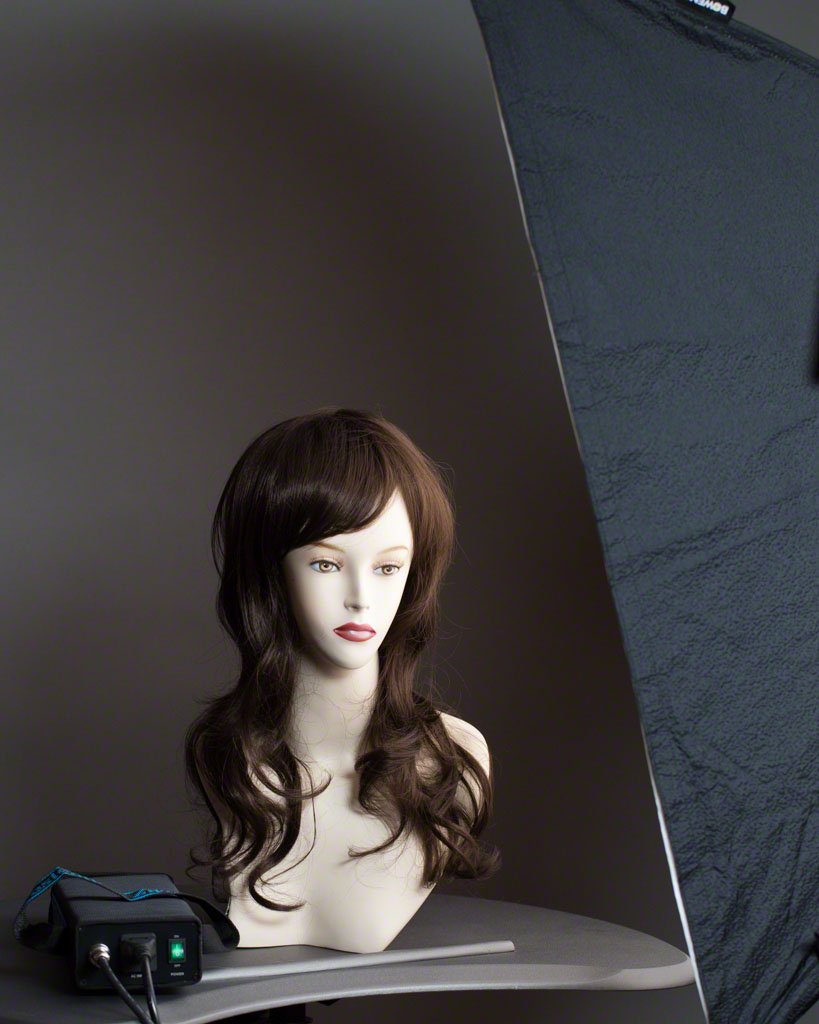
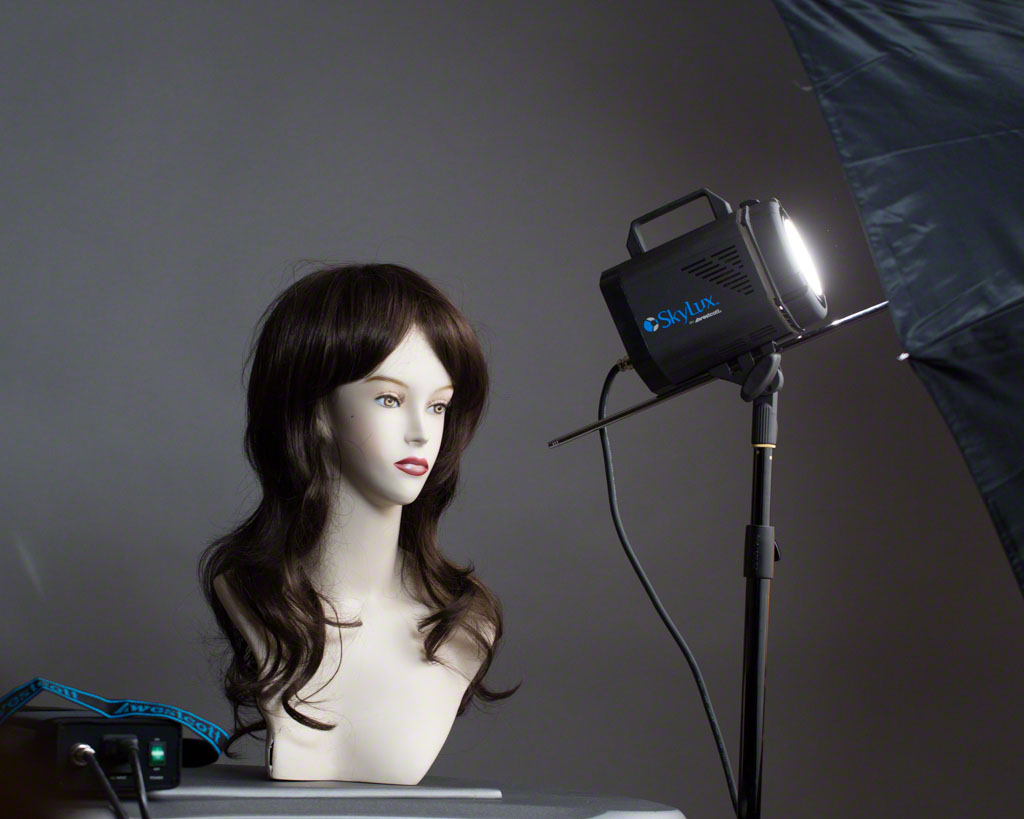
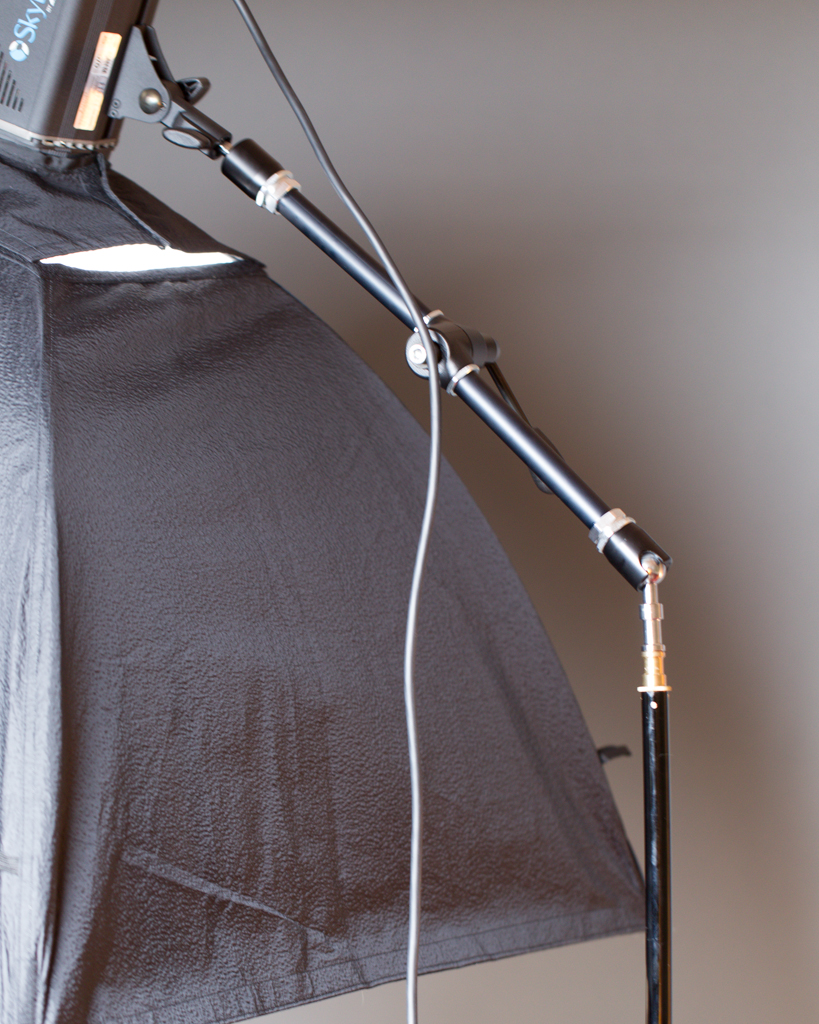
Westcott has been thinking about how people need to work.  The power connector is a Skylux_LED_from_Westcott_Lighting_1screw down five pin connector and the cable is about 15' long to where it plugs into the external ballast.  The ballast then has a 5' cord to the AC outlet.  The ballast unit comes in a lightly padded case with a strap so you could hang it on a light stand or hook if you wish.  The lamp feels lightweight, the ballast feels like a brick, so separating them makes it much easier to hang the Skylux at the end of a boom arm.  This is where that 15' initial power cable comes in handy.  In reality the head is heavier than the ballast according to the specs but it just doesn't feel that way.  In a couple of the sample shots you can see that the unit is attached to the light stand via a Manfrotto Magic Arm.

At the top of the tilter handle, under the lamp housing,  is a small recess designed to take an umbrella.  I slid a Bowens umbrella into the holder and it worked fine.  I would have used my big Westcott but did not have the room for the demo shot.

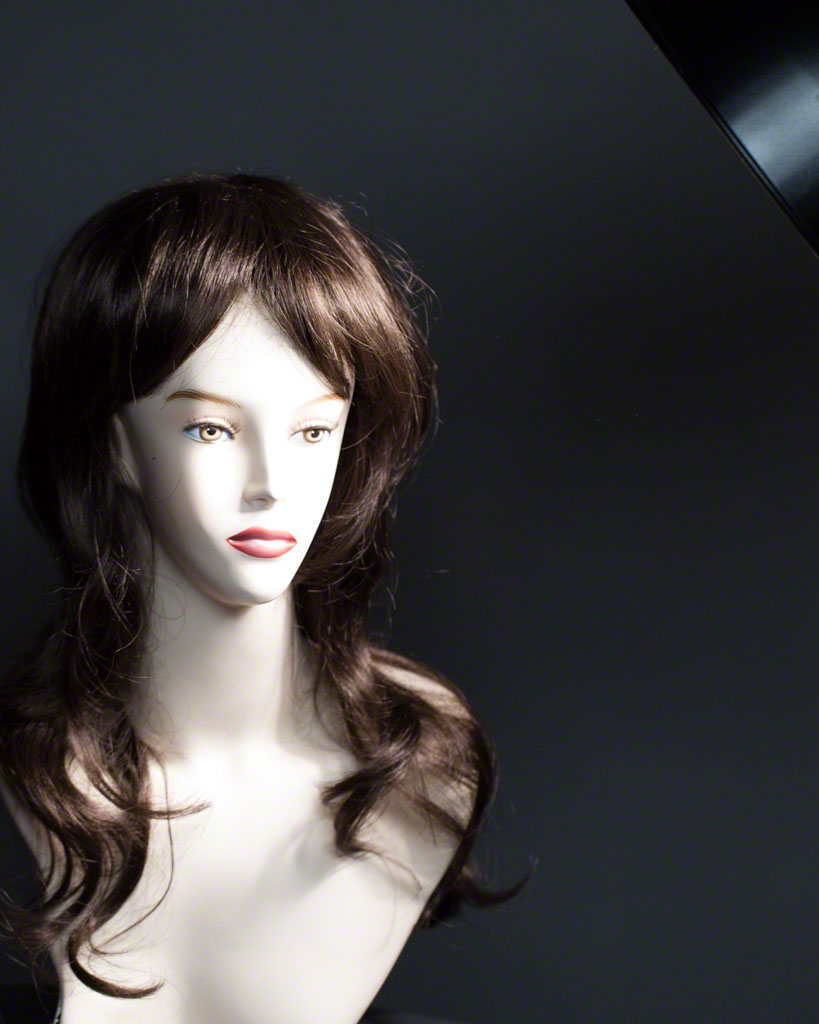
The real question is how does it light?  The answer is pretty darn well.  I came away impressed and admittedly I was asking myself what kind of desperate person would pay $1200 for a single continuous head.  I set up my usual config with the light, some modifiers, a table and my habitual model Sondra.  She looks annoyed because the aforementioned soft box detached itself and landed on her part way through the shoot mussing her hair.  Exposures are not optimal in the attached shots, mostly because I was trying to balance the light from the Skylux and still show the surroundings.  The background is an 18% grey roll, the model lighting is by the Skylux and the room illumination is by my tried and true KinoFlo Tegra 4-Bank.

So what's the verdict?  I came to the review with plenty of skepticism.  Price was the main driver, and in fact I still think that the device is much too expensive for most people.  I like the continuous power control, but wish it would go below 30% power.  I am guessing Westcott holds it here to maintain colour temperature consistency as you manipulate the power.  Turned up full, it's quite bright but it's not going to give you flash head levels of depth of field.  Shooting with the 100/2.8 Macro, I was able to get the aperture down to f/5.6 maximum running at 30% power before I would have needed a tripod.  That's a good indicator of where you're going to be with this light.  Since it is pretty well suited for flash hating children and pets, understand the limited depth of field and remember that you are going to have to get the light in close.  My meter readings at full power firing into the umbrella at ISO 400 were 1/40 @ f/5.6 evaluative, with the focus point on Sondra's near eye.  This produced a very pleasant exposure but it's hardly action stopping.  The inside of the umbrella was about 3' from Sondra at this reading.

I like the Skylux very much.  I don't like it $1200 worth though.  For the same kind of money, you can get a pair of Bowens 400w/s heads with stands and modifiers or the 400w/s Elinchrom D-Lux 4 system.   I'm really very excited about the potential for studio head style continuous lighting.  If you are doing videography as well as still photography, there is a benefit there if you cannot afford to get into two different lighting systems, or don't have the space for all this stuff.  Westcott is funny from a pricing perspective.  Their Rapidbox offerings are very price competitive and an excellent value.  Their first portable continuous light, the ICElight is dim, expensive, has short battery life and did I mention it was dim AND expensive?  The Skylux is absolutely the direction to be looking.  If it had a bit more power, a wider dimming range and sold for about $600 with a stand, it would be perfect.  As it is, it's a very nice light, easy to use and quite flexible, but priced too high to get real market traction.

Specs are below and are courtesy FJ Westcott.

Product Specifications

SKU 4850
Warranty One year against manufacturer defect
Material All-metal construction

Item Specifications

Color Temperature 5500K
Mount Built-in Tilter Bracket
Lux 2250 Lux at 6' (1.8m)
Lamp Type LED Array (94 CRI)
Footcandles 209 at 6' (1.8m)
Dimming Control 30%-100%
Beam Angle 60.1-degrees
Lifespan Over 50,000 hours
Softbox Mount Bowens S-Type Mount Speedring (sold separately)
Power Cord 20' (6.09 m) attached
Reflector Diameter 4.84" (12.3 cm)
Length: Light Head 10.8" (275 mm)
Width: Light Head 4.8" (124 mm)
Height: Light Head 8.5" (124 mm)
Weight: Light Head 4.2 lbs. (1.9 kg)
Length: Ballast 10.2" (260 mm)
Width: Ballast 3.5" (89 mm)
Height: Ballast 2.0" (51 mm)
Weight: Ballast 3.3 lbs. (1.5 kg)
Packaged Width 11.8" (299.4mm)
Packaged Height 11.6" (293.4mm)
Packaged Depth 8.4" (214.4mm)
Packaged Weight 7.5 lbs. (3.4kg)

The Photo Video Guy Podcast - Episode 67

Canon testing 75MP DSLR.  Canon patents 50/1.8IS.  Canon financials released, PSmarket crashing.Nikon patents new sensor design.  Nikon 200/2 ED VR II sharpest lens ever tested by DxO.  Hassleblad releases the Stellar.  SANdisk announces wireless flash storage.  Fuji roadmaps XC50-230/4.5-6.7 and updates X series firmware with a patch.  Manfrotto supports Arca Swiss plates.  Photoshop World attendees get 1 full year of Creative Cloud free.  Breathing Color paper available in Canada.  Set My Camera DF iPhone app.  Westcott Skylux now in Canada at $1200

Need Vitriol? Admit subscribing to Creative Cloud

I was seriously disappointed when so many people started ripping Scott Kelby for trying to explain Creative Cloud.  He didn't tell anyone to subscribe, he was trying to explain what he saw.  I have a very good sense of what he felt like now. I announced yesterday on Google Plus that I had received an offer from Adobe targeted at CS6 Master Collection licensees and that following a phone conversation with Adobe, I decided to subscribe.  For me, the annual fee is less than half of what I have consistently paid for upgrades over the various iterations of Master Collection and even before that when Macromind and Adobe were different companies. 

Today, I am stupid, Darth Vader, a sellout, a transacter of souls, easily fooled by people with clipboards, a drinker of Koolaid and an abandoner of principles.  Like Mr. Kelby, I did not tell anyone to subscribe, but I did relate that I had chosen to, because I have been vocal on why I don't like leased software in the past.

I still don't like leased software.  I still own CS6 Master Collection and if my experiment with Creative Cloud doesn't work out, I still can use CS6 in perpetuity.  Would I prefer it if Adobe treated the Master Collection as they have Lightroom 5, that is to make it available as a subscription AND as a perpetual license, buyer decides?  Absolutely.  They didn't.  Sometimes business makes decisions we don't like and we can follow or not, our choice.

I was pleased that Adobe reduced the subscription cost to a price/value ratio that is acceptable to me.  Many are saying Adobe flinched and is in the process of caving in.  Maybe so.  There has certainly been a lot of negative flashback at Adobe for their decision but the data shows that over 1M customers have subscribed to Creative Cloud.  I assure you, if the price/value ratio was not acceptable to me, I wouldn't have done it, and time will tell whether it's a good buy.  The net is that I get to use all of Creative Cloud for one year for about the same cost as a one year membership to the Professional Photographers of America, a membership I have maintained for some time.  I can assure you that I will get more value from Creative Cloud in terms of tools and revenue, but that doesn't make the PPA membership useless.

Having spent more than fifteen years of my life working for software companies, I understand the piracy challenge all too well so I discount some of the complaining about Creative Cloud because it makes it harder for people to steal software.  Some complainers still have a principle argument against Adobe and despite their insults, I still support their arguments.  In the end my data is my data, and as I use tools to get to finished product, and after analysis have determined that I go back and revisit a work to enter the edit process midstream later occurs nearly never.  A finished photograph or a finished video are for me at least, finished.  In some ways it's like renting a tool from Home Depot.  Even when the tool is gone, I still have the cabinet I built with the tool.

I would definitely prefer if Adobe offered a license choice for Master Collection CC.  If they change their mind, I will likely go that route.  In the interim, I will try the components in Creative Cloud and make ongoing business decisions from there.   For those who care to heap insults on me for my decision, whatever.  You are entitled to your opinion, but in this case it's my money, my work, I don't tell anyone else to follow me.

The Photo Video Guy Podcast - Episode 66

Canon to replace 430 EX II by year end.  Magic Lantern firmware for 5D Mk III and 7D increases dynamic range to 14 stops.  Canon 8D is not real.  Fuji to add focus peaking to coming X series firmware update.  Nikon updates distortion control to v 1.0009 for most all DSLRs.  Nikon issues patents for two new zoom lenses with diffractive optics elements.  Leica M 240 wins TIPA Best Camera award.

Looking for video rigs

I went out shooting with buddy Jay Stinson today and on the way home we stopped by the downtown Vistek store, just to have a look around.  As some of you know, I have been studying videography/filmmaking and I've recently been looking at rig systems for my video camera.  I had seen the Redrock Micro stuff at a trade show and one of their inside sales people (Rachel) had helped me build a configuration for budget purposes over a period of several days.  She was very helpful, but I have to say that picking the right parts for this "adult lego" system was pretty confusing.  By the time I was done with the exercise, I sat back to retrench because the config was into multiple thousands of dollars that I don't have and cannot justify. Robert Cole is my video consultant at Vistek and he suggested taking a look at Shape products.  They're made in Canada and they in fact have a complete bundle for the Canon C300.  Shape is, I think, a small company, but I like the idea of potentially supporting fellow Canadians.  I cannot talk to them until August 4th because they are closed for vacation, but I'm hopeful.  They are based out of Montreal.  Have a look at their kit here.

What was even more interesting was the introduction to a Turkish company called edelkrone.  There's an accent missing on the last e so please bear with me.  He could only show me digital brochures but is going to see if they can accommodate my use cases as most of what they show on their website while extremely comprehensive, is primarily oriented to having a monitor mounted on the rig.  When I got home, I spent some time viewing their videos on their website.  The founder does most of the presenting, and the videos are pretty well done.  You see that the products are not only well built, the engineering is very thoughtful and the packaging is very lovely, very Apple-esque.  If you want to learn more about this now available in Canada product, or if you just want to see some video rig kits that are incredible and priced for real people have a look here.  I was particularly impressed by the thinking that went into their two follow focus devices.  They are designed for the one person cameraperson/director/dp and have things like reversing gearing (to work with Nikon lenses that focus backwards) and unlike most other follow focus units are not height dependent.  Very cool stuff.