FIRST LOOK : Topaz Impression

Yes, yes I know, there are ten zillion tools for post processing and really who needs another one? Maybe I do.  I'm not an artist with a pencil or brush but my buddy from Everyday HDR and the Digital Zone System #Blake Rudis is.  Blake sent an email out today and he is pretty enthused with a new plugin / standalone app from the folks at Topaz Labs called Impression.   I am a Topaz Labs customer and I do like their tools very much.  Will I spend $$ on Impression?   Let's find out...Topaz Impression is a plugin and standalone application that allows you to apply painterly effects to your images.  It also does charcoal, pencil and pastel as well.  I used to draw, some even said quite well.  I could paint in water-colour but oils, acrylics, pastels all were beyond my ability.  But I like the look of artist materials and this plugin lets you apply these finishes to your photographs.

Impression has options for Ancient, Impressionistic, Modern, Painting, Pencil, Charcoal and Pastel.  Each option area has multiple finishes, some inspired by great masters, some by the medium itself.  Not every option fits every photograph but I thought I'd share some test images from the evaluation copy I got today.

Original Edit from Lightroom


Topaz Impression - Van Gogh II


Topaz Impression - Pastel II


Topaz Impression - Charcoal III

These are some very quick samples using the standalone app.  Each process gives you a starting point and a huge amount of flexibility in adjusting the application of the look.  There are not hundreds of options but there is a significant gamut of manipulation available within each option so less really is more.

Topaz Impression is available as an item in the entire Topaz Suite or as a standalone purchase.  I already own the full suite, and I'm not sure that I would want to spend $99 on this plugin alone.  I don't see myself getting sufficient return from the investment.    I may change my mind in the future because I really do like what I see, but for the moment, I cannot make the jump.


REVIEW : Tamron 16mm-300mm f:/3.5-6.3 Di II VC PZD

This is the first of what I hope will be three different reviews of what photography writers like to call "The One Lens".  We're not speaking of something Tolkeinesque or the unicorn of lenses, we're speaking of the one lens that you would carry with you when you only wanted to carry your DSLR and one lens and have that lens be useful for pretty much everything.The lens I will start with is Tamron's new (second version) of their wide to long telephoto zoom.  This lens is designed for crop sensor cameras, having a sensor ratio of 1.5:1 or 1.6:1.  So your Nikon D5XXX, D7XXX and the like bodies and all Canon bodies from the 7D on down in price point. The focal length measurement on the box is as if this was a lens for full frame but it isn't so on a Nikon or Sony this is effectively a 24mm-450mm equivalent.  On a Canon, this is a 25.6mm-480mm equivalent.  And those are the mounts available.

The maximum aperture is a variable, for cost and weight reasons, starting at f:/3.5 at the widest angle, dropping to f:/5.0 when the barrel marker hits about 50mm and f:/6.3 after about 200mm on the barrel.  So in most cases, this is an outdoor lens (but more on challenging that later).  In order to get the shutter speed you want to have for crisp images (1/focal length in use is a good standard), you may find yourself pressing for higher ISO settings so be confident in your camera sensor's low light capability before embarking down this path.  Cameras with CCD sensors that tend to go south much past ISO 800 are not optimal platforms for a lens with this limited light gathering capability.

This lens is a twist zoom and when zoomed out to 16mm it is short and very compact and at f:/3.5 will suit well for travel photography, perhaps even inside museums.  Outdoors it will be terrific.  Zoom all the way in to 300mm and the lens becomes Gepettan, meaning it becomes a stunning twin to Pinochio's nose growing in length to nearly a foot long.  Thank goodness it stays nice and light.  There is a simple lock to lock the lens at 16mm to prevent zoom creep if carried facing down.

This second generation lens has improvements in the lens elements and also improved Vibration Compensation (VC), Tamron's nomenclature for stabilization.  The Sony mount has no in lens VC instead depending upon Sony's in body stabilization.

Construction is complex with 16 elements in 12 groups, expected in a lens of 18.8x zoom range.  This lens also does decent close up work (calling it macro is mcmarketing) at 1:2.9 ratios or about ⅓ life size.   This brings the close focus distance to 15.3 inches.  That's quite impressive in a lens that wound in is only 3.9 inches (99.5mm) long and weighs 19ozs (540g).  It takes 67mm filters and there are 7 aperture blades for those who get excited counting blades to try to guess what the bokeh will look like.  It comes with a flower petal bayonet mount plastic lens hood which is useful at 16mm and for the most part useless at 300mm.  This isn't Tamron's fault, it's the reality of a single lens hood for such a wide zoom range.

To keep things sharp, minimize distortion and manage colour fringing, the lens has both Low Dispersion and Aspheric lens elements.  Considering a Canadian street price of under $700, photographers who have been around for a while will smile wistfully remembering what aspheric element lenses used to cost.

The PZD stands for the new focus drive system powered by Piezo electronics.  This improves focus response over the prior version which while accurate has been characterized as achingly slow.

Testing

For my test, I shot this lens mounted on a Canon 7D.  Thanks to Chris Atkinson at Henry's Newmarket for help arranging the testing.  The whole kit including battery grip is very manageable and I can definitely see going on a vacation with just this lens on the camera.  I tend to overload when I travel and it gets out of hand very quickly so a one lens, one body kit with just a flash in my pocket would be very nice.

Please note that third party lens makers always have to make a helicoid rotation decision.  Tamron lenses rotate like Nikon lenses, so Canon users will have to get used to focusing "the other way" when on manual focus.

My first shots were acclimitization shots, so done with the ISO punched up to 6400 and shooting handheld in what can only be characterized as crappy indoor light.  Either I have gotten a lot steadier, or the VC really makes a difference.  I was handholding at 1/60 with the lens zoomed all the way in to 300mm and getting very sharp images with the aperture all the way open.

In my testing, I found some visible but not horrible barrel distortion at the wide settings, that is pretty much gone by the time you get to 28mm on the zoom range.  This distortion is correctable in Lightroom or Adobe Camera Raw using the Lens Corrections that are built in.  Pushing into the 300mm focal length there is pincushion distortion that is less evident unless you have straight lines at the edges.  It's not awful and is readily corrected in post-processing.   I found the contrast falloff at the wide angle range to be subtle but there, much less evident at 300mm.  Vignetting exists as well at 16mm but is correctable via lens correction in post.

When first unboxed, I found the zoom ring to be unpleasantly stiff.  Certainly no risk of lens creep.  As I have shot the lens for a few days now, it has loosened up to be much more usable and there's no indication of coming sloppiness.

Since the lenses I own are almost entirely Canon's L glass, I am accustomed to the weight and metal construction of the Canon lenses.  The Tamron, being a primarily plastic body is significantly lighter.  The lens elements are all glass though.  I try to be very careful with my lenses, but I would be concerned about the Tamron if it got bounced around.

Is this the magical unicorn of the one lens?  Have a look at the sample images and make up your own mind.  I liked it better than the Sigma 18-250 or Tamron's own 18-270.  Yes it is more money, but I think you are getting a fair bit more for your money here.   I much preferred it to Canon's 18-200 (despite multiple tests, it's just not that good) and it compares very favourably with Nikon's 18-300 DX lens.

Handheld at 300mm 1/15

Handheld 4 stops of vibration reduction

Handheld, High ISO


Here we have a series of sharpness tests and a colour check.  These are JPEGs right from the RAW.

Overall, this is a really great piece of kit.  It has wonderful range at a fair price for the capability that it delivers.  If you are shooting Canon, I cannot think of a better choice.  If you are shooting Nikon, it is a strong alternate to Nikon's own 18-300.

Perspectives on Photoshop World 2014 Las Vegas

pswpp_w699_h367.jpg

So straight up, I am a huge believer in the work that the people at KelbyOne do when it comes to photographic and related software training.  They have been in my personal experience, unfailingly supportive, friendly and consistently deliver great content.  I just returned this morning on the red-eye from Las Vegas and wanted to get my thoughts down before I fell asleep (again). I flew in a bit early because there is a lot of interesting stuff to shoot in the Las Vegas area, especially if you are willing to get off the strip.  In truth, I shot nothing on the Strip at all, it's not really my scene.  I did do a helicopter trip to the Grand Canyon, went to the Valley of Fire for sunrise, went to the Neon Sign Graveyard and also did a Pre-Con workshop with the inestimable #JoeMcNally.  The Pre-Con is an add-on package to Photoshop World and if there is one you want to do are well worth the time and money.  My friends Isabel and Stephanie did a Pre-Con on light painting with Dave Black and said it was really good.

For those who've never been, Photoshop World #PSW14 is the firehose of training.  You choose your tracks, your instructors, your classes.  Show up awake, and prepare to drown in knowledge transfer.

This year, I want to thank Glyn Dewis, Jim DiVitale, Joe Glyda, Raphael "RC" Concepcion, Roberto Valenzuela, David Ziser, Dave Cuerdon, Jason Groupp, Dave Black, Moose Petersen, Julianne Kost, and of course, Sergeant Major Joe McNally (rank earned while he was "encouraging" us during his workshop) for delivering superb content in a friendly and powerful manner.   I'd like to thank Bill Fortney for pointing out again that Moose Petersen suffers because people confuse me for him.  (He's the one with talent!)

Classes start right after the Keynote and run into the early evening.  PSW also has a welcome reception where you can have a beverage with the instructors the first night, a party (if so inclined) the second night, a Midnight Madness bash the third night and a big wrap up with videos and prizes as the closing event.  There is a tradeshow floor with plenty of vendors to talk to as well.

One of my favourite events is The Art of Digital Photography where some of the instructors present their personal best in a slideshow format.   Dave Black always manages to pull tears and did so again with his moving tribute to Michelle Kwan.  McNally is always disarmingly funny.  Di Vitale always kicks off and shows why he is the master of the composite.  Julianne typically does her presentation in parts and is one of the few who really make iphonography truly impressive.  Joe Glyda, always has a personal assignment, this time was a dam assignment from the Hoover Dam that was peppered with Joe's moderately bent sense of humour.  First time presenter Bill Fortney showed his beautiful Americana landscape and macro work.  The session is always closed by Moose whose images remind us why he so loved as a landscape artist.

The Kelby team do a great job at organization managing over 3,000 attendees with people whose full time jobs at Kelby Media have nothing to do with events management.   There are always some hiccups but I find that when you ask politely, most of the time things are sorted immediately.

The Las Vegas event is at the Mandalay Bay so the hotel is connected to the conference which adds convenience.  Las Vegas certainly has the hotel space for a conference this size and is a fairly reasonable plane ride.  Food and activities are very expensive however as the entire goal of the city appears to be to separate you from your money as fast as possible.  I've attended PSW in Washington DC, Orlando and Atlanta and found it more economical but definitely not as convenient.

Up to now, PSW has happened twice per year.  It looks like there will be only one in 2015, August 10-13 in Las Vegas.  Given the amount of work, and the incredible coordination required, I can certainly see the rationale for consolidation.

The big question people ask me is if it's worth it.  I have to say yes.  Consider it a $2000 investment in yourself.  You have airfare, hotel and attendance not including meals and any other entertainment, but I don't see any other option to get this much variety in training, with this pantheon of instructors anywhere else.  Jason Groupp did advise that WPPI is a larger event, focused on Wedding and Portrait photography and that may be an alternative if one of those is your specialty.  I like that at PSW I can learn about pretty much anything in the realm of photography and software editing from a wide variety of instructors and know that their content is backed up by superb video training online.

What would I change if asked?  I would definitely look at making the Pre-Cons a two day event.  While they are an extra cost, I would definitely do two, because of the actual photography involved under the leadership of great instructors.  Consider this.  The Pre Con with Joe McNally cost less than some lesser known offerings of similar duration.  And it was with Joe McNally.  Joe was there early and his entire crew built us 6 different sets, arranged the talented artists to be there and did all the setup, and provided all the lighting.  Big thanks to John and MD, a huge shake for my friend Michael Cali, and also a cheer for Joe's wife Annie.  I have done a number of classes and workshops with Joe and I ALWAYS learn something new.  Here are a few of my own images from that workshop

McNallyWkshop-028 McNallyWkshop-043-Edit McNallyWkshop-046-Edit McNallyWkshop-056-Edit McNallyWkshop-094-Edit

I would also suggest that the classes explicitly advise whether they are tutorials or slideshows.    My personal preference is the tutorial and my hat goes off to my new mate Glyn Dewis who in addition to being a brilliant teacher is one of the nicest fellows I have ever met.  He is incredibly gracious and easy to talk to.

If your eyes are beginning to strain or you like to take notes, the ProPass option (extra $$$) is definitely worth it.  You get early access to front row seating, early entry to the keynote, a ticket to the event party, some swag and a discount coupon for the Kelby bookstore.  Corey Barker's latest book moved from $42 to just over $10 for me as a result.

In the years that I have been going, the tradeshow floor has gotten smaller with fewer vendors showing up.  I doubt that Kelby Media is hosing anybody to be there but it would be nice to see a lot more vendors and more vendors with actual stock to sell.  Ordering over the Internet may be the way that many people shop, but sometimes personal service should turn into an immediate reward.  A big shoutout to my buddy Joe Johnson Jr, and the rest of the great people at Really Right Stuff for the time that they spent with Isabel and Stephanie, talking about the best route for tripods and supports.  I think everyone knows that I believe that the products from RRS are the best on the planet.  Their new video head is really impressive and Joe said he was going to send me one of their new sliders for a heavy duty evaluation.  I was also very impressed by the Phottix line of products.  Jason had never laid hands on the Mitros+ flashes before and was getting great multi flash radio controlled TTL exposures in his class in minutes.  The user interface could not be simpler.  The Mitros+ sells for about $400 and is as powerful as a top line Nikon or Canon TTL flash but also includes a radio transceiver built into each unit.  For those who already own a bunch of TTL flashes but want the efficiency of radio instead of infrared (I still stand by my statement that just because Joe McNally can make infrared work at 100', the rest of us develop apoplexy trying to make it work at distances greater than 10'), the Phottix ODIN system gives group controls, radio transceiver, channel flexibility and much more.  I will be pushing on my Canadian affiliate partner Henry's to start carrying these units in Canada.  Phottix also has this really cool collapsible beauty dish that is very impressive.  RC stopped by and he talked to me about it at some length.  Sadly B&C and Hunt were sold out and B&H was only doing web orders.  Hopefully we will see these locally soon enough.

Some attendees say that the event should be longer.  I think an extra day of pre-conference and one more day of classes would be ideal.  Of course I would then need several days to recover and would definitely look for transport other than the sardine tin crush of Air Canada Rouge.  That is a really horrible travel experience despite the great attitudes displayed by the flight attendants.   It would be easier of course if other travellers did not think that a small automobile qualified as a carry on and learned that one carryon and one personal item are not the same as four pieces of monster hardshell luggage.  And a screaming baby is neither appreciated or wanted by ANY other passenger.

I need to thank Moose for his sense of humour and for having his photo taken with me to help direct people to the real Moose Petersen.

I suppose I should disclose that the old line "what happens in Vegas, stays in Vegas" should be modified to "what happens in Vegas, ends nearly immediately in Vegas" so before either Steph or Isabel post anything (they are on a plane as I write this), I did actually get married in Vegas to a lovely lady named JaneMarie courtesy of the very talented wedding photographer and instructor Jason Groupp.  Fortunately for JaneMarie, the wedding was annulled before class was over.

Photoshop World returns to Las Vegas in August 2015.  You should go.  It's in my plan now.

REVIEW : Wacom Cintiq 13HD Drawing Tablet / Display

800x600_13HD_01.jpg

Some folks really struggle working with a Wacom tablet.  They find it difficult to relate the position of the pen on the tablet to the work that they want to do.  I have students who bought a tablet but gave up on it pretty quickly.  Sad because when you invest time, they can become indispensable.   A quicker route to success might be a tablet that is also a displayI bought the bigger Wacom display / tablet the first year it arrived.  I don't have the touch version and I'm absolutely ok with that.  Being able to tilt the screen at any angle and draw right on it for editing images, or when I think I can actually draw is nothing short of magical. As I am doing more tutoring and mentoring, I was thinking of something that would take up less space and still give me all the power of the big Cintiq.  Chris Atkinson at Henry's of Newmarket agreed to help me out.  He brought in the Cintiq 13HD for me to review and try, on the understanding that it had better not be coming back.  He has no worry on that score.

Findings

If you already use a Wacom tablet, the drivers you have probably work.  If you don't and you use a Mac, download the latest drivers from Wacom's site because the included CDs are basically useless to you.

I am using the Cintiq 13HD with a 15" Macbook Pro Retina so the connections were (mostly) straightforward.  The Cintiq needs a USB port AND an HDMI port.  My Macbook has the HDMI port but if yours doesn't you at least will need a display port or Thunderbolt port and a Thunderbolt to HDMI adapter.  This should be in the box frankly and that it isn't is cheap to the point of dumb.

800x600_13HD_07

You will also need AC power.  Much is made of the portability of the Cintiq 13HD and it's true so long as AC is available.  It is, after all, a display.  The cable is a bit of an octopus having the HDMI and USB at one end, a tap for the power connection and a single connector at the Cintiq end that is reminiscent of Apple's old 30 pin connector.  The cable is about ¼" in diameter so it doesn't bend well and takes up space.

Wacom pen

Wacom includes their excellent pen in a nice presentation case along with an assortment of alternative nibs along with accent rings to personalize the pen.  The finish on this pen is nicer than on the pen for my other Cintiq or for the Intuos 5 tablet that the Cintiq replaces.

800x600_13HD_01.jpg

800x600_13HD_01

The Cintiq has four soft buttons and a "rocker-wheel" with centre button on one side of the unit.  The screen is blessedly matte so not fraught with reflections like so many other displays.  Colour fidelity is very high, matching the colour corrected 23" Cinema Display I have nearly exactly out of the box.  I am having issues with the Color Munki Photo software with multiple displays with Mavericks and so have not yet promoted the Cintiq to primary, and done the reboot dance to see if the software can calibrate the display.  Hopefully some day XRite will manage to get their thumbs out and fix their software.

The buttons and wheels are all programmable through the Wacom preferences tool on the Mac, I can only presume that they have a similar offering for those running Windows.  I find them a bit less usable than on the Intuos or the bigger Cintiq.

Mass Moving

800x600_13HD_02

The Cintiq 13 is designed to be lightweight and it is.  It comes with a cover/stand that has three different lean angles in addition to flat.  It does not slide around but it does tend to wobble a bit and it is more work than it should be to click the Cintiq into a specific lean angle.  I wish that this was more stable.

Usage

My testing involved using the Cintiq as a second display and as a working tablet.  It's a nice display but smaller than a usual desktop.  Screen resolutions are limited to 1080p, 720p and 1600x1200.  Default is 1080p which is nearly illegible for my eyes.  I've set mine to 1600x1200 and it's ok, 720p makes a Photoshop an exercise in moving around so that doesn't work for me.  I would prefer more resolution choices than are offered.

That stand is also quite annoying if you don't get the screen positioned just right, tending to fall over a lot.  The price of portability I guess.

As a tablet the Cintiq works very well.  I found it gritty at first but more use smooths the nib out and it now rides smoothly.  I got used to working on big displays so I have had to relearn zoom and move keystrokes in Photoshop to move around on images.  The big deal for me is the ability to engage the pressure sensitivity as a brush function and this worked flawlessly.  I was able to control filters and masks not just by drawing but also handle flow rate and such using just pen pressure.  Just like you should be able to do.

Summary

wacom-cintiq-13HD-img3-l

Should you buy one?  Your use case will determine.  I did because the device fits my desired use case and because I was able to purchase mine during one of Wacom's irregular dealer rebate sales.  You have to look for those, but when they come you can usually save over $200 on the purchase of a Cintiq.   There are real downsides, including the big cable, the remembering to flip your display settings in your computer if you need the cable exiting the left side of the unit, and a high regular price.  Wacom also does these tablets that are also Android tablet computers, but at their regular selling price, I don't see them flying out of any stores soon.   On sale you can usually find a Cintiq 13HD for under $1000.  That is a lot more than a decent LED powered IPS LCD display and a Wacom Intuos 5 tablet, but there is a convenience and usability factor you just don't get any other way.

Addendum

Writer Steve Walker does and amazing job in his work on tablets of all types. Check out his work at https://tabletfeast.com

FIRST LOOK : Macphun Tonality and Tonality Pro

tonalityproicon.jpg

I try to keep up with what's new in editing and post processing offerings.  When I first saw the offerings from Macphun, I was underwhelmed, but in the last six months we have seen significant enhancements in their offerings including Intensify Pro, Snapheal Pro and Focus Pro.  Unlike other vendors who put software into a suite and offer a bundle, Macphun Software goes the individual product route.  It's good because you only get what you want, but if you find yourself liking what they do, it could end up costing you more than a suite.  Macphun is getting pretty close to that point with the release of Tonality.  In fairness they do have a bundle, but that doesn't help those who've been loyal from the beginning and bought products as released.Tonality (and Tonality Pro) are another in a limited but wonderful specialization in black and white conversion.  I've talked about Silver Efex Pro 2 from Nik and Perfect Black and White from OnOne. The team at Macphun is comprised of many of the original (pre-Google-gobble) Nik Software folks.  Thus, you know that they know their way around photography and their way around a Macintosh.  One of the criticisms levelled at Macphun is that their software is Macintosh only.  Having spent a large part of my life at a software company, I've seen what happens when a small focused team gets stretched too far across more platforms than they can reasonably cover.  It's not good for anyone, and fortunately for me, and people like me, Macphun chooses (for the moment) not to overextend themselves beyond the Macintosh.

TonalityPro1


Tonality Pro (pictured) has the standard look and feel of a Macphun app.  A nice large working window on the left and scrolling menu / function bar on the right.  There are disclosure triangles to collapse sections to increase ease of use ( a la Lightroom) and all the expected functionality in a black and white conversion tool.  Macphun puts heavy emphasis on UI sometimes referred to as User Interface but also known as Usablity Index.  Having done seminars on Intensify Pro and Snapheal Pro, I've seen the ramp time to being comfortable being shorter for new users than some competitive offerings.  What is also good is that as a user develops skill, there is not a beginner wall to run into,  Macphun software has functionality that advanced users want and will use.

Like OnOne, but unlike Nik, Macphun supports Layers natively in their apps.  This makes the non-pro versions pretty useful for people without Photoshop.  The software doesn't have the scope and scale of Photoshop layers, but is quicker to learn and for many, easier to understand.

The Tone controls are similar to those found in Lightroom.  There are master exposure and contrast controls, including what Tonality calls Smart Contrast, then individual controls for Shadows, Midtones, Highlights, Blacks and Whites.   One could look at this as a simplified Zone system offering five zones instead of eleven.

The next section is Clarity and Structure.  Here's where Tonality starts to step out ahead.  In addition to macroscopic Clarity, there are also individual controls for general Structure and Micro Structure.  As details are a big part of the Black and White movement in general, these enhancements are very welcome.

Most all B&W converters bring the ability to apply a digital colour filter as we did when shooting black and white film.  Tonality not only brings the filters, you can control both the Luminance and Saturation of the filter.  I particularly like how intuitive this presentation is.  You can do this in other software, including natively in Lightroom, but I think the Tonality model is much easier to understand for new users.

Next you can choose to Split Tone, with separate density controls for Highlights and Shadows as is expected in a split tone or duotone control.  These features are not widely used in any software but when done well can really add significant interest.

There is a separate control specifically for Glow, a very nice feature as anyone who has come to love Nik's Glamour Glow will tell you.

There is also a blur control, that you can manage radially, similar to what is Lightroom, Photoshop and other software.  Again the UI is kept simple and understandable.

Next up is Texture.  Many photographers love the ability to overlay a texture to drive a mood, and this usually involves sourcing a texture and then a trip to Photoshop to apply a new layer with the texture and then working with the blend mode, and opacity to get the look you want.  Tonality brings it all to you simply in a module.  24 sample textures are included and you can of course load your own.  Blend modes are limited to Normal, Multiple, Soft Light, Overlay and Screen so Photoshop gives you more options, but I've heard from educators as sophisticated as Scott Kelby that these are the ones 99% of folks will ever need.

As one would expect, there is a Vignette and a Grain control.  They have the expected features and are easy to use.

There is also a Photoframe feature similar to the tool in Perfect Photo Suite but with only eleven choices.  Certainly sufficient to get started and the user has control over frame width.

The final individual control is Opacity to control the overall density of the combined settings.

Tonality also provides a substantial set of Presets to start with to use directly or as building blocks to your image.  Because there is the capacity for Layers, you can apply multiple Presets.  One might think that there is only one set of Presets called Basics because of the orientation of the disclosure triangle.  This is not correct as the number of Preset sets includes Basic, Architectural, Film Emulation, Portrait, Dramatic, Outdoor, Street, Vintage, Toning and HDR.  There is also a block for user created presets as well as a Favourites bucket.

Looking along the top bar we see the usual open, save, share, zoom and undo tools.  There is also an eyeball to quickly switch preview modes, a very nice cropping tool and help.  On the upper right there are Histogram, Paint (like painting on an inverse mask) with the expected size, opacity, feather, softness and brush type choices, Erase (paint on the mask), and a Graduated Filter tool.

In my test image (below) I found a limit of eight layers when used as a plugin from Lightroom.  I also discovered that the crop tool is not there when used as a plugin and I think that it should be for the simple reason that if you apply a photo frame and then want to change the crop, well you will lose your photo frame.  It's nitpicking but that's my observation.

Tonality Pro Example


The default return format is TIFF which will compress all the layers created in Tonality Pro when round-tripped from Lightroom.  You can also set the format to PSD, but the default setting in Tonality Pro is to flatten all the layers for the return, so if your expectation is to be able to hop in and out, and tweak layers after the fact, forget that.  It's disappointing that this so.  I could not find a preferences option not to flatten and did not find anything on this in the otherwise excellent online guide and tutorials.  Hopefully the Macphun folks will read this and consider it a feature request, or if it's already there, point out to this user how to do it.

Macphun does produce very good tutorial offerings in the form of videos and online guides.  Not all links resolve everything right now, but this will improve over time based on past experience.

When you mouse over the histogram a hidden feature appears that I really like, this is the Zone System overlay.  It shows hashes in your photo for each zone as you mouse down the scale.  Sadly there is no function I could find to change the colour of the hashmarks as grey on black and white is not particularly user friendly.  Perhaps this could be done in an update.

Should You Buy It?

For many folks, plugins are like candy, there are never enough.  At $60, the Pro version is not stupid money, but considering everything you get for $150 in the Nik suite, some would (ok have) argued against the spend.  I do a lot of work in black and white and while these days, I do most of it using The Digital Zone System from new friend Blake Rudis, the spend was worth it to me for speedy options. I really like that I can work in layers and manage the opacity of each layer, and that I have rich masking tools in the product.  It has a very usable interface and the learning curve is not steep at all.   There are items that are significant "missings" for me, but these may not be the same for everyone.  If you don't own a black and white conversion and editing tool, and don't want to learn to do all this work manually in Lightroom or Photoshop, Tonality Pro is a really good bet.  Now if you don't need this to be a plugin, can live with five instead of eight layers and don't care about blend modes, zone systems and colour bleed capability, you can get regular Tonality through the App Store for $20.   For lots of people, that could be more than enough.

Support The Photo Video Guy by purchasing Tonality Pro through my site

Tonality Pro

Review : The Profoto B1 500 AirTTL System

Profoto-B1.jpg

When I first saw the announcement of this system in late 2013,  I was really excited.  Consider the following;

  • A fully self contained studio grade flash with 500ws output
  • A fully self contained power source in the form of a Lithium Ion battery
  • Complete remote control including power, modelling light and test from the hotshoe of my camera
  • Full e-TTL II integration with my Canon DSLRs
  • Full remote manual control to use with any other camera such as my Hasselblads or Leicas
  • A light weight, highly portable flash head that only needs a stand
  • Ability to use all of Profoto's light shaping modifiers

If all this sounds pretty cool to you too, read on to learn how it all worksI have not been a Profoto customer so far.  I own Bowens lights and Elinchrom lights and think that they are both great.  Bowens are built tough but are heavy and the battery system accessory is not inexpensive.  Elinchroms are lightweight, have a brilliant collapsing soft box system, include a wonderful remote that works without fail but the heads are mostly plastic and don't handle a beating all that well.  My Elinchroms for battery based use are a completely different set of lights, lightweight and convenient but needing adapters to use existing light modifiers.  None of the studio strobes I own or have used up until now have TTL flash support.

The other issue is that Profoto kit is expensive.  Like about double what its competition is except for the reflectors which are ridiculous money.  Profoto has a wonderful reputation for great light and great tools to be sure, but having witnessed Joe McNally make beautiful light with a match and a piece of cardboard I believe that beautiful light is as much talent as tech.

But to have really good TTL in a super powerful head that was portable and could use all kinds of modifiers, would be so nice wouldn't it?

With thanks, as usual, to Chris Atkinson of Henry's Newmarket, I have for a short evaluation period a B1 500 AirTTL light and Air Remote TTL-C controller.

Starting Up

Profoto-B1.jpg
Profoto B1

It seems that some organizations are overdoing the beautiful packaging thing.  I recently went through the unboxing of a Wacom Cintiq 13HD (review coming).  Took forever to get it properly unboxed.  Not so with Profoto.  Simple packaging without pounds of heavy black cardboard.  The light comes with all the necessary cables in what I would call a "gig bag" a soft well padded case with dividers to hold the light.  An immediate message that the thing is designed to be portable.  There's even a slot for the Air controller which is a separate purchase.

Profoto B1 Kit
Profoto B1 Kit

The battery came with a minor charge in it.  The charger is the typical block AC thing with a power connector that plugs directly into the battery.  The battery is charged removed from the body of the unit.  It actually reminded me of the Hasselblad mode of addressing.  Probably a coincidence.  It took about an hour to bring the battery up to power.

I like well written manuals but I also like intuitive UI design so I can get to work without having to crack the manual.  Here's how it went.

  1. Put the battery on charge
  2. Put 2 AAA batteries in the Air Remote TTL-C
  3. Put the B1 on a light stand with a boom
  4. Put the Air Remote TTL-C on the 1Dx
  5. Click the B1 battery into place
  6. Turn the B1 on by holding the on button and waiting for it to cycle up
  7. Turn on the Air Remote TTL-C and the 1Dx
  8. Aim light at model
  9. Shoot
  10. BANG!  Perfect exposure, beautiful, if very direct light (unit comes with an integrated reflector/ diffuser but no light shapers)

Darn, everything should work this easily.

Looking Deeper

Air-Remote-TTL-C-front

The piece that really makes the kit special is the TTL support.  Currently the only option is the Air Remote TTL-C for Canon but I understand that a Nikon version is coming.  Both the flash head and the remote have USB ports so the firmware is updateable over time.  The unit has three groups via buttons on the front but I've heard rumours that future firmware will support more groups.

The energy buttons allow you to control Flash Exposure Compensation in TTL mode, and basic output power control when not in TTL mode.  Power control can be managed independently across Groups A, B and C.  There are multiple channels available for radio communication with a range of over 100m in TTL mode.  There is no documented limit to the number of heads per group.  Canon's unit says a maximum of 15 600 EX-RTs can be controlled from their offering.

This is sort of amusing since you would need nearly ten 600 EX-RT units to match the max output of a single B1 Air.

The Model button turns the LED modelling lamp on and off and the Head button allows you to control which head you are working with if needs be.

The remote feels comprehensive not like it will fly apart in a strong wind.  There's a sense of "pro" gear therein.  The display is nice and bright and easy to read.  I was also very pleased to discover that you can also make all your TTL group and FE comp settings from within the camera and they pass properly to the Remote Air TTL-C and then onto the head.  Yes, I know this shouldn't be a surprise, but let's say other TTL radio options (like oh say PocketWizard) have been far below expectation.  Some folks believe that the Remote Air TTL-C is overpriced.  It certainly carries the Profoto premium ticket price, but take a look at the cost of Canon's own ST-E3-RT, a good device but more of a pain than the Profoto and like the Profoto it is a proprietary and closed system.

I also very much appreciated that I could set the flash(es) to either 2nd curtain sync or High-speed sync right from the Air TTL-C.  Older reviews griped about the lack of HSS but I suppose the one I got had the newer firmware that added HSS support.  So in that vane, the unit is fully firmware upgradeable via USB.

Moving on to the B1 head itself, again you feel the quality when you pick it up.  Mounts are solid and lock up properly.  The battery clips in properly and securely.  The handgrip makes handling the head very easy.   The head comes with a protective cap that when removed reveals the diffuser cover over the flash tube.  This is the first strobe head I have every used with a basic integrated reflector and diffuser.  It feels more robust to me than an exposed tube and modelling lamp.

Profoto uses a rubber ring with a clamp lock for their light shaping tools.  Profoto tools are a lot more expensive than competitors.  One thing that makes them different is that the external reflectors come in what Profoto calls zoom capable.  This simply means that you slide the reflector mount to the degree coverage marker you desire on the barrel of the head.  This could mean you need to purchase fewer reflectors in the long run.  Profoto also uses their own mount on a speedring for soft boxes.  It looks (on the web) like everyone else's speedring, with the exception that you have more control over how deeply into the soft box the nose of the head goes.

Many photographers don't start with Profoto gear and so may have an investment in other vendors light modifiers.  I was not able to find an adapter to mount Bowens reflectors or speed rings on the Profoto.  Elinchrom makes a Profoto mount for their collapsible soft boxes, and also make a mount converter to accept Elinchrom reflectors etc on the front while mounting to the Profoto head.  I bought two of the Elinchrom to Profoto converters and they work just fine.  I already have a mount converter from Bowens to Elinchrom so I will try that on top of Elinchrom's converter.  It's not quite so elegant as a Profoto Beauty Disk or Magnum reflector but it costs considerably less than having to buy new Profoto light shapers.  It works.  It's not elegant and does change the angle of coverage slightly but it will do until I can justify Profoto branded light shapers

There are also numerous off shore light modifiers available with mounts to fit Profoto.  In checking a variety of sources, reviews are uniformly poor citing low quality, poor fit, no fit, unreliable locking and other problems.  The photographer who elects to go Profoto is best advised to sell off older kit if possible and replace it with the best he or she can afford.  I did purchase the Fotodiox Profoto adapter for Bowens speedrings.  It looks and is sized identically to the Bowens brand, and works just fine.  I was also pleased to discover that the same adapter can be used with my Lastolite Hot style softboxes for shoe mount flash.  Lastolite makes their own adapter but delivery was going to be a while and the price is ridiculously high.

Conclusion

The real question is "is this thing worth the price premium?"

When I first bought my Bowens, I did so because their light shapers were myriad, reasonably priced and their heads well built.  I quickly became frustrated by their poor remote control option which is infrared line of sight requiring a blood sacrifice with every use and that I had to pay a lot more to get radio remote.  Now of course, the PW cards are gone and Bowens offers their own proprietary radio control in most kits.  Still no remote power setting or similar useful features.  Because of this, and the absolute pain in the arse that setting up Bowens softboxes turned out to be, I went with Elinchrom BRX heads.  Very light and a wonderful radio control system.  But they don't handle abuse well and I am not nuts about the mounting system.  Still they became my go to heads.  And then I needed battery power.  So I bought a set of Elinchrom Ranger Quadras, partly because my flash mentor, the inestimable Joe McNally recommended them as lightweight, reliable and lots of pop for the dollar.  They work great, but you need to run cables from the power pack to the heads, and you need adapters to use regular Elinchrom light shapers.  Still, a great system, except for that wire issue.

None of these solutions brought TTL.  I still use a light meter.  Many folks don't because in truth you can get to decent in exposure in three or four test shots, but I like the idea of the light meter, except when the subject is moving in relation to the lights.  TTL, for me at least, has always been a good place to start, usually requiring a bit of flash exposure compensation but never really far off.  Hence the simple love affair with the Canon 600 EX-RT setup.  Light, transportable, TTL, lots of groups and independent control from the top of the camera.

Take the power of the Bowens heads, add the TTL capability of the Canon flash system, add the flexibility to use my existing Elinchrom and Bowens light shapers.  Eliminate cables completely.  Give me serious range.  Add second curtain sync and HSS to studio power strobes.   And control the whole thing from a robust legible controller on the top of the camera.  That's the Profoto B1 Air system.

Profoto B1 Location Kit

So the answer is yes.  The Profoto B1 Air system is absolutely worth the investment.  So much so that despite having many lights, I have purchased the Location kit that has two heads and the car charger in addition to the regular charger.  I've already put my first pair of Bowens 500 Pro heads with PW receivers up for sale.

The Scintilla of Difference

divine_fire_spark.jpg

I was recently watching a session with one of my personal favourite instructors and photographers, Mr. Joe McNally, and he used this phrase in part of his discourse.  He described it as the difference that sets your work apart from all the other folks doing something very similar.   As he often does, a word from Joe prompts me to think deeply about a concept.  Want to learn all about this? Scintilla means a tiny trace, or spark, of a specified quality or feeling. What sets a great photograph apart from a good photograph is the scintilla of difference.

Think of this.  How many sunset photos have you seen?  How many have you shot yourself?  After being involved in photography for over 35 years, I've made more than enough images myself and when I worked a long time ago in photographic retail when film processing was a big deal, I saw literally thousands of sunsets.  To the person who made them, each of them was wonderful and special.

The question to ask is, do they set themselves off differently from every other sunset?  We have all seen a sunset that was beautiful or majestic or had amazing colour.   We've probably made images of them.  They may still ring great bells for us, but most of the time that is because they act as a mnemonic trigger, releasing the memory of what was happening and how the shooter felt at the time the photo was made.  For those without the memory, it's a pretty picture.  Probably.  Or it might be the ten thousandth sunset picture that they have seen and they are now so jaded by sunsets they could care less if they ever see another sunset image.

This leads to the next major step in our own development as artists and as our own photo editor.  There is nothing wrong at all with liking one of your images.  There is nothing wrong with you printing an image of a sunset and hanging it in your home if it matters to you. The question is whether it belongs in your portfolio or your online archive of work.  If it's just another beautiful sunset, where its only power is your personal mnemonic trigger, then the answer is probably not.   We've talked a lot at the camera club and in my private classes about the importance of framework in the work you publish.  Does the image tell a story that a viewer can clearly understand?  Does the image provide a framework where the viewer can write his or her own interesting story?   At a recent club challenge, local photographer Bill Bell shared a street image he made in Paris.  It was extremely well received and not for the technical excellence.  What made the photo special was the framework created so the viewer could write his or her own story about the woman in the image.  About ten members offered their perspective and their stories were different each time.  If Bill knew the real story, he smartly kept it to himself, the viewer's own stories being much more poignant and relevant to them.

Great photos have this spark, this scintilla of difference that sets them apart.  I think of Alfred Eisenstadt's images of Marilyn Monroe in her back yard, Arnold Newman's portrait of Igor Stravinsky, Gregory Heisler's image of Muhammad Ali, John Paul Caponigro's work in Iceland or Moose Peterson's bear series.  There's a certain something that sets those images apart, something that the artist has seen and made available to the viewer, even when separated by decades as with much of Eisie's work (Alfred Eisenstadt's book Witness to our Time was my personal inspiration to take up photography).

Social media encourages people to publish everything.  When Google + first started up the Food Photography community, the work was fascinating and you could see that the publishers were trying to tell a story or show a set up or coach newer shooters on a process.   Now it is a near endless movie of out of focus, poorly exposed, badly composed photos of people's lunch.

One of my friends, Valerie, really enjoys flowers.  She grows them, she hunts them and she photographs them.   This is a very hard gig, and Valerie only does this to please herself.  Any photo editor will tell you that if you put an image of a flower in your portfolio it had better blow the doors off, because flowers are naturally beautiful.  Your image has to do more than just replicate the beauty.   Yet every day there are thousands of pictures of very beautiful flowers published on social media.  They are beautiful.  And they look like every other one with very rare exception.  When Valerie puts her artist into a flower image, there's more there than a beautiful flower, and for the image to have any weight at all, there has to be.

As a student, a teacher, a mentee and a mentor, I search for the scintilla of difference.  I've missed great images because I was too busy focusing on getting a great image.  I've made hundreds of images while doing an assignment and come back with nothing.  When mentees ask how many keepers I have at the end of a day, I tell them that I have had a very good day if I retain 6%.  I have worked very hard to be a very tough editor of my own work.  I don't publish often and I am very lucky that when I do, I receive the kind of critiques I need to get better.  Coming full circle, the best instructor I have ever seen give critique is Joe McNally.  He is clear, he is direct but he is never demeaning or arrogant.  I like to believe that I have developed my own critique style based on what I have learned from Joe and also what not to do by watching other critiques, the providers going unnamed so as not to be rude.

So that's the challenge gentle readers.  Before you publish, heck before you even start post processing, does the image have the scintilla of difference that will set it apart, does it have the spark, that raises it above the fog?

Later

PS, could we all agree to remove the phrase "awesome capture" completely from our vocabulary as it is both meaningless and trite.

Whither Aperture?

aperturelogo.jpg

Apple's recent announcement to discontinue further development on both iPhoto and Aperture in favour of Photos coming in OS X 10.10 and IOS 8 may not have industry wide impact, but it certainly raises questions and speculation (much of it goofy) for customers.  Here's what I see.Many years ago, Apple took the path to a professional photographic editor and catalog manager.  At about the same time, Adobe released the beta of the product we know as Lightroom.  Aperture was unsurprisingly, OS X specific whereas Lightroom was available for both Windows and OS X.  Both turned out pretty great.  Over the last couple of years, Apple has taken flack for not really pressing hard on Aperture, despite continually updating the product, just not with big version numbers.  With the recent announcement, there's all manner of hyperbole that Apple is abandoning serious photographers. Apple understands where it gets its money, and that is the consumer market.  When they moved from Final Cut Pro Studio 7 to Final Cut Pro X, pros went batshit crazy waving torches and pitchforks.  FCP X wasn't bad, it simply was not as feature rich as FCP7 and it completely changed the workflow model for Non-Linear Video Editing.  The masses exited and went to Premiere Pro or Avid or something and the death gong was sounded far and wide for FCP X.  Apple handled it badly basically cutting its nose off to spite its face.  In the background they continued to work on FCP X and today's edition is all the things it should be.  It still has a more consumer oriented NLE workflow, but its death was greatly exaggerated.

Aperture will be supported on OS X 10.10   Customer libraries will continue to work.  Aperture users don't have to jump ship right now and in fact doing so is way premature for a couple of reasons.  What Apple won't do is take Aperture forward past support for 10.10.  So breathe easier and relax a bit.

Why Would Apple Do This To Us?

Simply, Apple believes that photos and photo management are integral to the operating system not an application.  When they merged the iPhoto and Aperture library modules, this was a strong indicator that directionally, Apple wanted to create separation between the editor and the catalog.  Photos which is going to be part of 10.10 is built using a developer tool called PhotoKit.  PhotoKit makes the image library part of the OS and makes the assets therein available to any application capable of making a call against PhotoKit.  This means that future editors won't need their own catalog or library module because these core services will be in the OS.  They are truly core services.

Photos will be unlikely to have all the edit functionality of Aperture on first release.  We'll get a better sense of what V1 looks like as OS X 10.10 moves through the formal developer process, but I think it would be premature to assume an Aperture V4 is going to appear inside Photos.

Your existing Aperture will work in 10.10   If I were an Apple Developer and was working with the developer preview and if I had Aperture installed on such a machine, then I would be able to say that it works just fine.  But, I'm not allowed to say such a thing.

Why Not Move Right Now?

Apple's library system for iPhoto and Aperture is a non-trivial beast. You could install Lightroom or Capture One right now.  Importing all your Aperture libraries is possible but to say it is ugly, slow and painful would be to grant it flowers and candy.  It's in the best interest of Adobe to get to work right now on a migration utility to move (safely and non-destructively) your images from an Aperture library to a Lightroom library.  Don't expect Lightroom to read the Aperture library natively, I really don't see that happening or being good for anyone in the long term.  The folks behind Capture One could look to do the same.  That migration is going to be key for the current big guns and they will have a limited window to do so.

Why?  Simply because Apple will offer a migration from their current library to the OS bound asset library in short order.   They have to do that, so the window of opportunity for a competitor to do a lift and drop out of the Aperture library to their own system is most attractive before Apple gets the new product out.  After that it's a different game again, because the new library architecture won't look like the current one on the Apple side, and I would not expect either Lightroom or Capture One to sacrifice their own library modules in favour of the OS X centric library in 10.10   Unlike Aperture, they work on Windows too, and Windows will not have Apple's new image asset functionality native to the OS.

But My Plugins Won't Work

This is a bunch of poop as far as I can tell.  Aperture isn't changing, so there's no cost to the plugin vendors that work with Aperture today from continuing to do so in the short term.  Once Apple gets the new library system into the dev channel, the plugin vendors will be all over that because it will give them yet another route to the images, with the ability to bypass Lightroom's library completely.  OnOneSoftware already runs completely standalone as do the Topaz tools.  Neither have a library system.  Apple will hand them full access to one.  Win for the plugins.

But Apple is Going All Cloud Everywhere and I Have Too Many Photos

This is yet another line of poop spewed by people who didn't fully read the announcement.  Is Apple committed to iCloud Drive?  Yes.  Will it be cheaper than alternatives?  Current guidance says heck yes.  Will it work beautifully?  I hope so, but Apple has not exactly knocked cloud out of the park in prior attempts.  More to the point. Apple understands that consumers like stuff on all their devices and cloud is a perfect way to do that.  At no time has Apple said all your data would be in the cloud.  You will get to pick and choose, just like every other cloud service.  Your photos will be where you decide for them to be.

So What Should I Do Photo Video Guy?

As the blind master said to Kwai Chang Caine, "patience grasshopper"  Or I think he did.  It was a long time ago.  If you are an Aperture user, keep using it.  It still works.  It will work for a long while yet.  If you aren't an Aperture user, now is NOT the time to switch or start.  If you are really concerned, take a class or hire a mentor to teach you Lightroom.  Download the 30 day free trial and poke around.  It's not the editor that is way different, it's the library and you REALLY want to get the library set up right the first time, otherwise the pain is manifest.  You can even start using Lightroom for your new stuff if you feel compelled to do so, but you really want to wait for someone to get a library porting tool out there because moving the content of your Aperture library to make it an import into Lightroom, while possible, is no one's definition of fast or fun.  You can do it, but you can also remove your own appendix with a scalpel, vodka and a hand mirror.  Can and should are not the same thing.  And if you aren't really pushing Aperture all that hard, just wait to see what comes in Photos when OS X 10.10 comes out.  If all your work is basic edits or Instapuke style filters, odds are pretty good that Photos will do all you want AND it will definitely have a library conversion tool.

Later.

PS Folks ask me why I hate Instagram.  First it's cheap repetitive crap and couldn't find its way to creative art with a map and a plane ticket.  Second the terms of service state that you agree to surrender your ownership to your content forever and ever amen.  Third it is owned by the greatest collection of privacy thieves and general scumbags in the interwebs, aka Fakebook.  And I hate those guys more than Instagram.   But I am an equal opportunity curmudgeon, I hate every organization who expects anyone to voluntarily surrender their intellectual property in exchange for identity theft and endless spam.

Although there are folks whose idea of creative art is an Instagram of their lunch salad and their intellectual property is mostly worthless so there you go.  But they aren't reading this.

First Look - Fujifilm X-T1

X-T1 Review-235Fujifilm is really pressing hard on the mirror less space and continues to evolve their offerings into highly viable choices.  They've also moved from a "cosmetics" first approach and are really hitting their stride in serious evolutionary approaches.  The X-T1 is the latest in their stable (at time of writing) and is, in my opinion, a real game changer, not just because of the body, but because of the increased focus on high performance glass.   Thanks up front to supporter of The Photo Video Guy, Chris Atkinson of Henry's Newmarket, for making the X-T1 available for a couple of days for this review.  I could not do this without your support Chris.  Readers, please support Chris and his store by doing some shopping at Henry's in Newmarket Ontario.

I want to go over the features/functionality of the camera and then log my impressions of each one.

Electronic Viewfinder

The electronic viewfinder has a 2.3M dot OLED display.  It's bright and has the highest magnification factor of any display of this type at  0.77x.   There are two modes FULL and NORMAL and these are good names.  FULL shows you all the info, including stuff you normally would not care about and NORMAL shows you the information you would want to see in a viewfinder, if you were say, a photographer working to make an image.  Because it is an all electronic viewfinder, the image is not what is actually coming through the lens so when you rotate the camera to a vertical orientation, the viewfinder needs to rotate to show that to you.  It's an electronic rotation and takes a bit of getting used to.  One thing to be careful of is that the viewfinder is very bright and the colours are super "popping" and this could make you conclude that the scene is different from what it really is.

Auto Focus / Manual Focus  / Focus Aids

Fuji has made real strides in their AF performance.  When the X-Pro1 came out, folks loved the camera but hated the slow AF.  Same was true for the original X100.  Fuji listened and have continually improved their AF code.  The X-T1 uses a combination of phase detection and infrared focus modes to give fast and accurate AF in all lighting conditions.  In fact, they claim it is the fastest Hybrid AF on the planet.  For me, it's very usable and certainly quick enough for most all purposes.  One of the biggest black marks I used to make against Fujifilm is now erased.

For manual focus, the camera has what it calls Split mode and when I first saw this I thought it would be an emulation of the old split ring focus model.  It's not.  What it is are two separate images, one of which can use focus peaking to help you get your manual focus nailed in.  The real test is of course very low light as with any camera.

X-Trans CMOS II Sensor

Fuji's X-Trans Sensor really made life great and difficult at the same time.  It's a terrific sensor.  The layout is also proprietary so software support for the X-Trans layout has been slow to come and often not very good.   This meant that users would have to endure the really horrible Fuji software to do the RAW conversion.  Fuji now provides for in camera RAW conversion (to JPEG) but that's not the same as having Lightroom or Capture One or DXO Optics do the work for you.

The X-T1 sensor is an APS-C sensor (1.5x multiplier for those who care) and due to its unique design does not have an Optical Low Pass Filter (OLPF) also known as an anti-aliasing filter.  Usually the absence of these filters increases the risk of moire on CMOS sensors.  X-Trans is really good and so you get the increased sharpness that leaving out the OLPF brings you but without (in my tests) the sudden joy of dealing with moire in your images.

Lens Modulation Optimization

Apple will tell you that when you control the hardware and the software, more control is possible.  Fuji clearly buys into that.  Take their proprietary X-Trans sensor, add in Fuji's own excellent XF lenses and then bind them together with Fuji's unique EXR Processor II and now Fuji can digitally optimize for softness towards the edges that naturally happens as the aperture is made smaller.  You can turn the function off of course, if you aren't using XF lenses, but maybe you'll want to stick with this top end Fuji glass for this benefit.  I saw no downside to the feature and it's one more thing that will save you time in post processing or the need to get too aggressive with your sharpening tools

Low Light - High ISO

The X-T1 does what all the better products are doing today and that is making heretofore unconscionable ISO numbers both practical and effective.  My Canon 1Dx goes to 204,000, Nikon's Df is absolutely clean at 25,600 (why it is lovingly called the Lord of Darkness).  Fuji pushes the X-T1 to 51,800 and that's pretty impressive considering the high ISO gods are typically larger sensor critters.  Auto ISO will only go so high as 6400, but initial work shows the X-T1 to be solid to 12800 and still decent at 25600.  If the difference between getting the shot and not getting it is ISO 51800 then get the shot.  If the shot is worth it, no one will see the noise.

This is one of the most powerful shifts in the current generational change in digital cameras.  Just three years ago, the ceiling was 6400 but great work has been done to really extend the low light capability in sensors.  Fuji has done a nice job.

Auto Bracketing

Fuji makes a big deal of their auto-bracketing options.  You can auto bracket white balance, exposure, ISO, dynamic range, and film simulation.

I suppose I will sound like a gnarly old man, but so what?  I surely get exposure bracketing, love the idea, do it regularly and every camera does it or should.  The X-T1 does too.  Yay.  White balance auto bracketing doesn't matter to me because I am not a JPEG shooter, and because for serious work I throw a colour checker into an image so I can process the white balance properly after the fact.  Others may love this.  I am struggling with why anyone would want ISO bracketing, so will go with, well it's here so use it if you wish.  Still don't know why you would.  I will talk about my lack of enthusiasm for any kind of film simulation shortly so moving on quickly.  Dynamic Range bracketing grows from work done to do in camera dynamic range expansion.  This is a bit spooky since there is no way in a single image to extend dynamic range, so how it's done is to make three images and then blend them together based on luminosity sections.  As the inimitable Danny Partridge said (look it up) "if it walks like HDR, and it talks like HDR, it's probably HDR."  Actually he was talking about ducks but the point is the same.

Film Simulation

Like every Fuji camera, Fuji includes film simulation or "looks" and as one should expect, the looks are for venerable Fuji film stock.  I shot a lot of Fuji film stock back in the day and different offerings definitely had different looks.  Film simulation impacts the look of the JPEG on the rear LCD and of course the output if you shoot in JPEG.  If you shoot in RAW it has no effect and that's the way I want it.  Film simulation is one of those features that I personally couldn't care less about.

Construction and Layout

This feels like a real camera.  There's metal in here and plenty of it.  Construction is solid and robust and there is excellent weather sealing provided.  I watch RC Concepcion try to drown one of these things and it kept working.  That doesn't mean it goes in the pool or the ocean, but just because it's raining, it doesn't mean you have to stop making images.  The camera is rated to -10 degrees which I cannot thankfully test at this time.

The layout is like a real camera.  I understand that such a phrase could sound trite or arrogant but I like dials.  Apparently so does the target market for the camera.  It has a real aperture ring on the lens, a real shutter speed dial and a real ISO dial amongst other controls.  Having to dive into a menu to alter any element of the light gathering triangle makes my teeth hurt and just as I loved Olympus' work on the OM-D E-M1 in the layout space, I think that Fuji has done a terrific job here.

The X-T1 does have a menu system and like the older versions it's basically a continuous menu - submenu structure, meaning there is less hopping around than you might find in other vendor's archaic menu structures (hey Canon, I'm talking to you here, or goodness forbid Hasselblad).  I'm not nuts about it and still believe that every camera manufacturer needs to accept that they are not software UI geniuses and go hire someone who is to do these things, but the menus are not completely impenetrable and at least the text is legible and unlike, oh say, Olympus, isn't fraught with colour coding that only makes sense to the designer.

Special Functions

There are myriad special functions built into the camera including creative effect filters and panorama mode.  These are very useful for JPEG shooters, but like film simulation, less useful for the RAW shooter.

The X-T1 comes with a slip on micro flash with a GN of 20 so it's just bright enough to make the image from on camera flash have all the depth and joy of on camera flash, in other words, crap.  Much better news is that the X-T1 has an infrared commander mode option to control other Fuji flashes.  There aren't a whole lot of choices in this space, so my expectation is that most buyers will be shooting the camera in available light.   The camera does pleasing have an X sync port on the front covered by a classic screw cap, that is sure to be lost on first removal.  Loss notwithstanding, serious photographers wanting to use this camera with classic strobes will find this very handy.

Video

The X-T1 does the usual selection of video options up to 1080/60p.  Fuji, I think, understands who the buyer is and after stating that the camera does do video, moves on rapidly to other stills topics.  A series of short clips shot with the test unit look like the 1080 video from any other camera, albeit with the shallower depth of field that the lenses I had enabled.
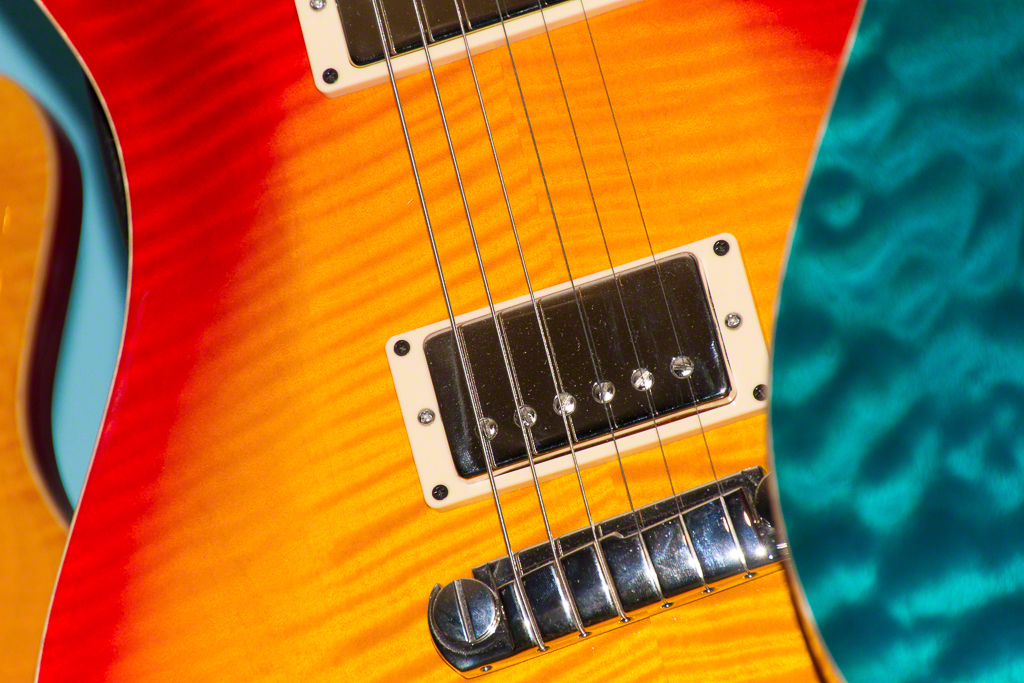
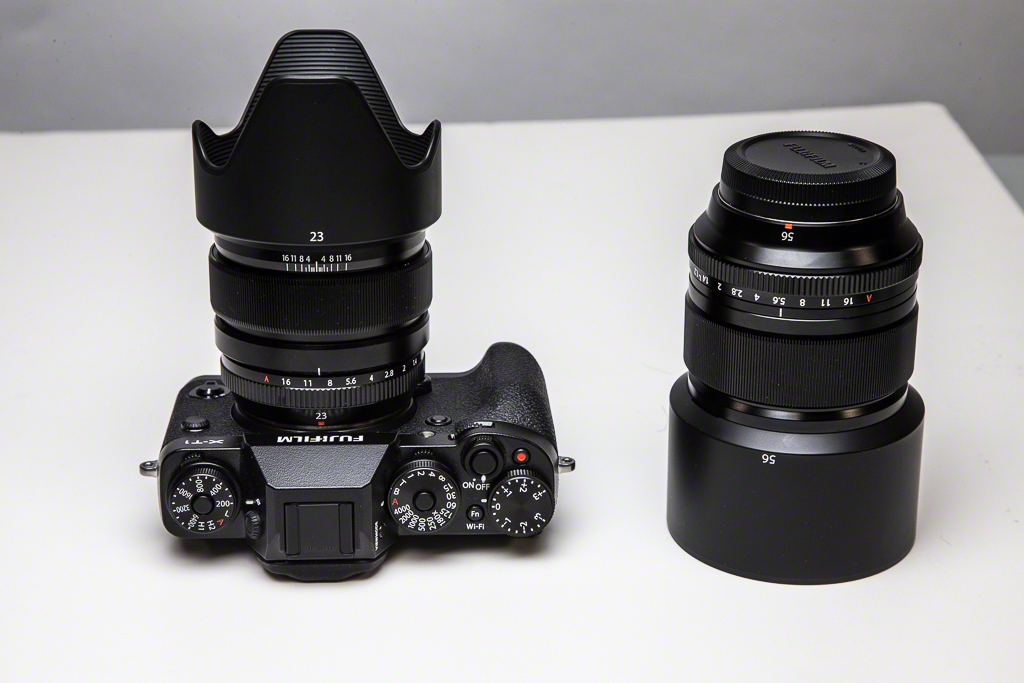
The Glass

For my testing, Chris loaned me two lenses.  The 23/1.4 and the 56/1.2.  They have the look of a full frame 35mm and 85mm respectively.  The build quality is excellent, they feel solid and precise in the hand.  Both lenses are weather sealed as well so quite practical.  The 23mm has a push/pull focus ring to switch it between manual and autofocus.  When in manual focus mode there is an honest to goodness hyper focal distance scale!  The 56mm feels similar, but isn't.  If you want manual focus with this lens, you have to use the camera body switch to do so.   The camera documentation suggests that different lenses must be switched to manual in different ways.  Neither of these lenses feature image stabilization, which could be construed as odd for "pro" (Fuji's word) level lenses.

Shooting Experience

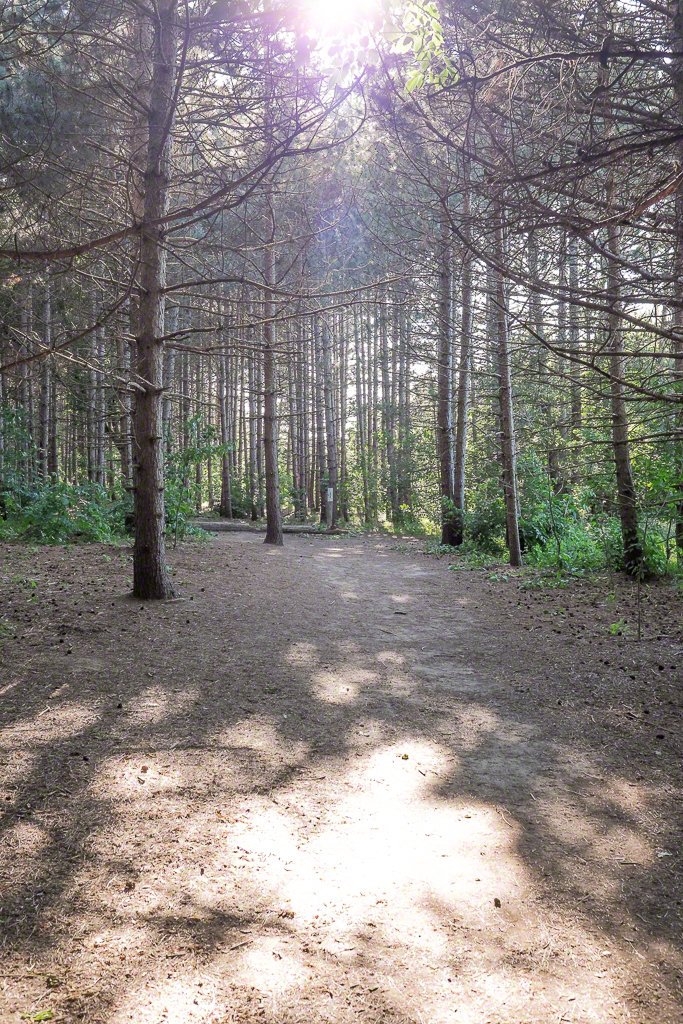
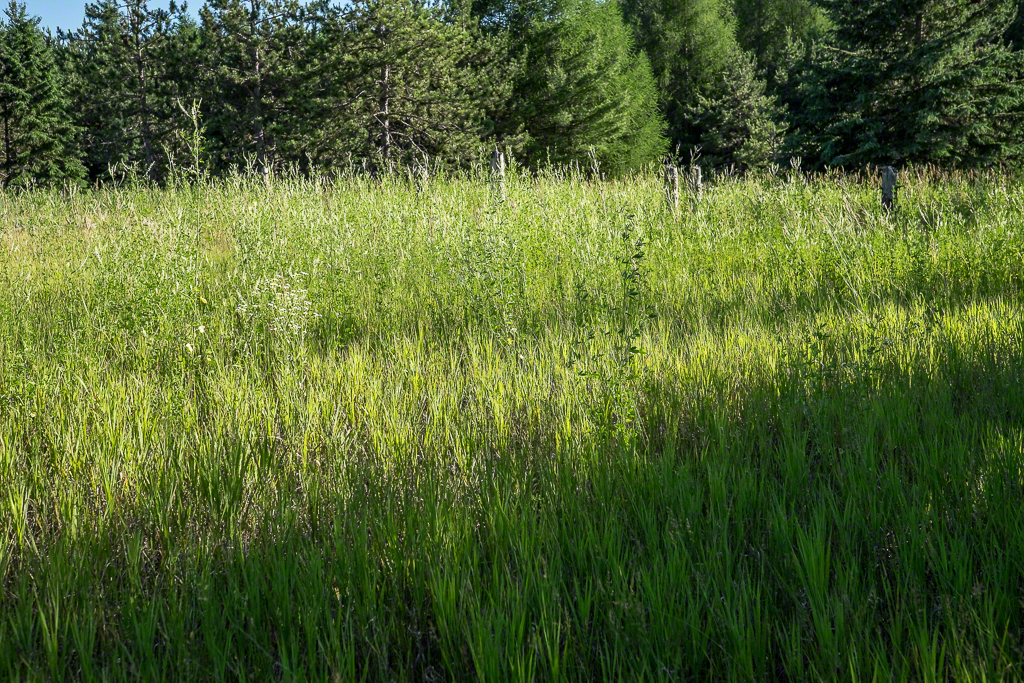
My initial test shots were done outdoors about 6pm so the sun was about 30 degrees in the sky, bright and cutting very harsh shadows.  I went for a walk into the woods to try for some flatter light with less heavy contrast.   The lenses are sharp, focus very quickly in AF mode, change relatively easily and come with decent hoods.  They accept standard 52mm filters but I did not have any mounted.  I was less enamoured with their manual focus.  They focus fine, but the focus ring has next to no tension to it so it feels sloppy.  Compare this feel to a true MF lens like a Zeiss or any one of my old Minolta Rokkors and they just don't feel all that precise.  The electronic aids like focus peaking are useful, but as I only used it briefly, I cannot say exactly how useful a shooter will find them.  I did not see the value as I do on my C300 or even the 7D with the Magic Lantern firmware.

My second pet peeve working with the lenses is that the A position, which enables Program or Shutter Speed preferred depending on other dial settings, is too easy to roll into or out of.  Frequently as I was dialling down for a smaller aperture, I would run right into the A mode.  This was frustrating requiring me to remove the camera from my eye to check.  There should be a lock or click stop or something.  A photographer less inclined to go to Aperture Preferred or Manual would likely not feel the same way as I do.

The body is wonderful from a fit and feel perspective.  It fits my hand well and while I did not get the extended battery grip for the test as I did for the OM-D E-M1, I am glad that one exists as I think I would want the extra power for a full day of shooting.  Your finger falls naturally on the shutter release and the camera holds well in one hand.  I particularly like that ISO, Shutter Speed and Exposure Compensation are proper dials.  Movies are started by the common flat red button and there are other programmable function buttons all over the camera with one on the top deck that is preprogrammed for WiFi.  Metering pattern is selected via a ring around the shutter speed dial and drive mode is selected via a ring around the ISO dial.  Acclimatization to this layout is very quick for an old manual shooter like myself and I really like the layout overall.  There is a button on the right side of the not a real pentaprism that determines whether the viewfinder is active, the LCD is active or the sensor detects your eye and automatically selects.  On the left side is a diopter control to set the viewfinder for your own eyesight.  For the first time, I can say that I liked an all electronic viewfinder without tweaking settings other than brightness.  I found the factory settings to be too bright on both the viewfinder and the LCD.  A bit of menu diving gets you to the settings to adjust these down.

I was very glad to have a real exposure compensation dial on the top right deck.  It is precise and easy to use with the camera to your eye, and with the EVF, you get exposure simulation so you get a very good idea of what the dialled in compensation is going to do.   I like this a lot when I am teaching as students "get" exposure compensation immediately when they see what it is going to do before the shot is made.

One thing Fuji loves is to program all manner of custom buttons.  It makes me nuts because nothing is labeled.  For example, the up/down/left/right rockers that you use to navigate menus have preprogrammed functions when you are shooting but there are no labels so it's a continuous lab experiment.  There are also two control wheels one front and one rear, and I'm going to have to crack the manual because so far I cannot figure out that they do anything regardless of mode.

The LCD is large and bright and will tilt a full 90 degrees.  I found myself using it like an old style waist finder and really liked that capability.  This would be a great way to shoot street scenes without making subjects uncomfortable.

If you want to do bracketing for out of camera HDR, getting there is easy, because it is a setting on the rotary switch around the ISO dial. You do have to use the menu system to select which type of bracketing you want, exposure, white balance, film sim, ISO, dynamic range, but this is a simple menu setting.  You cannot combine multiple bracket types.  The bracket options are ⅓, ½, and full stop increments.  I've written elsewhere that with the dynamic range in the sensors of 2014 bracketing increments of less than 1 stop are kind of pointless and it's disappointing that there is no larger increment option.  I find this lacking in a "pro" camera.  You only get three shots to a bracket, so Nikon shooters used to having up to 9 shots in a sequence are going to feel hard done by.  For my money, the small increment and limited bracket count is a mistake on Fuji's part.  HDR is very popular, and whether it is mostly ugly or not, Fuji should have paid more attention to exposure bracketing and less on goofy stuff like film simulation bracketing.  I would expect that the X-T1 buyer isn't spending all this money (my test kit was nearly $4K) just to put images up on Instapuke.

I tend to dislike multiple AF areas because I rarely find that the camera is selecting the most important focus point to me.  My usual route is to use only the centre point, lock focus and recompose.  This is not optimal on a tripod and I found that I was constantly going into the menu system to select where the focus point should be.  I could, and would, program a function button to get me here quickly but it is really annoying that so common a function would not be prepared out of the gate.

Processing the Files

Fortunately, Lightroom 5.5 has a RAW converter for Fuji's latest iteration of their RAF format RAW files.  I did not load the Fuji software this time.  My last experience with it was horrible and I was short on time.  Lightroom imported the files without issue but there are no lens profiles for the lenses that I was using so no corrections were available in automatic mode.  I also tried DXO Optics Elite 9 and it has nothing for Fuji either.

Images are sharp and clear, with good colour and decent dynamic range.  I could not get 10 zones but readily got 7.  Fuji's sensor layout is very different from the common Bayer layout so your histogram tends to show more separation of colours than with a Bayer sensor.  I did not encounter any moire in any of the outdoor shots.    Fuji has made their own glass for a very long time and the Fujinon lenses are well respected.  They still feature the EBC coating, that in the past stood for Electron Beam Coating.  Perhaps it still does.  Flare control is very good and I only got any serious flaring and contrast crashing with the sun high in the frame but still in frame.

Photo Mechanic 5 opens the files quickly for culling and represents the images similarly to Lightroom.  As I was shooting RAW, I am hoping that none of the film simulation crap was being applied, but it felt like I was shooting Fujicolor print film.  Everything is the tiniest bit green.

The X-T1 is a really nice camera, and I preferred it to the Sony A7.  Fit in the hand is better than the Sony and I was pleased to see the wider range of fast lenses compared to Sony who put out more bodies than they do glass.   The X-T1 is about the same size and weight as the OM-D E-M1.  The faster lenses and larger sensor give a much more full frame feel to depth of field and the lenses felt better in hand than the majority of the Olympus lenses except the most recent weather sealed zoom variant that I had with the E-M1.

Images are stored on an SD card, accessible from the right side (thank you!) so no need to remove grips or tripod plates etc.  The X-T1 has a new chipset so it can actually read and write the new UHS-II format cards at their maximum speed.  A nice thing, but not a deal breaker one way or the other.  The HDMI out is mini-HDMI and I liked that meaning I would not have to buy yet another HDMI cable if I wanted to push out to an HDMI display.

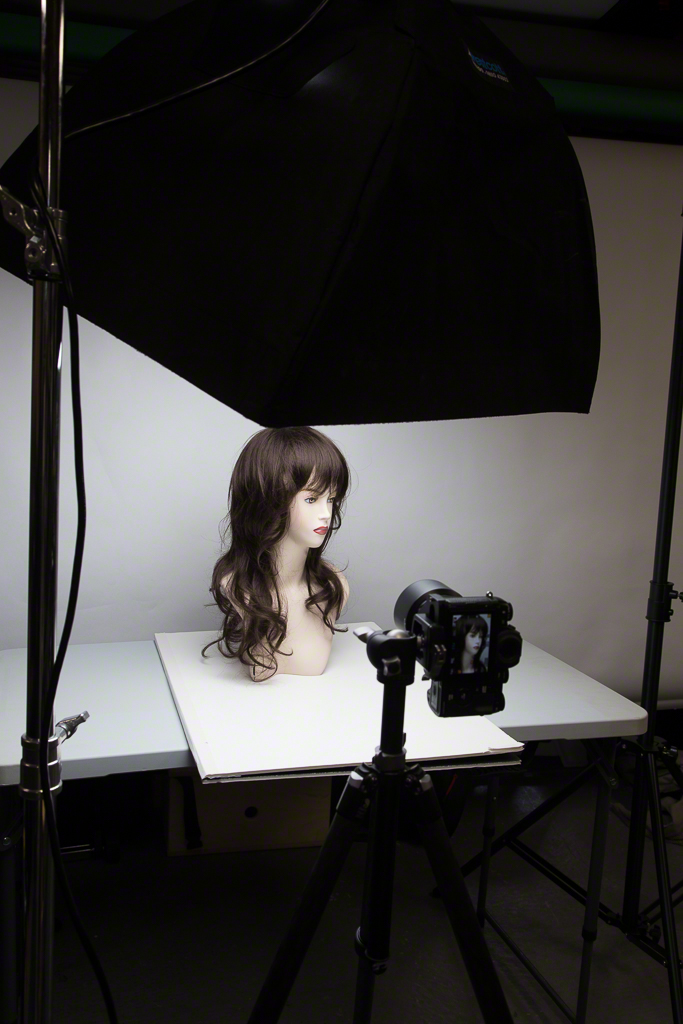
Working in the studio was quite pleasant.  I mounted an Arca plate to the base so I could use the camera on a RRS head and shot images of my patient model Sondra.  Lighting was very simple with a base level white board lit with a Westcott Spider-lite above and to the front.  Sondra's "skin" looks good to the eye but is typically white on camera and the Fuji is consistent there.  I used an Expo disc to make a custom white balance setting for this light and saw a real improvement, lending more credence to my suspicion that AWB in the X-T1 is a decent guess but not all too accurate.

When working in studio, I really like to tether my camera.  Like most every mirror less I have tried, this did not work with the X-T1.

Fuji's manual is not great.  Important sections are oversimplified and sections that are less relevant get too much attention.  I would guess that the manual was laid out by a product manager rather than an engineer because some functions show real bias (film simulation) where as others don't get proper attention.  This will be a case where a third party writer will do a much better job.  Fuji used to to do some very credible SLR and medium format cameras so it's not like they don't understand the important of good documentation.

I did however discover the uses of the front and rear rotary dials via the manual.  They are used to select effect filters and the like by default.  I would want to reprogram these to do something useful like allowing for shutter speed or aperture biasing in program mode.

Conclusions

Of all the Fujifilm mirror less cameras I have had opportunity to shoot, the X-T1 is my favourite by a long shot.  This is as much the camera layout and usability as the commitment that Fuji is making to higher quality and faster glass.  There are many things to like about the camera, and a few that are barriers to entry for my use cases.

Many folks looking at an X-T1 are looking to downsize from the larger and heavier DSLR kit while retaining prosumer level functionality.  From a size and weight perspective, the X-T1 definitely gets a B+.  It's not as small as other mirror less options but is well laid out for a serious photographer.  From a functionality perspective, I find the camera a bit too dumbed down in serious function and having too many trite low-end consumer style features that are close to the top of the UI.  For this I rate it a C.

I love the better glass and the bigger sensor.  All the outdoor shots were taken at ISO 800 and it's just great.  The reflected photo of myself was shot at ISO 3200 and is cropped and it is very good.  I like that there is a battery grip and that I can use real strobes with it.  I also like that it has a commander style mode, but would prefer to test this functionality under stress.

Overall exposure control is quite good.  Auto white balance needs a bit of work.  Both of the published shots of Sondra are using custom white balance achieved with the Expodisc.  Making a custom white balance is very easy with the X-T1 and I do find the default looks very "Fuji-ish" that is to say placing emphasis in the greens.

I would prefer that the filters and film simulation were capable of being disabled from general view.  I don't know that this makes me a purist, but as I never shoot by default in JPEG, these things just get in the way.

I would also like it better if Fuji made their RAW algorithms available to Adobe and others, along with lens profiles.  I have only found one lens that does not benefit in post by applying lens profile corrections and would do manual corrections on both the lenses I tested if I were shooting for a client.  I am still not convinced that Adobe's RAW converter in Lightroom 5.5 really masters what the X-Trans sensor is capturing.

I cannot say that I am blown away by the image quality.  It's excellent to be sure, but most everything from this class of camera is too.  It doesn't stand out or scream "better".

So the big question, if I were going to invest in an autofocus mirror less system, would I consider the X-T1.  I definitely would consider it.  Despite the smaller sensor, and slower glass, the OM-D E-M1 is still my preference, but the Fuji X-T1 has made such enormous inroads that right now it would be my #2.  This is a considerable step from the level of "never" that Fuji has lived on for some time based on my use cases.  If Fuji did an X-T2 that was more serious photographer oriented, the glass options would push it into first position.

If you are looking to move up from your consumer DSLR or move down to less weight, the Fujifilm X-T1 is an excellent contender.  It is well built, would be awesome for travel and there are really fine lenses available.  Bear in mind that it will not cost you any less than a similar DSLR.  It's an illusion that a competent mirror less will be less expensive than a similar DSLR.

Quick Tip : Videos on What's New in Photoshop CC (2014)

The folks over at KelbyOne have put together some short videos on what's new in Photoshop CC (2014) with demos on how to use the new tools.  Best of all, the videos are free to all, you don't have to be a KelbyOne member to view. Click here for the site

Creative Cloud for Photographers 2014 - What's the Hubbub Bub?

This week Adobe pulled an Apple-esque keynote presentation to show what they are doing for Creative Cloud 2014.  (Ok not really - Apple knows how to do these, Adobe is working on it)  There's all manner of dev stuff and mobile dev stuff but photographers really want to know what's in the update for them.  Ok, follow along gentle reader, and I shall try to synopsize....First and foremost the Photography subscription is no longer a limited time offer.  For $10 per month you get Lightroom and Photoshop CC.  This is a great deal.  Where Adobe is RAISING prices for full CC members who came from upgrades from box software GRRRR, they are doing the right thing for the folks who only need Photoshop CC and Lightroom.   It's the best way to get these products, and your subscription can be active on up to two computers at a time. First up is Lightroom 5.5 and for everyone who was expecting BIG changes, keep walking, because this isn't it.  It's not the Lightroom 6 that the rumour sites have been rumouring.  It's a general update with support for more cameras and lenses, bug fixes and enhancements to the sync with Lightroom Mobile.

Speaking of Lightroom Mobile, the iPad version was bumped and there is now an iPhone version.  Not sure how much serious work you will do on the minuscule iPhone screen but if it is how you like to show your work, it's smaller and easier to carry than an iPad.   None of the really in demand functions for Lightroom Mobile have been implemented yet and with respect for the Adobe software engineers, I know those improvements are going to take some time.

If you get Lightroom through Creative Cloud, you will get your update as normal.  If you are a classic Lightroom licensee you will be prompted to download and install the update.  There's really nothing of enormous significance in 5.5 unless you have a brand new camera or lens that was not supported in 5.4   Hoped for fixes for the not so healing brush are still to come as is reordering of the develop sidebar to reflect how most users actually work.

Past complaints of slow rendering of previews started to go away with the advent of Lightroom Mobile and the creation of Smart Previews of pretty much everything on import, so the switching between images in the Develop module is faster than before.  It still doesn't use the embedded JPEGs in the RAW files like most other culling apps do, but I do find the performance is better making Lightroom nearly useful for speed culling.

Moving on to Photoshop CC (2014), the first thing you will note is that your original Photoshop CC is still there.  The new version does not overwrite the old version, you will have two separate applications.  This is not as dumb as it sounds because some third party software may not work right out of the box with the 2014 builds and Adobe understands that the joy of getting a new release shouldn't be overshadowed by furious anger when your critical plugin no longer works.

And there's the rub.  All your plugins will need to be reinstalled.   Now you can copy the contents of the Plugins folder from Photoshop CC and paste them into the Plugins folder in Photoshop CC (2014) and they should work.  Should being the operative work here.  If you use the OnOne Perfect Photo Suite, you will have to reinstall or use the File | Automate command to launch the utilities from within Photoshop if you choose not to reinstall.  I tried most of my plugins and things worked smoothly for me.

There are some new features in Photoshop CC (2014)   The new radial blur tool allows you to take a static subject and make it look like it is spinning.  The guides are easier to use.  Smart objects and cataloging of smart objects have both been improved.  If you are looking for that "OMG I HAVE TO UPGRADE" feature, you aren't likely to find it.  The updates are nice but they are evolutionary not revolutionary.  Of course I can only report on the things that Adobe took time to mention, there could be lots of other small changes that will make your editing life so much better, but I haven't found them.  I'm at best an intermediate level user of Photoshop anyway, so there could be a ton of stuff I would never even notice because although I use it heavily as a photographer, I don't tap into the design aspects (aka the other 90%) except on rare occasion so for me to say "no big deal" comes wrapped in the "opinion" caveat.  One thing I do like, because I use Photoshop for title pages and such is that now when you are mousing over a font, your selected text in your project gets rendered in the moused over typeface, and this is a feature that I will really benefit from.  There is a downside to over 500 typefaces after all.

Updating should be transparent but Adobe's servers were getting hammered on announcement day and have been timing out.  Some applications such as Adobe Muse are failing on update.  Folks using the Photography bundle have not been complaining too much and if it looks like you have no connection, just quit the Creative Cloud applet and relaunch it and all should be well.  Please note that you will need to accept the new terms of service (natch) and if you use tools that manage apps that want to "phone home" constantly (that is SO annoying), you will be approving or declining connections a lot at first.

As a former Master suite licensee who tended to update every new version (typically every 18 months except for the slip and slide from CS5 through CS5.5 to CS6) that I get the newest updates this simply is a benefit.  Now if only Adobe wasn't increasing my price and their customer service centre in Asia wasn't staffed by such annoying and arrogant people.

Removing the Creative Blockage

We've all been there as artists and creatives.  The place where nothing seems to work, where we feel stalled, stuck and perhaps even contemplating moving on to another interest.  I've been there as a photographer, a musician, as an archer, and am there now as a videographer.  It's not the end but it is cusp or inflection point, so I thought I would share how you can get past this point and grow again.Sometimes the easiest answer is to stop and take a break.  I did that a long time ago as a photographer.  I took a break, albeit too long a break.  The photographer I am today is a much better photographer than when I took the long break because in that time, I learned a lot, and apparently I am a slow learner. That Won't Work

I hear very often this very statement from folks I am mentoring, or students in a class or other people out on a shoot.  I offer the following guarantee.  If you say this, even mentally, you're right.  Don't even bother trying, you've already decided.  Sound foolish?  It is.  Stephen J. Covey made lots of people rebuild their thought patterns by encouraging them to start with the end in mind.  There is a ZEN principle, that says to envision the end before the start.  If your envisioned end doesn't work, you'll get there.

I Will Probably Fail

I surely hope so.  We are not expert at anything the first time we do it.  Or perhaps not even the thousandth time we do it.  While focused repetition can be the mother of skill, failing to fail is a guarantee of not learning anything.  To quote Alfred Pennyworth, "Why do we fall?  So we can learn to get back up."

I Don't Know How

At one time this is true for everything we do.  If you have learned to walk, at one time you could not.  If you read, at one time you did not.  If you speak a language at one time you could not.  None of these skills burst fully formed into existence.  We learned.  It took time.  We practiced.  We got better.  How is this different from art?  Does the great pianist play Rachmaninoff on the first day?  Was Adams' first image of Half Dome also his last image?   Focused repetition is the mother of skill and the availability of the knowledge to do new things is more available today than it has ever been.  That knowledge is not an end in itself, it is a tool to help you extend your creativity.

It Might Not Turn Out

Oh paean to negativity...  This very statement says that it might actually turn out.  So do it.  With a bit of positive orientation, it might just turn out, and if it doesn't you could be a step closer to when it does.  When I get an idea or concept in mind, I don't get there in one image capture.  It can take lots.  Sometimes so many I wonder why I keep trying.  But I get there often enough to keep going.  I don't play golf, but I am told by those who do that the one great shot makes up for the hundreds of truly horrible ones.

What If No One Likes It?

And to this I say, who the heck cares?   Van Gogh wasn't painting for someone else's pleasure, he painted because he had to, for himself.  By the way, he was not well appreciated in his lifetime, but now, hoo boy, major artist that fellow.  I know that it sounds anti-social but if you are making art with the primary goal of pleasing anyone other than yourself, you've started with the wrong end in mind.

I Don't Have Anything to Post Today

Good for you.  Be honest.  If you look at the tidal wave of images on social media. how many really capture you?  How many times do you plus or thumbs up something, purely because some one did that for you or you think you have some kind of social obligation to do so.  "Liking" stuff that you really don't like is destructive to your creativity.  It lowers the bar for acceptability and inhibits your ability to strive.  Don't get me wrong, I see some really compelling pieces of art when I bother to look at social media.  But those are the gems in an ocean of dreck that does nothing for me other than make my eyes hurt.  If you aren't posting every day, that doesn't make you a bad artist, it makes you honest and selective and by the way scarcity makes work more in demand than abundance.

I Cannot Think of Anything to Shoot

Right again.   Try this.  Stop thinking so hard about what to go shoot and just go shoot.  See with your mind open and something will reveal itself.  When I ride the motorcycle, I rarely take a camera because if I did, and if I stopped every time I saw something I would never get anywhere.  I make mental notes of what was revealed and will go back with time or seek out a similar reveal.  I need to stop more in the moment and count on seeing it again less.  It may not be there again.

My Work Will Not Be Well Received

If by this you mean that someone won't like your work, you're right and if you let this stop you, well you've made an intellectual decision to stop and let the voice of another change your existence.  It's a fact of life that for every piece of art, there is someone who hates it and that someone is probably the classless type of bottom feeder that he or she feels that others want to hear what he or she has to say.   A critique can be very useful.  A critic is good for organ donation.  And by the way, just because someone offers you a critique, sanctioned or not, the virtue of its existence does not make it valid, unless you decide it to be so.

Making Art Seems So Selfish and Everyone Knows Selfishness is Bad

I'm not sure who "everyone" is but they need to be drowned and soon.  No person can add value to anything before that person values and cares about himself or herself.  If you place no worth on yourself, you cannot place worth on anything else.  That's a parasite. Art is by definition selfish.  You make it yourself.  No one else makes your art.

Trust Yourself and Go Do

Not to be all Yoda-like but there really is no try, there is do or do not. The greatest barrier to creativity often lives between our own ears.  We create our own walls, often more formidable than those that others might try to erect in front of us.  For most readers, photography exists in a space covering hobby to passion to source of income.   There are always those who will criticize, not as help but as a way to exert power you grant them over you.  There's a two word phrase for those folks, and you are all smart enough to figure it out for yourself.

So go do.  You will love some of the work you do.  You will hate some of it.  You  will be thrilled.  You will be saddened.  Welcome to the human race.  Others may have more skills in some areas but they won't have your eye, so go make your own work seen with your own eye.  Do new things, do old things, do different things, do the same thing, just go do.   If that sounds like a simple answer, it is.  There really isn't more to it than that.   The best way to breach creative barriers is to recognize that they are of our own creation, and then to tear them down by determining that they add no value.

See the finished work, make the image, edit the image and do what you will with it.  Publish it, print it, hide it away forever, it's all your choice.  Make the choice to create.

First Look : Yong Nuo YN-E3-RT

I am a big fan of Canon's transition from infrared remote flash to using radio.  The 600 EX RT is a very powerful unit and by adding Canon's effective but pricey ST-E3-RT, you could control a bunch of 600s from the camera without using up a flash head on camera.  It works, but what if there were a more cost effective alternative?yne32There is.  It is from Yong Nuo.  This company is a known quantity amongst hot shoe flash people.  Training master #Scott Kelby has advocated use of Yong Nuo flashes for some time.  I have clients who live by the Yong Nuo radio triggers because they deliver radio based TTL flash control without inducing a month of Kraft Dinner for meals.  They just work. Yong Nuo even announced their clone of the 600 EX RT although that remains scarcer than hen's teeth for the moment.  At the same time, they announced the YN-E3-RT.  It's their version of the ST-E3-RT and the big difference is investment.  The Canon offering is great, but pretty expensive.  The Yong Nuo does what the Canon does and is less than half the price.  Yes you will be likely ordering it from China.  Mine took about 10 days to arrive.

There are some pretty cool benefits to the YN-E3-RT over the Canon unit.  Most importantly for me, is that it adds infrared focus assist.  Canon had this in the ST-E2 unit that worked with the 580 EX series.  It was not a well loved offering but it did have IR focus assist.  When the E3 from Canon came out, serious flashers asked WTF?  We're often shooting in conditions where the lighting that brings on the need for flash also doesn't provide enough light for regular Autofocus.  By including focus assist in the YN-E3-RT, Yong Nuo demonstrates that they listen to buyers, something Canon frequently has a problem with.

If you use the Canon unit on cameras older than 2012, max flash sync speed is 1/125.  Not awful but not what the camera may be capable of.  The Yong Nuo eliminates that barrier.  It also means that if you have an older camera, you can get group support in the flash system a missing unless you have a newer product with Canon's offering.

The Yong Nuo also arrived with a bunch of sync cables, that I don't recall getting with my Canon unit, although I may have misplaced them.

From a construction perspective, the units look identical.  Canon allows for either green or orange display, the YN does green.  No biggie.  I found the buttons on the Canon more precise and with a nominally better fit but if I did not have the side by side comparative capability, I probably would not know.  The Yong Nuo unit has a USB port so you can update the firmware on it.  The port is in the same place as the sync cable port on the Canon.  The YN-E3-RT comes in a padded nylon case that is virtually indistinguishable from the Canon model.

Canon's unit sells for about $385 where I live.  The Yong Nuo cost me $140 through Amazon Canada.  Some have complained that the IR AF assist in the YN doesn't cover all the focus points.  True, but the Canon unit doesn't cover any since it has NO autofocus assist.

Judge for yourself.  The Yong Nuo solves a couple of legitimate issues for me with IR focus assist and no throttling of flash function on my older 1D Mk IV.  I'm pleased so far.

Power for you, power for them - introducing WakaWaka

wakawaka1 We are all driven by the need for power for our electronic devices.  But what happens when you aren't near grid power?  Well my friends, there is power in the sky, and there are plenty of vendors who make solar power chargers, but how many of them also bring power to areas where the word "grid" has no meaning?That's what WakaWaka and the WakaWaka Foundation is all about.

wakawaka2The Waka Waka is a solar charged battery system.  It is small, in a real world tough casing, available in black or yellow.  12 hours of sunlight brings it to a full charge.  Not only can you charge your mobile device off it, (an iPhone 5s charges from dead to full in 2 hours) you can also use it for supplemental light from 5 to 75 lumens delivered by high efficiency LEDs.  At low power, the WakaWaka can generate light for 150 hours on a full charge.  It also has a convenient tilter holder.

wakawaka3Did I mention it's tough?

When John Charbonneau of Nadel Enterprises Inc. (Canadian Distributor) was showing me the device he was literally pounding the countertop with it.

About the WakaWaka Foundation

The idea here is to support folks living in areas of energy poverty, such as Haiti, Syria and Kenya.  The deal is pretty simple.  If you buy a WakaWaka power system, someone in a WakaWaka supported area gets their own power system.   They are working around the world already as you can see in this map.  Obviously the numbers are growing every day.

IMPACT_-_WakaWaka

You can learn more about the WakaWaka Foundation at their website.

Now to really make a difference, you need to buy one.  At least.  You can certainly purchase the WakaWaka power system online through the website, but if you live in Canada, you can also get one at Henry's   At this spring's Exposure show, Nadel was showing off the WakaWaka and customers could purchase one from the onsite Henry's staff.  If you missed it, no problem.  The black one is SKU 586NAD001 and the yellow is 586NAD002 and either one is $99.99.

wakawaka4You need portable power and light, so do folks elsewhere in the world, so get your own WakaWaka and put one in the hands of someone who desperately needs power.


DXO Optics Pro goes to V9.5

The folks at DXO have updated their well known optics package to version 9.5.  It's available for download now at their website, either as a trial or as a purchase.  Customers licensed for DXO Optics Pro 9 receive the update at no cost.  So what makes this update worthwhile? There are a number of great tools built into DXO Optics Pro.

DXO is best known for their incredible lens correction capabilities.  Unlike other products that use a general lens profile database, DXO builds profiles for lenses mounted to specific bodies.  The software downloads the profiles you need based on the EXIF data stored in the RAW files.  It makes for very comprehensive corrections.

DXO also includes their perspective correction algorithms that are richly used in DXO's Viewpoint software.  They are very good, even better than the correction algorithms in Photoshop CC, which is already superb.

DXO recently introduced their Smart Lighting algorithms.  They are programmatic adjustments for highlights and shadows and do a very good job very quickly.  Of course, there are also full overrides for the Smart Lighting settings.  What's great about this function is how well it works without you having to muck around with sliders and correct for colour shift if you push too hard.

DXO is not so well known for their noise reduction algorithms.  Most of us think of Nik's Dfine when it comes to robust noise reduction.  DXO has excellent noise management built in to the software as well.

What makes v9.5 so significant is that for the first time, DXO Optics Pro has a Lightroom plugin!  Now you can roundtrip directly from within Lightroom.  This is a very important shift and will definitely encourage more folks to try out DXO Optics Pro.

One last thing about DXO that is also not well known.  If you like to convert your RAW files into the open DNG standard but are not completely enamoured by Adobe's DNG Converter or the converter in Lightroom, you may want to check out the DNG conversion in DXO Optics Pro.  It is very effective but bear in mind that the file sizes are quite large as should be expected from a high definition uncompressed RAW file.

Finally! A point and shoot worth having - Sony RX100 III

Point and shoot cameras haven't made sense to me for a while.  I have an iPhone always with me and if I do my job it makes pretty decent images.  There are all manner of apps and stick on, clamp-on, bolt-on accessories for it.  I've even made decent sized prints from an iPhone image after work in the digital darkroom.  So why do I love this Sony? When the first iteration came out, the RX100, I arranged an evaluation with Henry's in Newmarket Ontario.  Sony's distinctly not P&S sensor, coupled with a good UI, excellent RAW performance and a stunningly good Intelligent Auto mode made for great images, quickly and in a nice small package.  It was pricey for a point and shoot, but if one was hunting image quality, it was the one to beat.   If only it had a viewfinder...

Then came the RX100II.  Faster CPU.  Still no viewfinder.  But it had a hotshoe, and the ability to add on a stupidly expensive optional electronic finder.  Why anyone would want a hot shoe on a tiny pocket camera was beyond me, as a flash of decent power would be three times the size of the camera.  Still a great sensor, great intelligent auto and good layout.  And a price increase.   Still missing a viewfinder.

Who's going to pay $800 for a point and shoot anyway?  Not the casual snapshotter.  This is a limited vertical market, for serious photographers who need something with great glass, great image quality, small size and a darn VIEWFINDER!

Third time is the charm.  The RX100 III that ships in June or maybe July hits the key indicators for me.  Faster Bionz X CPU.  20.2MP BSI-CMOS sensor.  Built in pop up EVF with 1.44M dots.  High performance video with clean HDMI out.  And of course the new lens.

What?  Did Sony replace the 28-100 2.8-4.9 Zeiss lens?

Yes they did.  The new lens is still from Zeiss and is a 24-70 equivalent f/1.8-f/2.8 variable aperture zoom.  Sony has given up some telephoto for more width and at least one stop faster optical performance.  Let's face it, 24-70 is a seriously popular range, loved by street and general look image makers.  The additional lens speed is very helpful and the new lens only increases the depth of the camera by about 3mm.

I have not had hands-on yet but I hope to as soon as one is available.  Initial first looks around the web are very positive.

Pricing is presently listing at $899.99, we'll see what the retailers do when it comes out.  I expect the initial street price to be high and then to see it level out about 60 days post release.

Specifications (courtesy Sony Canada)

Product Specifications

  • Software

    • Operating System Compatibility : PlayMemories Home: Windows® XP SP3, Windows Vista® SP2, Windows®7 SP1, Windows®8 (PlayMemories Home is not Mac compatible); PlayMemories Online Uploader: Windows XP SP3, Windows Vista®SP2, Windows®7 SP1, Windows®8, Mac OS X (v10.5- v10.8); Image Data Converter Version 4.2: Windows® XP SP3,Windows Vista® SP2,Windows®7 SP1,Windows®8, Mac OS X (v10.5- v10.8)
    • Supplied Software : Supplied Software: PlayMemories™ Home, Image Data Converter Version 4 (via software download from camera)
  • Advanced Features

    • Image Stabilization : [Still Image] Optical [Movie] Active Mode, Optical type with electronic compensation (Anti-rolling)
    • Auto High Dynamic Range : Yes, (Auto Exposure Difference, Exposure difference Level (1-6 EV at 1.0 EV step), off)
    • Sweep Panorama : Horizontal (Wide/Standard), Vertical (Wide/Standard)
    • Face Detection : On, Off, Face Registration, Face Selection; maximum eight faces detected
    • Priority Setting (for Face Detection) : Yes (eight faces max) New Registration / Order Exchanging / Delete / Delete All
    • Smile Shutter™ technology : Smile shutter (selectable from 3 steps)
  • Camera

    • Camera Type : Cyber-shot® Digital Still Camera
    • Lens Compatibility : Fixed lens
    • Colour : Black
  • Convenience Features

    • Media/Battery Indicator : Yes
    • View & Index : Single (with or without shooting information), RGB histogram and highlight/shadow warning, 4/9-frame index view, Enlarged display mode (L: 13.6x, M: 9.9x, S: 6.8x), Auto Review (10/5/2 sec, Off), Image orientation (On/Off), Slideshow, Panorama scrolling, Folder selection (still), Forward/Rewind (movie), Delete, Protect
  • Drive System

    • Continuous Shooting Speed : 10 fps at 20.2MP
    • Burst Buffer : JPEG Standard (12 shots) JPEG Fine (12 shots) RAW (13 shots) RAW+JPEG (10 shots)
    • Shutter Speeds : iAuto (4 - 1/2000) / Program Auto (1 - 1/2000) / Manual (Bulb, 30 - 1/2000) / Aperture Priority (8 - 1/2000) / Shutter Priority (30 - 1/2000)
    • Self-timer : 10 sec. / 2 sec. / Self-portrait One-person/ Self-portrait Two-person/ Self timer Continuous (3 or 5 shots)
    • Drive Mode : Single-shot, Continuous, Speed Priority Continuous, Self-timer (10/2 sec. delay), Self-timer (Cont.), Self-portrait One-person, Self-portrait Two-person, (with 10 sec. delay; 3/5 exposures), Bracketing
  • Exposure System

    • D-Range Optimizer : Off, Dynamic Range Optimizer (Auto/Level 1-5), Auto High Dynamic Range: Off, Auto Exposure Difference, Exposure difference Level (1.0-6.0EV, 1.0EV step)
    • Auto Exposure Lock : Yes (AE Lock button). Can be disabled from menu
    • Exposure Compensation : +/- 3.0 EV, 1/3 EV step
    • Minimum Illumination : Movie: Auto:1.2lux(Shutter Speed 1/30")
    • Picture Effect(s) : [Still Image] Toy Camera, Pop Color, Posterization, Retro Photo, Soft High- key, Partial Color, High Contrast Monochrome, Soft Focus, HDR Painting, Rich-tone Monochrome, Miniature, Watercolor, Illustration [Movie] Toy Camera, Pop Color, Posterization, Retro Photo, Soft High-key, Partial Color, High Contrast Monochrome
    • Exposure Settings : [Still] Superior Auto, Intelligent Auto, Program Auto (Program shift available), Shutter Priority, Aperture Priority, Manual, Scene Selection, Movie, Sweep Panorama [Movie] Program Auto, Aperture Priority, Shutter Priority, Manual
    • Scene Mode(s) : Anti Motion Blur, Fireworks, Gourmet, Handheld Twilight, High Sensitivity, Landscape, Macro, Night Portrait, Night Scene, Pet Mode, Portrait, Sports Action, Sunset
    • Metering Modes : Multi-segment, Center-weighted, Spot
    • Metering Sensitivity : EV 0 to 20 (at ISO100 equivalent)
    • ISO : Auto(ISO125-12800, selectable with upper / lower limit),125/160/200/250/320/400/500/640/800/1000/1250/1600/2000/2500/3200/4000/5000/6400/8000/10000/12800 (Extendableto ISO80/100),Multi-Frame NR:Auto(ISO125-12800), 200/400/800/1600/3200/6400/12800/25600
    • Creative Style : Standard, Vivid, Neutral, Clear, Deep, Light, Portrait, Landscape, Sunset, Night Scene, Autumn Leaves, Black & White, Sepia, Style Box
    • Color Temperature : 2500 – 9900K with 15-step each Magenta/Green compensation (G7 to M7), Amber/Blue (A7 to B7), Custom
    • ISO Sensitivity (Movie) : Auto:(ISO125Level-ISO12800Level, selectable with upper / lower limit), 125/160/200/250/320/400/500/640/800/1000/1250/1600/2000/2500/3200/4000/5000/6400/8000/10000/12800
    • White Balance Mode : Auto / Daylight / Shade / Cloudy / Incandescent / Fluor (Warm White) / Fluor (Cool White) / Fluor (Day White) / Fluor (Daylight) / Flash / C. Temp., Filter / Custom
    • Exposure Bracketing : 3 continuous or single shots in 1/3 or 2/3 EV steps
    • WB Shift : G7-M7,A7-B7
  • Flash

    • Flash Bracketing : ±2.0 EV
    • Flash Metering System : Pre-flash TTL
    • Flash Compensation : ±2.0 EV (switchable between 1/3 EV steps)
    • Recycling Time : Approx. 3.4 sec.
    • Flash Modes : Auto / Fill-flash / Slow Sync / Rear Sync / Off
    • Flash Coverage : ISO Auto: 1’ to 49’ 2” (0.30m to 15.0m) (W) / 1’ 9” – 18’ 8” (0.55m to 5.7m) (T) ISO 12800: Up to 98’ 5” (30.0m) (W) / 37’ (11.3m) (T)
    • Flash Type : Built-in, Pop-up Auto
  • Focus Control

    • Focus Features : Predictive control (AF-A, AF-C), Focus Lock
    • AF Illuminator : Built-in LED, Range: approx. 3' 4” - 9' 9” (0.3m-3.0m)
    • Focus Sensitivity : EV 0 to 20 EV (at ISO100 equivalent)
    • Focus Area : Multi point AF (25 points) / Continuous AF / Single Shot AF / Flexible spot (S/M/L) / Lock on AF (Wide/Center/Flexible Spot (S/M/L))
    • Focus Points : 25 points
    • AF Modes : Single-shot AF (AF-S) / Continuous AF (AF-C) / Direct Manual Focus (DMF) / Manual Focus
    • Focus System : Contrast-detect AF
  • Imaging Sensor

    • Pixel Gross : 20.9M pixels (approx.)
    • Focal Length Conversion Factor : 2.7x
    • Color Filter System : RGB primary color filters
    • Effective Picture Resolution : 20.1M pixels (approx.)
    • Imaging Sensor : Exmor® R 1.0” CMOS sensor (13.2 X 8.8mm) (3:2 aspect ratio)
    • Processor : BIONZ® X image processor
  • Interface

    • NFC : Yes (NFC Forum Type 3 Tag compatible, One-touch remote, One-touch sharing)
    • DC IN : Yes, via AC-UB10 AC charger and USB cable
    • Memory Card Slot : Dual compatibility slot: Memory Stick PRO Duo™/Pro-HG Duo™/PRO-HG HX Duo™ media - SD, SDHC and SDXC memory card
    • HD Output : HDMI® (Type D micro)
    • Wi-Fi : Yes
    • Accessory Shoe : Multi Interface Shoe
    • Tripod Mount : Yes (1/4" diameter, 20 threads per inch)
    • Remote Commander : Yes, via RM-VPR1
    • PhotoTV HD : Yes, with BRAVIA Sync enabled HDTV and HDMI® cable
    • USB Port(s) : USB 2.0 Hi-speed (mass-storage, MTP)
    • BRAVIA® Sync™ : Yes, via HDMI® with compatible BRAVIA HDTV (link menu)
    • Microphone Input : Via MI Shoe + Optional ECM-XYST1M
  • LCD Display

    • Peaking : Yes Level setting: High/Mid/Low/Off Color: White/Red/Yellow
    • Real-time image adjustment display : Yes (On/Off)
    • LCD Type : 3.0” (7.5cm) (4:3) / 1,229,000 dots / Xtra Fine / TFT LCD / Tiltable (Up by approx. 180degrees, down by approx. 45degrees.)
    • Coverage : 100% Field of View
    • Angle Adjustment : Tilt angle: Up by approx. 180degrees, down by approx. 45degrees
    • Histogram : Yes (On/off)
    • Live View : Continuous Live View
    • Brightness Control : Auto / Manual(5 steps) / Sunny Weather
    • Grid Display : Yes (Rule of Thirds, 4x6 Square, Diagonal & 4x6 Square Grids, Off)
    • Customization : Grid, Histogram display, Digital Level Gauge, Grid Line, Magnified display for playback
  • Optics/Lens

    • Optical Zoom : 2.9x (Optical Zoom during movie recording)
    • Minimum Focus Distance : iAuto: AF (W: Approx. 5cm (0.17 ft.) to Infinity, T: Approx. 30cm (0.99 ft.) to Infinity) / Program Auto: AF (W: Approx. 5cm (0.17 ft.) to Infinity, T: Approx.30cm (0.99 ft.) to Infinity)
    • Lens Type : Carl Zeiss® Vario-Sonnar T*
    • Aperture (Max.) : F1.8(W)-2.8(T)
    • Aperture : F1.8 - 11 (W), F2.8 - 11 (T)
    • Aspheric Elements : 9 aspheric elements including AA lens
    • Aperture Blade : Iris diaphragm (7 blades)
    • Digital Zoom : Still image: 20M Approx.11x / 10M 16x / 5M 23x / VGA 44x; Movie: Approx.11x
    • Lens Construction : 10 elements in 9 groups (9 aspheric elements including AA lens)
    • Steady Shot Mode:Active : [Still image] Optical [Movie] Active Mode, Optical type with electronic compensation (Anti-rolling)
    • ND Filter : Auto / On(3 steps) / Off
    • Clear Image Zoom : Still Image: 20M Approx. 5.8x / 10M 8.2x / 5M 11x / VGA Approx. 44x; Movie: Approx. 5.8x
    • Focal Length (35mm equivalent) : [Still Image 3:2] f=24-70mm [Still Image 16:9] f=26-76mm [Still Image 4:3] f=25-73mm [Still Image 1:1] f=30.5-89mm [Movie 16:9] f=25.5-74mm (SteadyShot Standard), f=30-86mm (SteadyShot® Active Mode), f=33.5-95mm(SteadyShot Intelligent Active) [Movie 4:3] f=31-90mm (SteadyShot® Standard), f=37-105mm (SteadyShot Active Mode), f=41-117mm (SteadyShot InteligentActive)
  • Power

    • Battery Type : InfoLITHIUM® NP-BX1 (3.6V)
    • Power Requirements : AC 100V to 240V, 50/60 Hz, 70mA
    • Power Consumption (in Operation) : Approx. 1.8W
    • Number of Still Images : Approx. 320 images with LCD monitor (CIPA standard)
    • Battery Capacity : 4.5Wh (1240mAh)
  • Recording

    • Panorama Still Image Size : Wide (12,416×1,856/5,536×2,160), Standard(8,192×1,856/3,872×2,160)
    • Audio Format : XAVC S: LPCM 2ch; AVCHD:Dolby Digital(AC-3) 2ch(Dolby Digital Stereo Creator); MP4:M PEG-4 AAC-LC 2ch
    • Video Format : XAVC S / AVCHD Ver. 2.0 / MP4 (MPEG-4 AVC (H.264))
    • Video Mode : XAVC S: 60p 50M(1,920x1,080/60p) / 30p 50M(1,920x1,080/30p) / 24p 50M(1,920x1,080/24p) / 120p 50M(1,280x720/120p) AVCHD: 28M PS(1,920x1,080/60p) / 24M FX(1,920x1,080/60i) / 17M FH(1,920x1,080/60i) / 24M FX(1,920x1,080/24p) / 17M FH(1,920x1,080/24p) MP4: 12M(1,440x1,080/30fps) / 3M VGA(640x480/30fps)
    • Color Space : sRGB standard (with sYCC gamut) and Adobe RGB standard compatible with TRILUMINOS™ Color
    • Still Image Size 16:9 : L:17M(5,472×3,080) / M: 7.5M(3,648×2,056) / S: 4.2M(2,720×1,528)
    • Still Image Size 3:2 : L: 20M(5,472×3,648) / M: 10M(3,888×2,592) / S: 5M(2,736×1,824)
    • Still Image Mode : JPEG (Standard, Fine), RAW, RAW+JPEG
    • Media Type : SD, SDHC and SDXC memory card; Memory Stick PRO Duo™/Pro-HG Duo™ media
    • Still Image Max Effective Resolution : 20.1 Megapixels
    • Still Image Size 4:3 : L: 18M(4,864×3,648) / M: 10M(3,648×2,736) / S: 5M(2,592×1,944)
    • Video Signal : NTSC color, EIA standards
    • Microphone/Speaker : Built-in Stereo Microphone / Mono Speaker
    • Still Image Size 1:1 : L: 13M(3,648×3,648) / M: 6.5M(2,544×2,544) / S: 3.7M(1,920×1,920)
    • Mic Level Control : 16 steps
    • Still Image File Format : JPEG (DCF Ver. 2.0, Exif Ver.2.3, MPF Baseline compliant), RAW (Sony ARW 2.3 format)
    • Wind Noise Reduction : Yes (On/Off)
  • Service and Warranty Information

    • Limited Warranty Term : 1 Year Parts & Labor
  • Viewfinder

    • Type : 0.39" SVGA electronic viewfinder(OLED), 1,440,000dots
    • Magnification : Approx. 0.59x with 50mm lens at infinity, -1m1(diopter) (35mm equiv.)
    • Diopter Adjustment : -4.0 to +3.0m-1
  • Weights and Measurements

    • Weight(Approx) (Main unit only) : 9.3 oz. (263 g)
    • Dimensions (Approx.) : 4 " × 2 3/8 " × 1 5/8 " (101.6x58.1x41.0 mm) excluding protrusions
    • Weight (Approx.) : With battery and Memory Stick PRO Duo Approx.10.2 oz. (290 g)

Google updates Nik Analog Efex Pro to Version 2

Earlier this week, the Nik Collection was updated with the big change being the release of the second version of Analog Efex Pro, now seen as Analog Efex Pro 2.0 Existing Nik customers should receive the update automatically but if you are like me and the updates are random and flaky, you can download the latest release at www.google.com/nikcollection.  If you have a licensed version installed, the update uses the existing license without problem.  It also leaves Analog Efex (V1) intact, although I'm not sure why you would care to do that.

In the new version, Nik has added Control Points (commonly found in other Nik products) and more camera presets.

If you've never used Analog Efex Pro, it applies film looks to your photographs a la Instapuke (that thing someone call Instagram).  More accurately it is more like some of the other many film look plugins.  Analog Efex Pro 2 also adds what they call the "camera kit" that allows you to "assemble" a camera model with your own custom look.

I did my own install and played around a bit and then watched Google's Brian Matiash on The Grid with Scott Kelby.  Mr. Matiash is very excited about the offering and I find him to be a sincere fellow and not a corporate shill.

To my chagrin, I did learn that the trending photo effect is the double exposure, so we can all expect to see thousands of posts of horridly awful double exposures to come.  But, I digress...

i know that making perfectly good photos look fuzzy and fogged and noisy is a really popular thing to do, and if you like this sort of thing, Analog Efex Pro 2 really gives you a ton of control and with the same simple and powerful user interface found in other Nik products.

To each their own.  I found no practical use for the original and cannot imagine why I would want to dig into this offering either given that if I want a filmic look, I will shoot film and get the real thing.  I can screw up my images without the need to use software to make them look crappier.  Your mileage may vary.

Now available! OnOne Perfect Photo Suite 8.5

Released today is the latest release of OnOne Software's superb plugin and standalone editing software #Perfect Photo Suite.  Version 8.5 is a FREE upgrade for V8.0 licensees. New and returning users can expect richer masking and significantly improved photo browser performance.  Here's the press release courtesy of my friend's at OnOne.

And don't forget if you buy your license through this site, you help support The Photo Video Guy!

****PRESS RELEASE****

Perfect Photo Suite 8.5 Now Available - Photo Editor for Adobe Lightroom, Adobe Photoshop, Apple Aperture, and standalone use.

Update adds super-fast photo browsing, more file-management options, and improvements to the Perfect Eraser and Masking Bug tools.!
Portland, OR - May 13, 2014 - onOne Software, Inc®., the leading developer of innovative digital photography solutions, today announced that Perfect Photo Suite 8.5 is now available, a new version of its full-featured photo editor, which works as a plug-in with Adobe Photoshop, Adobe Photoshop Lightroom, and Apple Aperture, as well as a standalone app. Version 8.5 includes speed and productivity enhancements to the Perfect Photo Suite’s Browse module, improved performance with the Perfect Eraser tool, and enhanced masking support in Perfect Effects and Perfect Layers. In addition, RAW file support is now included with the Standard Edition in version 8.5.

Perfect Photo Suite 8.5 is available today as a free update to all owners of Perfect Photo Suite 8. It supports Photoshop CC, CS6, and CS5; Lightroom 5 and 4; Photoshop Elements 12, 11 and 10; and Apple Aperture 3.

onOne’s Perfect Photo Suite includes eight powerful, integrated applications, each one targeted to a specific photo-processing task:

* Perfect Effects. The richest and most versatile photo-stylization tool available on the
market today. It includes an extensive library of one-click presets, fully customizable
and adjustable effects and powerful masking tools, all of which help make your photos !pop. 
* Perfect Enhance. Offers essential tools for basic enhancements, including brightness, contrast, sharpening and color cast removal. Enhance also has retouching features like the Perfect Eraser and a Clone tool, which makes it easy to remove objects, fix dust spots and repair flaws in a photo.

* Perfect B&W. Create stunning photos that recreate the timeless look created by the masters of black and white photography. Perfect B&W adds dramatic and elegant looks to photos, letting you easily create the many moods black and white
! photography can evoke, resulting in beautiful, one-of-a-kind photos.!
* Perfect Portrait. Offers simple, yet powerful, portrait retouching, with automated feature detection and enhancement tools to smooth skin, remove blemishes, brighten eyes and teeth, and correct skin color. Fast processing speeds also allow photographers to retouch images quickly for simply stunning portraits.

* Perfect Mask. Creates high-quality masks quickly and easily with automated functionality and powerful tools that make selecting subjects and isolating
!backgrounds for removal extraordinarily accurate.

* Perfect Layers. Gives photographers the ability to combine images and extend their photo-editing options in a layered file workflow without Photoshop. Photographers can create and edit multi-layered files with Perfect Layers directly from Lightroom, Aperture or when using the Perfect Photo Suite as a standalone application. Also included are blending modes, textures, borders, PNG file support, and the powerful
edge-detecting Perfect Brush.

* Perfect Resize. Still the industry standard for photo enlargement. It is renowned across the photographic and printing industries for its ability to increase image size well over 1000% without the loss of sharpness or detail that is normally expected. Proven Genuine Fractals technology has been applied to algorithms that optimize the clarity and detail of different photo types, including mobile snapshots.

* Perfect Browse. Quickly get to the photos you want to edit wherever they're stored— whether they're on your computer, network, or on a cloud-based storage service. Now includes one of the fastest previews available for browsing photos. Also great for viewing photos side-by-side in a thumbnail grid or in a larger, more detailed view along with important metadata and navigate through them with intuitive keyboard 
shortcuts.

In addition, all Perfect Photo Suite 8 customers are automatically enrolled in the onOne Loyalty Rewards program. Each month customers receive free product add-ons such as presets, textures, backgrounds, ebooks, and other creative assets to help expand their photo editing arsenal and get the most from onOne products.

Availability and Pricing

Perfect Photo Suite 8.5 is now available. Existing owners of Perfect Photo Suite 8 are eligible for a free update. New users may purchase the Premium Edition for $179.95 or the Lightroom & Aperture Edition for only $99.95. The Standard Edition, a standalone application, is available for $79.95. Owners of earlier versions of the Perfect Photo Suite can upgrade to the Premium Edition for $99.95 or the Lightroom & Aperture Edition for $79.95. 

For more information on Perfect Photo Suite 8.5 release, please visit www.ononesoftware.com.

About onOne Software
onOne Software, Inc., a leading developer of innovative software tools for photographers, develops time-saving software solutions for professional and advanced amateur photographers. onOne Software solutions have been created to help photographers spend more of their time behind the camera taking pictures instead of the computer workstation. Such solutions include a wide range of easy-to-use standalone applications and plug-in enhancements for Adobe Photoshop, Photoshop Elements, Photoshop Lightroom, and Apple Aperture. Founded in 2005, onOne Software is a privately held company located in Portland, Oregon. For additional information, visithttp://www.ononesoftware.com or call 1-888-968-1468.

General Press Inquiries: press@ononesoftware.com
 Online Press Center: http://www.ononesoftware.com/press
 onOne Software Blog: http://www.ononesoftware.com/blog

A seriously awesome Freebie! Perfect Effects 8

My friends over at OnOne Software are doing everyone a good one, but for a limited time only.  Click here to get the awesome Perfect Effects 8, key element of the Perfect Photo Suite that sells for $100 on any normal day of the week, for FREE. Yes, that's right friendly friends, FREE.  What more could one ask for?  No, don't send me your list, instead click here to go get your free copy of Perfect Effects 8.

Did I mention awesome?  How about FREE?

Creativity in an Ocean of Tech

I'm just back from the April edition of Photoshop World #PSW in Atlanta Georgia.  This was my fourth Photoshop World and I heard some very different messages from what I have heard in the past.  Posting what I was hearing to Google Plus engendered some "interesting" replies, some positive, some highly negative, and that, in addition to the pushing by my shooting buddy Isabel, has prompted the writing of this article. Photography is, or can be, very technical.  As a founder of a camera club, I constantly hear about concerns for what settings were used for a particular shot.  As an educator, I am frequently asked, what the right aperture or shutter speed is for a particular situation.  As a reviewer of photography and video products, I am asked which is better, or best.

I've struggled with this for a long time.  I can teach technique or explain the physics of light or help people "get" the exposure triangle, but I have been troubled by the tech-centricity of what I see in our photographic world.  Manufacturers assault us with techno-babble, megapixels, focus zones, patterns and rates.  All interesting I suppose and perhaps helpful in a purchase decision but not really relevant to your execution of your craft.

I heard very clearly from photographers and educators that I respect a great deal that basically settings don't matter.  In a one on one, an internationally respected photographer bluntly told me that studying someone else's EXIF was more harm than good.  These messages fly in the face of what many say, and I see educators placing a lot of emphasis on these things, and yet their students are not coming away less frustrated or as better photographers.  If all this stuff is so important, why are these aspiring photographers so unhappy?

When I look at the work that inspired me, and the photographers that created these images, I don't see the settings, I see the final art.  Sharp or soft focus, deep or shallow depth of field, motion blur or not, all these things go to create the story, the character and the emotion of the photograph.  I don't know what settings Eisenstadt used to make the photograph of the skating waiter from Switzerland, and in the end, they don't matter.  What matters is the story that the photograph tells about the time, the place and the culture.  When the world gasped at Steve McCurry's photograph of the Afghan girl as shown on the cover of National Geographic, no one cared about the exposure data.  (It's not published but I am pretty sure it was shot on Kodachrome 64).  What captured the eye was the story, or the framework for the story the viewer created for him or herself based on the facial expression.

Let me make this clear.  Settings matter in so far as they assist you to take a sharp, well-exposed picture.  But having done this for over forty years, you and I know that there are lots of exposure options that will get us a well-exposed picture.  We also know that getting  important subjects sharp is not all that hard, it's been done for well over a century.  Those are table stakes.  You don't get to play the game without them.  A friend of mine does online mentoring.  One of his exercises forces the student to put the camera in Full Auto or Program mode.  Lots of his students feel like their hands are tied.  At first.  My friend Gabriel jokes that the P stands for Photographer.  It doesn't but I suspect that in the minds of the manufacturer's rep it stands for "decent Picture".  Creativity is not forged in knowing your settings or your EXIF, it is only forged in experimentation, in spending time seeing as opposed to playing with dials and buttons.

In my composition classes, I teach the principles of composition.  We all know at least one, typically the Rule of Thirds.  It's not a rule because it's unenforceable, but it is a framework to start from and when all else fails, if you use it, at least your composition has a chance of being interesting.  I find it fascinating when I hear so called educators tell folks who are working to develop their compositional eye, that the rules are there to be broken, so go so far as to add only when you understand the rules can you break them but the general message is that these artistic guides are really worthless and that unfocused rebellion makes for better images.  This is, as you might expect, a crock of poop.

Composition rules will not create your compositional eye.  You won't learn to see solely by following the rules of composition, but they will help you to get away from plopping everything dead centre and you may in fact find that the rules help you build compositions that foster your creative mien rather than restrain it.

There's a big difference between taking a picture and making a photograph, as much as the difference between scribbling with a pencil on a napkin and painting oil on canvas.  The difference is what Canadian great Freeman Patterson calls "Seeing".  Others refer to the process as perceiving.  I don't care what you call it, that is considerably less relevant than that you do it.  I've made photographs where viewers have said "but is that what was really there?"  My answer is "that's what I saw".  The two are not necessarily the same thing.  A made photograph has emotion, a framework, a story.  It's not just visual, you can smell the waves or the flowers, you can hear the wind in the trees, you can feel the sunlight on your face.  I read of an impressionist painter who said he painted music.  And for him, he did.

When I see, I see the potential for finished work, not just what is in the viewfinder.  While I work hard to get things right in camera, I choose to include the digital darkroom as an integral part of my creative process.  The digital darkroom is not where I correct mistakes, although I have done so, it's really where I complete the image.  Just like you, I've encountered people who call the digital darkroom dishonest or fake.  Photoshopping is now a verb, rarely used in positive context, yet if you are really embracing creative experimentation, it's another tool in your creative arsenal.  I've been part of conversations where I hear work described as having been "Nik'd" meaning unduly processed in the Nik suite.  I like the Nik tools but they aren't an end in themselves, they're just a tool and when they are applied the same way to every picture, they aren't helping.  That's not creative it's brute repetition.  Now some would argue that "it's workflow".  I don't see this since by their nature, every image is its own, so how could the same post processing apply to everything the same?   As a creative person, do you reduce every picture you take to effectively hitting it with the same stupid Instagram treatment?

Creativity is colour, and lines and shadows.  It's perspective and perception.  A razor sharp picture of a statue seen from the standing position is evidence, not art.  If all you see is that sharp statue at eye level, feel free to take a picture of it, but that's not making a photograph.

Great photographs aren't great because of shutter speed, or aperture, or ISO or lens or camera.  Those are all just tools and can be used well or poorly by the tool holder.  A great photograph is made.  It answers questions.  I have taken thousands of pictures and so have you where you look at them and go "uh huh, nice, um why did I take this?"  We have to agree to ask the questions up front before banging out 12 frames per second.  Why am I pressing the shutter?  What story do I want to remember?  What story would I like viewers to see?  What message am I trying to send?  What's the relevance of this moment?  Why does it matter?  Who cares or will care about the subject?

To grow as photographers we need to be able to answer these questions and many more.  And, contrary to the proselytizers of "community" and "social" and a bunch of similar and ultimately meaningless buzzwords, the only answer that really matters is your own.  If you are out there trying to make photographs to please others, sorry kiddo, you're doing it wrong.  If you feel sick to your stomach because you haven't posted anything to the social network du jour, stop making yourself sick.  Vivian Maier is now recognized as one of the greatest street photographers of the last century.  She made photographs for her pleasure first and only.  We would never have seen them at all had someone else not discovered them after her passing and had a "oh wow" moment.  She never wanted to "share" or "post"  She was the most honest kind of artist, the kind that doesn't care what someone else thinks.  Would she be pleased to learn how much her work has done for viewers?  I have no idea. My guess is that it wouldn't matter all that much to her.

So let's suppose that growing as an artist and enhancing your craft is important to you.  What do you do?   Look at other photographer's work.  Examine what you like and don't like.  You're right.  Learn to see by asking yourself every day what exactly you see.  You'll be thrilled to learn that you see much more than what is there.  Stop chasing the daily theme on the social network and being driven to post on some bogatz community where the end in mind is not to foster art but to sell you something.  Don't get hung up on settings and EXIF and the latest gewgaw.  Ask the hard questions before you press the shutter.  BUT PRESS THE SHUTTER.  And the only way that really works is if you always have a camera with you.  Certainly to take pictures, but sometimes to step across the line, and to make a photograph.

If there's no emotional commotion, it's not a photograph.